














🤖 Viber chatbot in PHP: sending structured messages with keyboard menus
The user presses a button in the chat and receives not bare text but a grid of images, links, and colored keys. It looks like a native app. In reality, it is plain JSON that your PHP script returns via the Viber REST API.
The problem with most tutorials: they teach you to respond with text to text. A real business bot must display a keyboard menu with link buttons, images, and carousels. Otherwise the user simply will not understand what the bot can do and will leave. Since February 2024, Viber has put bot creation on a commercial basis (100 € per month through official Rakuten Viber partners), and authentication now goes into the HTTP header X-Viber-Auth-Token rather than into the request body. Snippets with auth_token inside JSON no longer work.
Here is a working Viber bot in PHP from scratch: from setting up the webhook to sending a structured keyboard menu with reply and open-url buttons. The code is current for API version 7.3.
💡 Quick overview:
- Register a commercial bot through a Viber partner and obtain an authentication token
- Configure the webhook via
set_webhookwith theX-Viber-Auth-Tokenheader - Receive callback events from Viber: webhook → subscribed → message
- Build a keyboard menu (a button grid with custom colors, sizes, and actions)
- Send a structured response: text, images, links, carousels via
send_message
How Viber Bot API works
Viber Bot API operates on a REST model: your server receives callback requests on the webhook and responds by calling https://chatapi.viber.com/pa/send_message. Every request is authenticated with a token in the X-Viber-Auth-Token header.
The basic cycle looks like this:
- You register a bot through a Viber partner and receive a token in the "Edit Info" panel.
- You configure a webhook (the URL of your server with a valid SSL; Let's Encrypt works since it is in Viber's trusted Java certificate list; self-signed certificates are not accepted).
- Viber sends POST requests to this URL on every event: a user subscribed, sent a message, pressed a button.
- Your PHP script reads the incoming JSON, parses the
eventfield, and responds by callingsend_message.
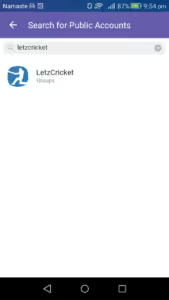
The first step to understanding is to look at a live bot. Open Viber and search for a public account of any well-known brand. Almost every one has a chatbot with a menu. The screenshot below shows a typical public account search result.
After subscribing you enter a one-on-one chat. It looks roughly like this: an avatar, a welcome message, and a button to start the conversation.
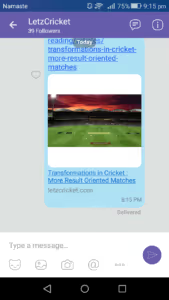
Tap the message icon in the upper right corner and send "Hello." If the bot is configured with a keyboard menu, you will see a response with a button grid:
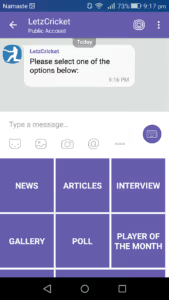
This is a structured message. There are two button types: reply sends text back to the bot (pressing "News" or "Articles"), while open-url opens a link in the browser. Now let us write the code that produces this.
Step 1: Obtain the token and configure the webhook
The token is located in the Viber admin panel: Edit Info section → App Key field. It is a string of letters and numbers that you include in every API request.
The webhook is set with a single POST request to https://chatapi.viber.com/pa/set_webhook. The request body is JSON with the URL of your handler and a list of events you subscribe to. The header is X-Viber-Auth-Token with your token.
Webhook setup script (save as setup.php and run once):
1 <?php 2 $token = 'ВАШ_X_VIBER_AUTH_TOKEN'; 3 4 $data = json_encode([ 5 'url' => 'https://your-domain.com/webhook.php', 6 'event_types' => ['message', 'subscribed', 'conversation_started'], 7 ]); 8 9 $ch = curl_init('https://chatapi.viber.com/pa/set_webhook'); 10 curl_setopt($ch, CURLOPT_POST, 1); 11 curl_setopt($ch, CURLOPT_POSTFIELDS, $data); 12 curl_setopt($ch, CURLOPT_HTTPHEADER, [ 13 'Content-Type: application/json', 14 'X-Viber-Auth-Token: ' . $token, 15 ]); 16 curl_setopt($ch, CURLOPT_RETURNTRANSFER, true); 17 18 $result = curl_exec($ch); 19 $httpCode = curl_getinfo($ch, CURLINFO_HTTP_CODE); 20 curl_close($ch); 21 22 echo "HTTP {$httpCode}: {$result}\n"; 23 24 if ($httpCode === 200) { 25 $response = json_decode($result, true); 26 if (($response['status'] ?? -1) === 0) { 27 echo "Вебхук установлен успешно.\n"; 28 } else { 29 echo "Ошибка Viber: " . ($response['status_message'] ?? 'неизвестная') . "\n"; 30 } 31 }
What happens here: cURL sends a POST to set_webhook. The token is strictly in the header, not in the body. Viber returns {"status":0} on success and immediately sends a webhook callback to the specified URL to verify its availability. Responding with {"status":0,"status_message":"ok"} to this callback is mandatory (we will cover this in the next step).
If you receive invalidUrl, check your SSL certificate. Let's Encrypt works; self-signed does not. On your server it is enough to run certbot --nginx -d your-domain.com and set up auto-renewal via cron.
Step 2: Receive callback events from Viber
When a user interacts with the bot, Viber sends a POST request with JSON to your webhook. Your task is to read the event field and react.
A minimal handler webhook.php that correctly responds to all events:
1 <?php 2 $request = file_get_contents("php://input"); 3 $input = json_decode($request, true); 4 5 if ($input['event'] === 'webhook') { 6 $response = [ 7 'status' => 0, 8 'status_message' => 'ok', 9 'event_types' => ['delivered', 'seen', 'message', 'subscribed', 'conversation_started'], 10 ]; 11 echo json_encode($response); 12 exit; 13 } 14 15 if ($input['event'] === 'subscribed') { 16 $sender_id = $input['sender']['id']; 17 sendWelcomeMessage($sender_id); 18 } 19 20 if ($input['event'] === 'conversation_started') { 21 $sender_id = $input['sender']['id']; 22 sendMainMenu($sender_id); 23 } 24 25 if ($input['event'] === 'message') { 26 $type = $input['message']['type']; 27 $text = $input['message']['text']; 28 $sender_id = $input['sender']['id']; 29 $sender_name = $input['sender']['name']; 30 31 $data = match ($text) { 32 'News' => getNewsList($sender_id), 33 'Articles' => getArticleList($sender_id), 34 'Gallery' => getGalleryList($sender_id), 35 default => getMainMenu($sender_id), 36 }; 37 38 sendToViber($data); 39 }
Event breakdown:
webhookarrives once when the webhook is set. You must return{"status":0,"status_message":"ok"}with a list of supported events. Without this, Viber will not confirm the URL and the bot will not start.subscribedmeans a user has subscribed to the bot. This is the ideal moment to send a welcome menu.conversation_startedmeans a user opened the chat (for the first time or again). Also suitable for showing the main menu.messageis the main working event. Thetextfield contains either an arbitrary user message or theActionBodyof a pressed button (if its type isreply). This is how the bot understands what was selected: "News," "Articles," or "Gallery."
The match() construct is available from PHP 8. If you have PHP 7.4, replace it with switch.
Step 3: Build the keyboard menu
A keyboard is attached to any message via the keyboard field in the send_message JSON object. It is an array of buttons with separate settings for width (Columns, 1-6), height (Rows, 1-2), background color, text, and action.
A function that assembles a main menu from seven reply buttons and one link button:
1 <?php 2 3 function getMainMenu(string $user_id): array 4 { 5 $buttons = []; 6 7 $addReplyButton = function (string $label, string $actionBody, int $cols = 2, int $rows = 2) use (&$buttons) { 8 $buttons[] = [ 9 'Columns' => $cols, 10 'Rows' => $rows, 11 'Text' => $label, 12 'TextSize' => 'regular', 13 'TextVAlign' => 'bottom', 14 'TextHAlign' => 'center', 15 'TextOpacity' => 100, 16 'ActionType' => 'reply', 17 'ActionBody' => $actionBody, 18 'BgColor' => '#FFFFFF', 19 ]; 20 }; 21 22 $addReplyButton('NEWS', 'News'); 23 $addReplyButton('ARTICLES', 'Articles'); 24 $addReplyButton('INTERVIEWS', 'Interviews'); 25 $addReplyButton('GALLERY', 'Gallery'); 26 $addReplyButton('POLL', 'Poll'); 27 $addReplyButton('PLAYER OF THE MONTH','POTM'); 28 $addReplyButton('QUOTE OF THE DAY', 'Quote'); 29 30 $buttons[] = [ 31 'Columns' => 4, 32 'Rows' => 2, 33 'Text' => 'VISIT OUR WEBSITE', 34 'TextSize' => 'regular', 35 'TextVAlign' => 'bottom', 36 'TextHAlign' => 'center', 37 'TextOpacity' => 100, 38 'ActionType' => 'open-url', 39 'ActionBody' => 'https://your-site.com', 40 'BgColor' => '#FFFFFF', 41 ]; 42 43 return [ 44 'receiver' => $user_id, 45 'type' => 'text', 46 'text' => 'Please select one of the options below:', 47 'keyboard' => [ 48 'Type' => 'keyboard', 49 'BgColor' => '#FFFFFF', 50 'Buttons' => $buttons, 51 ], 52 ]; 53 }
Buttons with Columns=2 and Rows=2 are square, three per row (2+2+2=6). The link button with Columns=4 occupies its own row. The grid is assembled left to right, top to bottom. The sum of Columns in a row determines the layout.
Button parameters:
Parameter | Values | Purpose |
|---|---|---|
| 1-6 | Button width in conditional columns |
| 1-2 | Button height in rows |
|
|
|
| string | For |
| string | Label on the button, supports HTML tags b, i, and font color |
| HEX | Button background color |
| URL | Image on top of the button, JPEG, optional |
Step 4: Send data via send_message
A sender function that you call from the event handler:
1 <?php 2 3 function sendToViber(array $data): void 4 { 5 $token = 'ВАШ_X_VIBER_AUTH_TOKEN'; 6 7 $ch = curl_init('https://chatapi.viber.com/pa/send_message'); 8 curl_setopt($ch, CURLOPT_POST, 1); 9 curl_setopt($ch, CURLOPT_POSTFIELDS, json_encode($data)); 10 curl_setopt($ch, CURLOPT_HTTPHEADER, [ 11 'Content-Type: application/json', 12 'X-Viber-Auth-Token: ' . $token, 13 ]); 14 curl_setopt($ch, CURLOPT_RETURNTRANSFER, true); 15 16 $result = curl_exec($ch); 17 $httpCode = curl_getinfo($ch, CURLINFO_HTTP_CODE); 18 curl_close($ch); 19 20 if ($httpCode !== 200) { 21 error_log("Viber API error: HTTP {$httpCode} - {$result}"); 22 } 23 }
The key difference from old tutorials: the token is in the header, not in the JSON body. The body contains only the fields receiver, type, text, keyboard, and optionally sender.name, sender.avatar, tracking_data. The maximum JSON size is 30 KB. If you exceed it, Viber silently discards the message; check strlen(json_encode($data)) before sending.
Step 5: Assemble content for buttons
When a user presses a reply button, its ActionBody is sent to the webhook as message text. You parse it in match() and call the appropriate function. Here is an example for a news list with images:
1 <?php 2 3 function getNewsList(string $user_id): array 4 { 5 $newsItems = [ 6 [ 7 'title' => 'Your Article Title', 8 'link' => 'https://your-site.com/article-1', 9 'image' => 'https://your-site.com/images/article-1.jpg', 10 ], 11 [ 12 'title' => 'Another Article', 13 'link' => 'https://your-site.com/article-2', 14 'image' => 'https://your-site.com/images/article-2.jpg', 15 ], 16 ]; 17 18 $buttons = []; 19 foreach ($newsItems as $item) { 20 $buttons[] = [ 21 'Columns' => 2, 22 'Rows' => 2, 23 'ActionType' => 'open-url', 24 'ActionBody' => $item['link'], 25 'BgColor' => '#FFFFFF', 26 'Image' => $item['image'], 27 ]; 28 $buttons[] = [ 29 'Columns' => 4, 30 'Rows' => 2, 31 'Text' => $item['title'], 32 'TextSize' => 'regular', 33 'TextHAlign' => 'left', 34 'TextVAlign' => 'top', 35 'ActionType' => 'open-url', 36 'ActionBody' => $item['link'], 37 'BgColor' => '#F5F5F5', 38 ]; 39 } 40 41 return [ 42 'receiver' => $user_id, 43 'type' => 'text', 44 'text' => 'Here are the latest updates:', 45 'keyboard' => [ 46 'Type' => 'keyboard', 47 'BgColor' => '#DDDDDD', 48 'Buttons' => $buttons, 49 ], 50 ]; 51 }
On the user's side this looks like a grid of cards: image on the left, title on the right. Tapping any part opens the link in the browser.
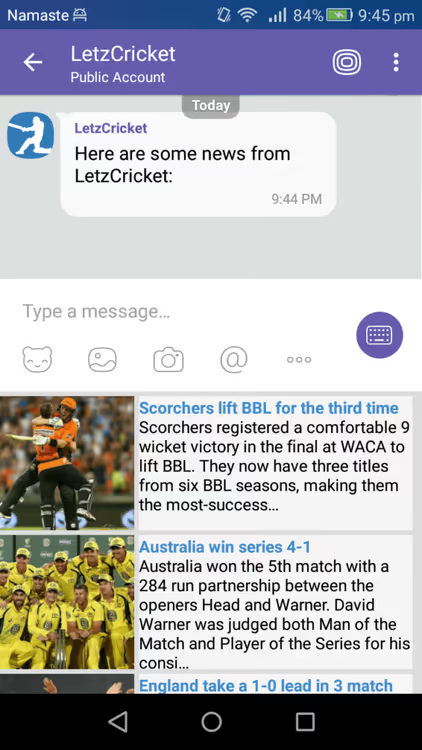
A gallery, article list, or polls are assembled in exactly the same way; only the contents of the $buttons array and the message text change. If there is a lot of content and the JSON approaches 30 KB, split it into pages with a "Next" button.
If you prefer working with a ready-made PHP library rather than the raw API, check out viber-bot-php by Bogdaan. It handles signature validation, event routing, and JSON generation for you.
Summary: full launch sequence
- Get the token in the Viber Admin Panel: Edit Info section → App Key.
- Deploy the handler to a server with HTTPS. Let's Encrypt works; a self-signed certificate does not. Viber validates certificates against the trusted Java Root CA list.
- Set the webhook with a POST request to
https://chatapi.viber.com/pa/set_webhookwith body{"url":"https://your-domain/webhook.php","event_types":[...]}and headerX-Viber-Auth-Token. - Check the response:
{"status":0}means success. Viber will immediately send awebhookcallback to your URL. Make sure the script returns{"status":0,"status_message":"ok"}. - Send the first menu: on the
conversation_startedevent callgetMainMenu()and pass the result tosendToViber().
⁉️🤔 Frequently asked questions
Can I use a self-signed SSL certificate for the webhook?
No. Viber validates the certificate against the list of trusted Java root certificate authorities. A self-signed certificate causes an
invalidUrlerror when setting the webhook. Let's Encrypt is in this list and is free. On your server, runcertbot --nginx -d your-domain.com, add auto-renewal to cron, and Viber will accept the certificate without issues.
What is the difference between reply and open-url in ActionType?
replysendsActionBodyback to the webhook as message text. The PHP script sees it in$input['message']['text']and routes it viamatch(). Use this for navigation within the bot.open-urlopens a link in an external browser and does not trigger the webhook. In practice, menus combine both types: five or six reply buttons for sections and one wide open-url button for navigating to the website.
What message types does Viber Bot API support?
Viber Bot API supports nine
typevalues insend_message:text(plain text),picture(JPEG image),video(video file),file(any file up to 50 MB),location(geo point),contact(contact card),sticker(sticker),rich_media(card carousel), andurl(link preview). For the current list with required fields, see the Viber Developers Hub documentation. The most common scenario istext+keyboardfor menus andpicturefor sending images. Carousels are great for storefronts and catalogs but require more code.
What should I do if the user does not see the keyboard?
There are three common causes. First: the JSON with the keyboard exceeded 30 KB, and Viber silently discards such messages. Check
strlen(json_encode($data))before sending. Second: the response toset_webhookdid not contain"status":0, the webhook was not set, and the bot is not receiving messages. Third: you are using the old format withauth_tokenin the JSON body. Since API 7.0 this is ignored; you need theX-Viber-Auth-Tokenheader. For debugging, enable logging of the Viber API response: it returns readable JSON with error codes invalidAuthToken, badData, or missingData.
Can I change the keyboard after sending?
Yes. With each new message you can send a different keyboard. The Viber client always shows the last one received. This lets you build multi-level menus: main menu → section submenu → specific content. Each level has its own set of buttons, and the user moves between them by pressing reply keys.
How much does launching a Viber bot cost in 2026?
Since February 5, 2024, creating a new bot costs 100 € per month through official Rakuten Viber partners. Bots created before that date continue under the old terms. The cost includes a dedicated account with an admin panel, analytics, and access to all message types including rich_media and Viber Pay. The technical part of the API is identical for commercial and legacy free bots.
The bot is ready: what comes next
A keyboard menu is only an entry point. Once the basic mechanics are working, add content carousels via rich_media, payments via Viber Pay, and user segmentation based on which buttons they press most often. Each new level does not change the foundation: you still read event and still send send_message with the X-Viber-Auth-Token header.
If you need a live example of working code, check out the viber-bot-php repository on GitHub. It covers all events, request signing, and building a keyboard with images. And for a visual start, here is a half-hour tutorial on creating a Viber bot from scratch:
The main thing to remember: Viber Bot API is simple at the start but demanding about details. A correct authentication header, trusted SSL, valid JSON under 30 KB, and clear ActionBody routing are enough to keep the bot running without failures. Take the snippets above, substitute your token and domain, and launch your first menu today.

A professional team of writers and editors specializing in creating quality content.