













🌿 Geotextile in landscape design: a complete guide to selection and installation
The path sank after the first rain. The lawn floated away along with the mulch. The rock garden turned into a swamp. Sound familiar? The root cause is almost always the same: soil layers got mixed, water went where it shouldn't, and weeds broke through where they weren't expected.
Geotextile solves these problems at the site engineering level. A thin synthetic fabric works as a separator, filter, and reinforcing mesh all at once, no chemicals, no annual replacement, and no extra maintenance costs. Let's break down which geotextile to choose, how to install it, and where it genuinely pays off.
💡 Quick overview:
- Which geotextile to choose for paths, flower beds, and parking areas
- Step-by-step installation: from clearing the site to the finishing layer
- Five scenarios where the material pays for itself in the first season
- Why geotextile beats herbicides: ecology and economics
What is geotextile and why it matters in landscape design
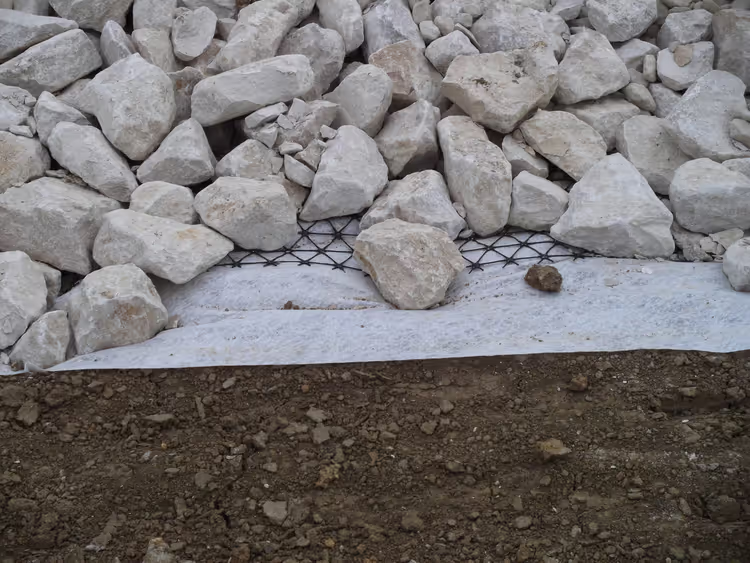
Geotextile is a roll material made of polypropylene or polyester fibers. Its structure resembles dense nonwoven felt: water passes through it freely, while soil particles, sand, and roots do not. It is this combination of permeability and barrier function that makes it indispensable on sites with elevation changes, clay soils, or high groundwater levels.
In landscape design, geotextile solves three key problems. First, layer separation: gravel does not sink into sand, topsoil does not mix with the drainage base, and the path or pad structure holds its geometry for years. Second, filtration: water drains along the planned route without eroding the base or creating stagnant zones. Third, reinforcement: the fabric distributes the load across the area and prevents even heavy pavers or parking decking from settling.
In practice, this means one roll of geotextile replaces three separate solutions: a separation membrane, a drainage layer, and a weed barrier. With a service life of 20 years or more, the material does not rot, does not release toxins, and requires no replacement, install it once and forget about it.
How to choose geotextile: weight, type, and width
Choosing geotextile comes down to three parameters: weight (g/m²), fiber type (nonwoven needle-punched or thermally bonded), and roll width. Making a mistake at this stage means either overpaying for excess strength or getting tears within a season.
Nonwoven needle-punched geotextile is the primary choice for landscape work. It is elastic, drains water well, and does not tear when laid on uneven terrain. Thermally bonded is stiffer and stronger in tensile strength but filters less effectively: it is used under concrete bases and parking areas where strength matters more than water permeability.
Match the weight to the load. For garden paths and flower beds, 100-150 g/m² is enough, the fabric holds its shape under mulch and blocks weeds. For pavers, paving slabs, and parking areas, use 200-300 g/m²: resistance to gravel puncture is critical here. For retaining walls, slope reinforcement, and drainage trenches, 250 g/m² and above.
Roll width affects the number of seams. Standard formats are 2, 3, and 4 meters. The wider the fabric, the fewer overlaps and less cutting waste. But a wide roll is harder to unroll solo on a tight site, factor that in when ordering.
Note: quality geotextile has a uniform structure with no thin spots or dense clumps. If the fabric looks patchy when held up to light or tears by hand without effort, you are looking at a cheap substitute that will crumble after the first winter.
Step-by-step geotextile installation: from clearing to the finishing layer
Proper installation matters more than the price of the material. Even expensive geotextile will not save a path if it is laid with wrinkles or if overlaps are forgotten. The process is universal for most tasks: paths, pads, flower beds, and drainage systems.
Step 1. Remove the topsoil. Strip the sod and soil to the depth of the future structure: for a pedestrian path, 20-30 cm, for a parking area, 40-50 cm. Level the base, remove roots and sharp stones, they are the main cause of punctures.
Step 2. Prepare the bedding. Spread and compact sand in a 5-10 cm layer. On clay and wet sites, add 20-40 mm crushed stone, it will carry excess water away from the fabric. Without bedding, the geotextile will lie on uneven spots and tear under load.
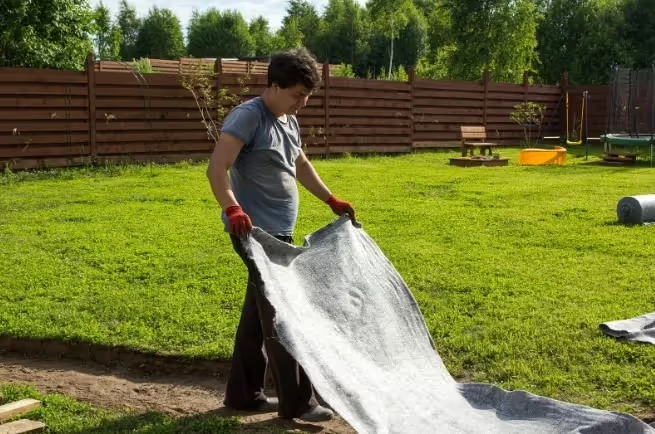
Step 3. Unroll the fabric. Unroll along the axis of the future structure. Overlap between adjacent strips: at least 15-20 cm, on slopes and loose soils, up to 30 cm. The fabric edges should extend up the trench sides 10-15 cm above the design level.
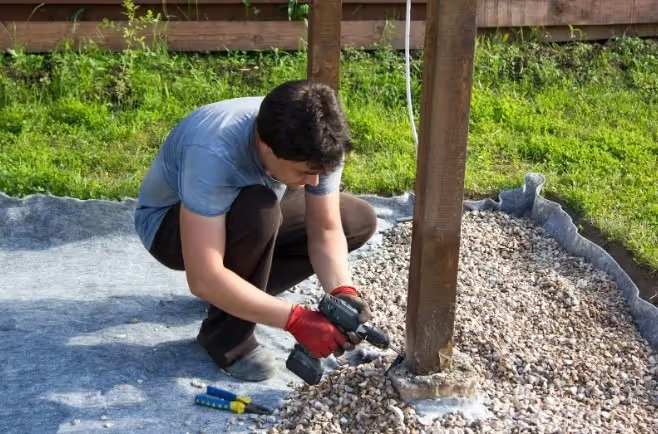
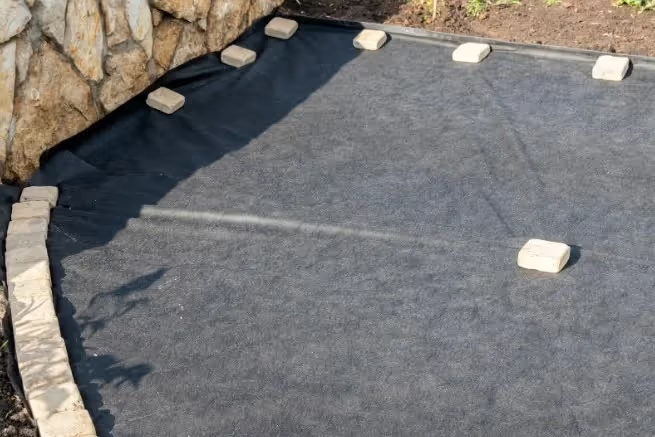
Step 4. Secure the edges. Pin the fabric to the ground with staples, spikes, or simply weigh it down with sand around the perimeter. Without anchoring, the geotextile will shift when the top layer is spread, and the entire structure geometry will fail.
Step 5. Apply the finishing layer. On top: crushed stone, gravel, sand, pavers, or topsoil, depending on the task. Spread evenly, do not dump material in a heap from height, impact loading punctures even dense fabric.
On challenging sites, slopes, landslide zones, water body banks, lay geotextile in two layers with a crushed stone interlayer between them. The second layer reinforces the structure and protects the first from damage during soil movement.
Watch the video above, it shows the full installation cycle for drainage geotextile with a focus on typical beginner mistakes: insufficient overlap, skipping anchoring, and choosing the wrong weight.
Five scenarios where geotextile pays for itself in the first season
Geotextile is versatile, but installing it "just in case" makes no sense. Below are specific scenarios where the material genuinely changes the outcome.
1. Garden paths and pads. Without a separator, gravel sinks into the soil within two or three seasons, the path settles, and potholes appear on the surface. Geotextile at 150-200 g/m² between sand and gravel solves the problem completely. The path's service life grows from 3-5 to 10-15 years.
2. Flower beds and borders. Fabric under mulch is a mechanical weed barrier that works without herbicides. Moisture passes through, cultivated plant roots breathe, but quackgrass and dandelions do not. Weight 100-150 g/m², one layer under 5-7 cm of mulch.
3. Parking areas and driveways. Here geotextile works for reinforcement: it distributes the vehicle's weight across the area and prevents gravel from pressing into the sand. Weight from 250 g/m², thermally bonded type. An added bonus is noticeable gravel savings: the fabric keeps it from sinking into the sand, so you can spread less.
4. Decorative ponds and drainage systems. Under a pond liner, needle-punched geotextile at 300-350 g/m² is laid, it protects the waterproofing from roots and stones. In drainage trenches, the fabric is wrapped around the gravel backfill surrounding the perforated pipe to prevent silting.
5. Slope reinforcement. On sloped sites, geotextile is combined with a geocell: the fabric holds the soil from sliding, the grid locks the cells with topsoil in place. The result is a stable reinforced sandwich on which you can plant a lawn or shrubs without erosion risk.
Ecology and economics: why geotextile is a long-term strategy
Geotextile beats traditional solutions not only in strength. It radically reduces the resource consumption for site maintenance. Judge for yourself: one roll blocks weeds for 15-20 years ahead. Over that time, you would have done at least ten cycles of weeding and herbicide application, and that means labor costs, chemicals in the soil, and money.
From an ecological standpoint, the picture is also favorable. Geotextile does not block soil gas exchange: the soil breathes, microorganisms live in their normal mode. Unlike solid polyethylene film, which is still sometimes laid under paths, the fabric does not create a greenhouse effect and does not turn the ground beneath it into a dead layer.
The economic argument: reduced volumes of construction materials. With geotextile, the gravel layer under a path can be reduced by a third: the fabric takes on load distribution and prevents the stone from sinking into the sand. At the scale of a commercial property, a park, a hotel courtyard, a waterfront, such savings are measured in tens of cubic meters and tangible budgets.
Add a service life of 20 years or more, resistance to UV, frost, and aggressive salts, and you get a material that requires no replacement and generates no waste for decades. For regions with a sharply continental climate, where temperature swings crack concrete and heave pavers, this is especially relevant.
⁉️🤔 Common questions
Can I skip geotextile under a garden path?
You can. But after 2-3 seasons, the gravel will mix with the sand, the path will settle, and you will have to redo it. Geotextile adds a token amount to the estimate while extending the structure's service life several times over.
Do I need to lay geotextile under a lawn?
Geotextile is not laid under sod or seeded lawns, grass roots need to go deep, and the fabric would become a barrier for them. The exception is slope reinforcement with a geocell: there, geotextile is laid under the grid, not under the lawn itself.
Which side goes up when laying geotextile?
For quality needle-punched fabric, both sides are functional, there is no difference. For thermally bonded, one side is smoother (lay it facing up, toward the finishing layer), the other is rougher (facing the soil, for better grip). Manufacturers usually indicate this in the instructions on the roll.
Can I overlap geotextile without staples?
On a flat site with no slope, you can, if you immediately spread gravel or sand on top to weigh the fabric down. On slopes, in strong wind, and on large areas, anchoring with staples is mandatory, otherwise the edges will curl up before backfilling.
Geotextile or geocell, which to choose for a slope?
These are not alternatives but complementary materials. Geotextile is the lower layer: it intercepts water and prevents soil washout. Geocell is the upper layer: it fixes the slope shape and holds topsoil in the cells. On slopes steeper than 30°, both layers are used.
Is investing in geotextile worth it: the numbers breakdown
Geotextile is not a mandatory element of every landscape project, but it is the most underrated one. It does not create beauty by itself: you cannot see it under gravel, mulch, or pavers. But it is precisely what determines whether that beauty remains in five years or turns into sunken paths, washed-out flower beds, and eroded slopes.
If the site is flat, the soil is sandy, and water drains on its own, you can do without geotextile. But if there is at least one of these factors: clay in the base, a slope greater than 5°, high groundwater level, or plans for a parking area, the fabric pays for itself in the very first season. Do the math: redoing 50 meters of path costs many times more than the roll of geotextile under it.
Our verdict: for a residential site, start with paths and flower beds, these are the most predictable scenarios with instant returns. For commercial properties, include geotextile in the project at the grading plan stage, adding it to the structural sandwich later will be exponentially harder and more expensive.

A professional team of writers and editors specializing in creating quality content.