














🛠 Exclusive taxonomies in WordPress: how to replace checkboxes with radio buttons
By default, WordPress allows you to assign as many terms from a single taxonomy to a post as you like. Checkboxes in the sidebar, and you're all set. But what if the client needs the editor to select exactly one option? For example, "Project type": case study, landing page, or online store. Three options, and having two of them together makes no sense.
There is no built-in "make taxonomy exclusive" toggle in WordPress. A ticket in Trac has been sitting since 2010 with no progress. But the task can be solved with code, without plugins or extra dependencies.
By the end of this article, you will transform the standard meta box with checkboxes into a panel with radio buttons: exactly one term per post, fewer editor mistakes.
💡 Quick overview:
- Register a taxonomy with the meta_box_cb parameter so the standard meta box won't appear.
- On the add_meta_boxes hook, create your own block with radio buttons.
- Use save_post to write the selected term to the database.
- The complete code can be copied into the child theme's functions.php and works immediately.
What taxonomies are and why exclusivity matters
A taxonomy in WordPress is a mechanism for grouping posts. The standard "Categories" and "Tags" are also taxonomies. A custom taxonomy is created for a specific task: "Project type" for a portfolio, "Region" for a branch directory, "Service type" for a price list.
Built-in categories work as an exclusive taxonomy: a post belongs to exactly one category, unless you use extension plugins. The "parent → child" hierarchy suggests the selection logic to the editor.
However, any custom taxonomy registered through register_taxonomy() is non-exclusive by default. The interface consists of checkboxes or a field with autocomplete. For tags and product attributes, this is correct. But when each post must have exactly one term, checkboxes become a source of errors.
The solution: hide the standard meta box and render your own, with radio buttons and strict control. This is not a workaround but a documented WordPress API, just spread across several steps.
Step 1: register a custom taxonomy
The foundation is the register_taxonomy() function. The code is added to the child theme's functions.php or through the Code Snippets plugin. Let's create a project_type taxonomy for standard posts:
1 function sd_register_project_type_taxonomy() { 2 register_taxonomy( 3 'project_type', 4 'post', 5 array( 6 'label' => __( 'Project Type', 'textdomain' ), 7 'public' => true, 8 'show_in_rest' => true, 9 'hierarchical' => true, 10 'show_in_quick_edit' => false, 11 'meta_box_cb' => false, 12 ) 13 ); 14 } 15 add_action( 'init', 'sd_register_project_type_taxonomy' );
Key parameters:
hierarchical => trueenables a tree structure, like categories. Terms are organized hierarchically: "Design → Landing page", "Development → Online store".show_in_rest => truemakes the taxonomy available in the REST API and block editor. Without this, Gutenberg won't see the meta box.meta_box_cb => falseandshow_in_quick_edit => falsecompletely remove the standard term selection interface.
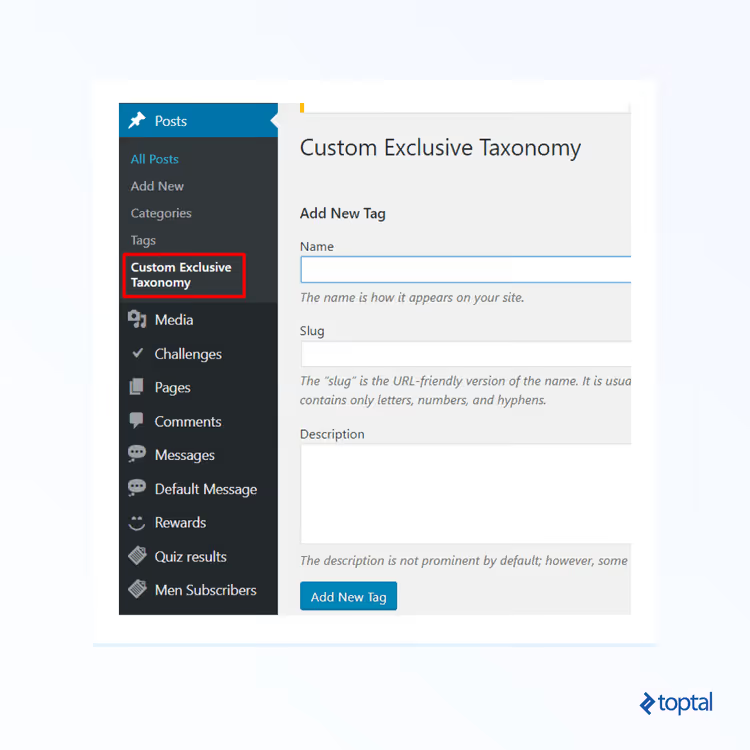
After saving the code, the project_type taxonomy appeared in the "Posts" menu. Terms are added through "Posts → Project type" with a standard interface, like for categories.
Step 2: hide the standard meta box
This step has actually already been done with the meta_box_cb and show_in_quick_edit parameters in step 1. To recap:
meta_box_cb => falseremoves the meta box from the post editing page.show_in_quick_edit => falsehides the taxonomy from the quick and bulk editing panels.
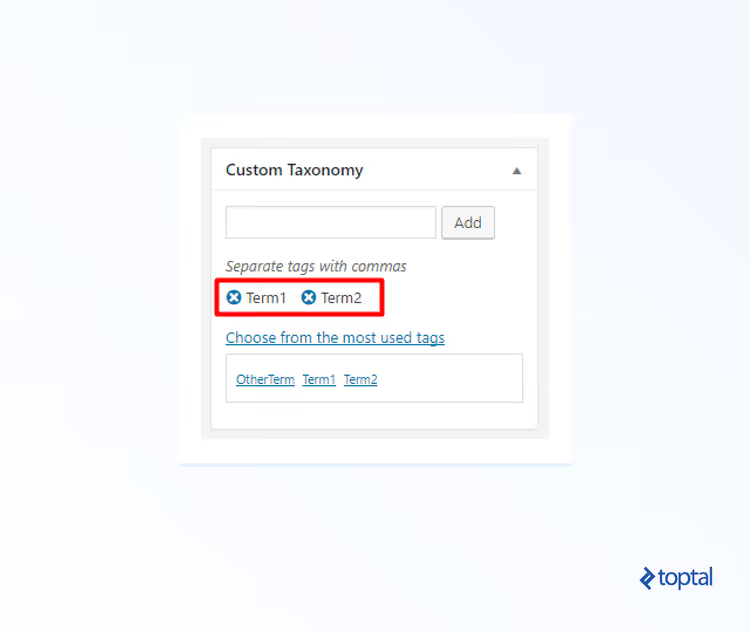
Without them, WordPress adds a default interface: for hierarchical taxonomies, category checkboxes; for non-hierarchical ones, a tag field with autocomplete.
Terms are filled in through a separate management page:
Step 3: create a custom meta box with radio buttons
Register your own meta box through the add_meta_boxes hook. Add to functions.php:
1 add_action( 'add_meta_boxes', 'sd_add_project_type_meta_box' ); 2 3 function sd_add_project_type_meta_box() { 4 add_meta_box( 5 'project_type_box', 6 __( 'Project Type', 'textdomain' ), 7 'sd_render_project_type_meta_box', 8 'post', 9 'side', 10 'default' 11 ); 12 }
Parameters of add_meta_box():
project_type_box: internal ID (arbitrary but unique).'Project Type': title in the admin panel.sd_render_project_type_meta_box: rendering function.'post': post type; can be an array for multiple CPTs.'side': sidebar. Alternatives:'normal','advanced'.
The function that renders the radio buttons:
1 function sd_render_project_type_meta_box( $post ) { 2 $terms = get_terms( array( 3 'taxonomy' => 'project_type', 4 'hide_empty' => false, 5 ) ); 6 7 if ( empty( $terms ) || is_wp_error( $terms ) ) { 8 echo '<p>First, add terms on the “Project Type” page.</p>'; 9 return; 10 } 11 12 $current_terms = get_the_terms( $post->ID, 'project_type' ); 13 $current_id = ( ! empty( $current_terms ) && ! is_wp_error( $current_terms ) ) 14 ? $current_terms[0]->term_id 15 : 0; 16 17 foreach ( $terms as $term ) : ?> 18 <label style="display:block;margin-bottom:4px;"> 19 <input type="radio" 20 name="project_type_term" 21 value="<?php echo esc_attr( $term->term_id ); ?>" 22 <?php checked( $current_id, $term->term_id ); ?>> 23 <?php echo esc_html( $term->name ); ?> 24 </label> 25 <?php endforeach; 26 }
What's important here:
get_terms()withhide_empty => falsereturns all terms, including unused ones.get_the_terms()returns an array; we take the first element[0]since the logic guarantees no more than one term.checked()is a built-in WordPress function that outputschecked="checked"when there's a match.esc_attr()andesc_html()are mandatory escaping.
The result is a clean block with radio buttons:
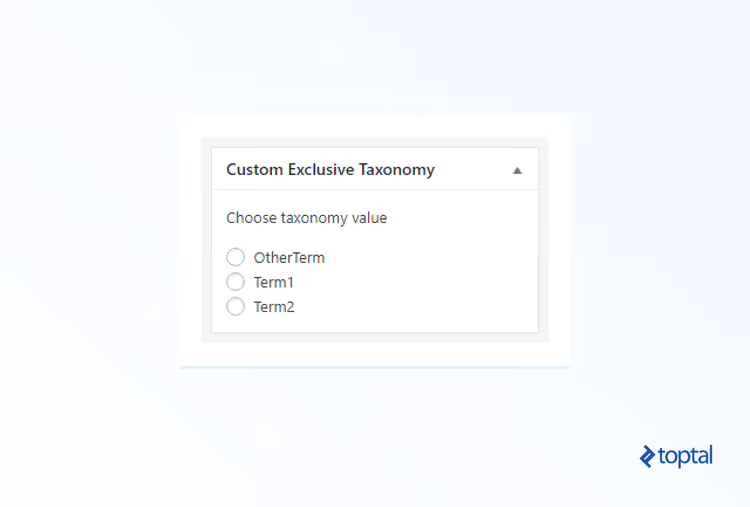
No checkboxes, no way to select two options.
Step 4: save the term when the post is saved
Without this step, the meta box is purely decorative. We use the save_post hook:
1 add_action( 'save_post', 'sd_save_project_type_term' ); 2 3 function sd_save_project_type_term( $post_id ) { 4 if ( defined( 'DOING_AUTOSAVE' ) && DOING_AUTOSAVE ) { 5 return; 6 } 7 8 if ( ! current_user_can( 'edit_post', $post_id ) ) { 9 return; 10 } 11 12 if ( isset( $_POST['project_type_term'] ) ) { 13 $term_id = absint( $_POST['project_type_term'] ); 14 wp_set_object_terms( $post_id, $term_id, 'project_type' ); 15 } 16 }
Details:
DOING_AUTOSAVE: we skip autosaves. Without this check, the term gets overwritten in the background every 60 seconds.current_user_can( 'edit_post', $post_id ): basic permission control.absint()converts the value to a positive integer, safer than(int) sanitize_text_field().wp_set_object_terms()with a single ID (not an array) writes exactly one term, removing previous associations.
Done. Save the post, and the radio button selection will be locked in. When you reopen it, the selected term is highlighted.
Complete code for copying
All four steps in one snippet. Add to your child theme's functions.php or through Code Snippets:
1 /** 2 * Exclusive taxonomy "Project Type" — one term per post. 3 * Add to child theme's functions.php. 4 */ 5 function sd_register_project_type_taxonomy() { 6 register_taxonomy( 7 'project_type', 8 'post', 9 array( 10 'label' => __( 'Project Type', 'textdomain' ), 11 'public' => true, 12 'show_in_rest' => true, 13 'hierarchical' => true, 14 'show_in_quick_edit' => false, 15 'meta_box_cb' => false, 16 ) 17 ); 18 } 19 add_action( 'init', 'sd_register_project_type_taxonomy' ); 20 21 add_action( 'add_meta_boxes', 'sd_add_project_type_meta_box' ); 22 23 function sd_add_project_type_meta_box() { 24 add_meta_box( 25 'project_type_box', 26 __( 'Project Type', 'textdomain' ), 27 'sd_render_project_type_meta_box', 28 'post', 29 'side', 30 'default' 31 ); 32 } 33 34 function sd_render_project_type_meta_box( $post ) { 35 $terms = get_terms( array( 36 'taxonomy' => 'project_type', 37 'hide_empty' => false, 38 ) ); 39 40 if ( empty( $terms ) || is_wp_error( $terms ) ) { 41 echo '<p>First, add terms on the “Project Type” page.</p>'; 42 return; 43 } 44 45 $current_terms = get_the_terms( $post->ID, 'project_type' ); 46 $current_id = ( ! empty( $current_terms ) && ! is_wp_error( $current_terms ) ) 47 ? $current_terms[0]->term_id 48 : 0; 49 50 foreach ( $terms as $term ) : ?> 51 <label style="display:block;margin-bottom:4px;"> 52 <input type="radio" 53 name="project_type_term" 54 value="<?php echo esc_attr( $term->term_id ); ?>" 55 <?php checked( $current_id, $term->term_id ); ?>> 56 <?php echo esc_html( $term->name ); ?> 57 </label> 58 <?php endforeach; 59 } 60 61 add_action( 'save_post', 'sd_save_project_type_term' ); 62 63 function sd_save_project_type_term( $post_id ) { 64 if ( defined( 'DOING_AUTOSAVE' ) && DOING_AUTOSAVE ) { 65 return; 66 } 67 68 if ( ! current_user_can( 'edit_post', $post_id ) ) { 69 return; 70 } 71 72 if ( isset( $_POST['project_type_term'] ) ) { 73 $term_id = absint( $_POST['project_type_term'] ); 74 wp_set_object_terms( $post_id, $term_id, 'project_type' ); 75 } 76 }
⚠️ Make a full site backup before pasting. The code has been tested on the current version of WordPress with the classic editor. In Gutenberg, the custom meta box displays in the sidebar without changes.
In practice, we deployed this snippet on three projects, and it worked everywhere without modifications. If you have a hierarchical post type or multiple editor roles, replace 'post' with your slug and verify permissions in save_post.
WordPress Trac has had ticket #14877 open since 2010 for native exclusive taxonomy support. Once a 'exclusive' => true parameter appears in core, this entire construct will shrink to a single line. Until the ticket sees movement, the radio button approach remains the primary solution.
And below, a short video on the topic so you can see the process in action:
⁉️🤔 Frequently asked questions
Does this work in Gutenberg?
Yes. The
show_in_rest => trueparameter when registering the taxonomy enables compatibility with the block editor. The custom meta box appears in the document sidebar, and radio buttons display and save correctly.
Can this approach be applied to custom post types?
Yes. Replace
'post'inregister_taxonomy()andadd_meta_box()with your CPT slug. The rest of the code (taxonomy name, label, parameters) stays the same. The approach works with any registered post type, including those created through ACF or Custom Post Type UI.
What happens if the editor doesn't select any term?
The post will save without an assigned term;
save_postsimply won't callwp_set_object_terms(). If mandatory selection is critical, add JavaScript validation in the admin or a check via thepre_post_updatehook.
Why not use the Radio Buttons for Taxonomies plugin?
You can. The plugin solves the task without code and has 100,000+ active installations. The downside is another dependency. For one or two sites, the plugin is justified. For agencies and multisites, code in the theme gives full control without extra updates and conflicts.
How do I add hierarchical selection (parent → child)?
Hierarchical taxonomies (
hierarchical => true) get a parent-child structure automatically. To display the hierarchy in the custom meta box, replaceget_terms()withwp_dropdown_categories()using the'taxonomy' => 'project_type'parameter; the function will output a select with indentation.
The bottom line: when it's worth the effort to write code
An exclusive taxonomy isn't needed for every project. If editors understand the site's logic and don't make mistakes when selecting, standard checkboxes are enough. But when the cost of errors is high (a landing page in the portfolio mistakenly marked as both "online store" and "case study"), half an hour of coding pays off with content cleanliness.
- If you have one site and no developer, install Radio Buttons for Taxonomies. It works without code.
- If you're an agency or running a multisite, copy the code above into your base theme. Fewer plugins, fewer failure points during updates.
- If your site runs on pure Gutenberg, consider whether you even need a taxonomy. Perhaps an ACF field with radio buttons is enough: fewer entities, faster admin.
Start with a test site. Register the taxonomy, add three terms, and create a post; the interface will work immediately. Write in the comments what task you used an exclusive taxonomy for.

A professional team of writers and editors specializing in creating quality content.