














🛠 Complete cPanel guide for WordPress beginners
You bought hosting, and it comes with cPanel. It looks like a spaceship control panel: dozens of icons, English terms, confusing abbreviations. You're afraid to click the wrong thing.
Relax. Every WordPress site owner goes through cPanel, and there's nothing to fear. After this guide, you'll navigate the panel like your own kitchen: create a database, upload a theme manually, make a backup in two clicks, block a spammer's IP. All of this takes minutes. No need to call "that programmer friend."
cPanel is a Linux-based hosting control panel. Nearly every hosting company uses it, from cheap shared hosting to powerful VPS. Graphical interface, logical categories, built-in wizards. Even if you've never seen the word "phpMyAdmin" before, you'll create your first database within ten minutes.
💡 Quick overview:
- Understand the cPanel interface and find key WordPress tools.
- Learn to work with files: upload themes and plugins, create FTP accounts, make backups.
- Create databases through the MySQL wizard and manage tables in phpMyAdmin.
- Add domains and subdomains, set up redirects and aliases.
- Set up professional email on your domain and connect it to applications.
- Enable basic protection: IP blocking, hotlink protection, ModSecurity.
How the cPanel interface works
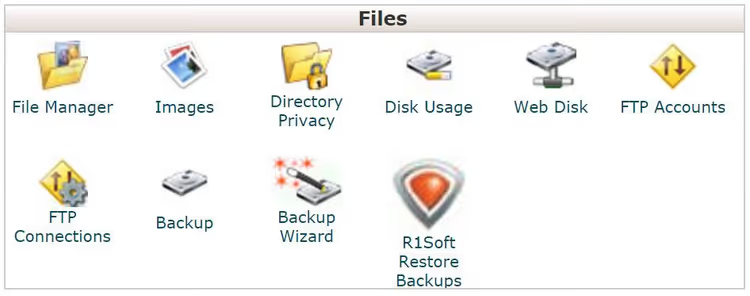
After logging into cPanel (usually at https://your-domain.com:2083 with the login and password your host sent you), you see the main page. On the left is a statistics widget: domain, home directory, disk usage, number of email accounts. On the right are tools grouped by category. You can drag categories around to customize the panel layout.
For WordPress users, there are eight working categories. Here's what each contains and why you need it.
Files: uploading themes, plugins, and backups
The "Files" category is where you'll start working. It contains tools for everything related to files on the server.
File Manager replaces an FTP client. If you need to urgently upload a theme or plugin and don't have FTP handy, open File Manager, navigate to public_html → wp-content → themes (or plugins), and drag in the ZIP archive. You can extract it right in the interface: right-click → Extract. After that, the theme or plugin appears in the WordPress admin.
FTP accounts. When giving access to a developer, don't share your cPanel password. Create a separate FTP account: specify a login, password, and restrict the home directory (for example, only public_html/wp-content/themes). The developer sees only their area while the rest of the site remains inaccessible. You can also set a disk space quota there.
Backup. The built-in Backup Wizard lets you download a complete site copy: all files, databases, email filters. Select "Backup" → "Full Backup" → download the archive to your computer. For restoration, the same logic applies: click "Restore," select the file from your computer, upload. This doesn't replace specialized plugins like UpdraftPlus or BackupBuddy, but as an emergency tool it works reliably.
Working with images. The Images tool can create thumbnails from all images in a folder, scale individual images, and convert formats (PNG to JPG to save space). For everyday work, WordPress's built-in tools are enough, but for bulk processing this is faster than any plugin.
Databases: phpMyAdmin, MySQL, and everything under WordPress's hood
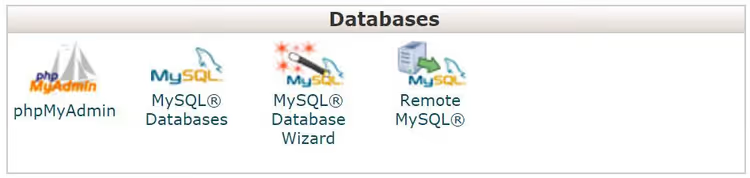
WordPress runs on a MySQL database. Every post, page, comment, and plugin setting is a row in a table. And while you don't normally touch the database manually, there are moments when you can't avoid it.
Creating a database
For manual WordPress installation (not through an auto-installer), you need a database beforehand. In cPanel, this is done through the MySQL Database Wizard:
- Enter a database name. Your account prefix is automatically added, resulting in something like
user_wp1. - Create a database user: choose a name and strong password.
- Grant privileges. WordPress needs all of them, so check "All Privileges."
Done. The database name, username, and password are the three values you'll enter in wp-config.php during installation. If you install WordPress through Softaculous (more on that below), the database is created automatically.
Working with tables through phpMyAdmin
phpMyAdmin opens from the same "Databases" category. On the left is a list of your databases, on the right are the tables of the selected database. WordPress creates 12 tables by default, including wp_posts for posts, wp_options for settings, wp_users for users, and wp_comments for comments. You can open each one, view contents, edit a row, or run an SQL query.
Practical scenario: a plugin wrote a bad setting to wp_options, the site broke, and the admin panel won't open. Go to phpMyAdmin → wp_options → find the row with the plugin's option_name → edit the value manually. The site comes back to life in a minute without reinstalling WordPress.
Export and import
The "Export" tab in phpMyAdmin saves the database to an SQL file, which is a manual backup. For import, use the "Import" tab: select the file, choose SQL format, click "Go." Important: before importing, make sure the destination database is empty, otherwise tables will be duplicated.
If an external service needs to connect to your database, use Remote MySQL: add the service's IP or domain to the list of allowed hosts.
Domains, subdomains, and redirects
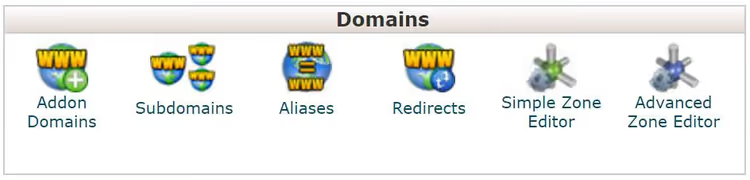
The "Domains" category handles everything related to your site's addresses.
Addon Domains let you host multiple independent sites on one hosting account. Buy a second domain, add it here, and cPanel creates a separate folder in public_html. Install WordPress there, and it works as a standalone site.
Subdomains. Want a test site? Create test.your-domain.com as a separate subdomain with its own folder. Perfect for a staging environment: install a WordPress copy, test updates and plugins, then move changes to the main site.
Aliases. If you have two domains that should point to one site, this tool is for you. For example, mysite.net and mysite.com can be linked by adding one as an alias of the other. Visitors from both will see the same content.
Redirects. Set up redirections: type 301 (permanent, for SEO) or 302 (temporary), source URL, and target URL. Useful when changing domains: set up 301 redirects from old pages to new ones, and search engines transfer the ranking weight.
Email on your domain
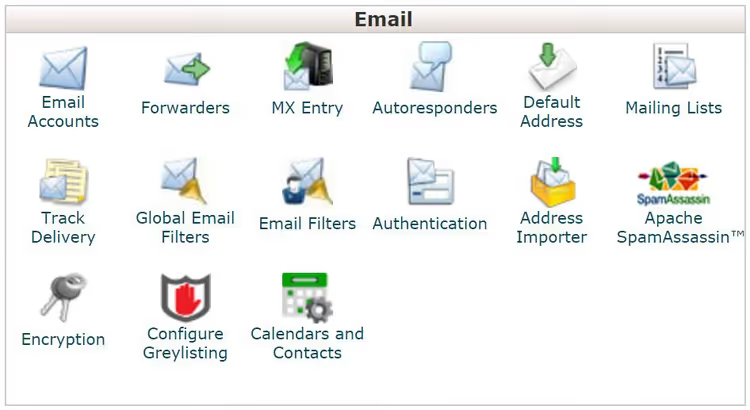
Email like info@your-domain.com looks more professional than vasya123@gmail.com. And if several people work on the site (author, editor, support), each can have their own address.
Creating an email account. Email Accounts → Create: enter the name (the part before @), password, and mailbox quota. Done, the account works immediately. Access it through Webmail (click "Access Webmail" in cPanel) or at https://your-domain.com:2096.
Desktop and mobile applications. To add the account to Outlook, Thunderbird, or your phone, you need the incoming mail server (mail.your-domain.com, port 993 IMAP), outgoing server (mail.your-domain.com, port 465 SMTP), and credentials. Your host sends these parameters in the welcome email. Don't forget to check "Server requires authentication" for SMTP.
Forwarding. The Forwarders tool redirects emails from one address to another. Convenient when all emails to support@ should go to your main Gmail.
Auto-responders and spam filters. Auto Responder enables automatic replies during vacation. The anti-spam tool filters junk before it reaches your inbox. MX Entry redirects domain email to an external server (Google Workspace).
Statistics and metrics: who visits your site
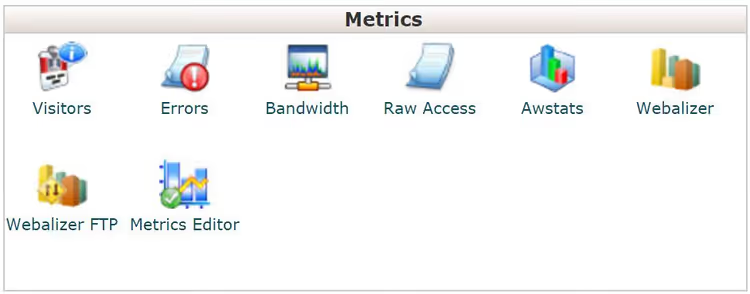
The "Metrics" category shows what's happening with your site in numbers.
Bandwidth. A graph of traffic usage: how much data was transferred via HTTP, FTP, and email protocols. On cheap plans, bandwidth is limited. If the graph hits the ceiling, the site stops loading. Time to optimize images and caching, or upgrade to a more generous plan.
Visitors. The last 1,000 visits: IP, time, entry page. Raw data for quick checks on suspicious activity. For serious analytics, install Google Analytics through the Site Kit plugin.
Awstats, Webalizer, Raw Access. Three presentations of the same data. Awstats and Webalizer provide graphs and reports. Raw Access gives you the raw text log, convenient for sending to a developer.
Errors. The last 300 server errors: broken links, missing files, 404s. If you see a suspicious spike, check whether dead links from other sites are pointing to you. For automatic monitoring from within WordPress, there are specialized plugins.
Security: basic protection without plugins
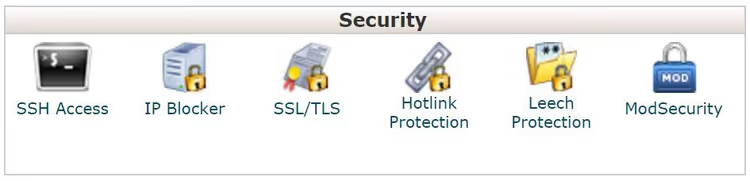
WordPress security isn't limited to plugins. Several free cPanel tools close important holes at the server level, faster than installing yet another plugin.
Blocking IP addresses
If some IP is hammering wp-login.php or flooding comments with spam, block it. The IP Blocker tool: enter the address and save. Single IPs, ranges, and CIDR notation are supported. The block takes effect immediately.
Hotlink protection
Hotlinking is when someone embeds your image on their site with a direct link. The image displays on their site while traffic comes from your server. The Hotlink Protection tool: enable it, add your domains to the allowed list, and choose formats to block (jpg, png, gif, webp, avif). Direct links from other sites stop working.
ModSecurity
ModSecurity is a free Apache module with rules for blocking typical web attacks: SQL injection, XSS, password brute-forcing. Enable it with one click in the "Security" section. Rules update automatically. Attacks are blocked at the server level before even reaching WordPress.
Installing WordPress with one click
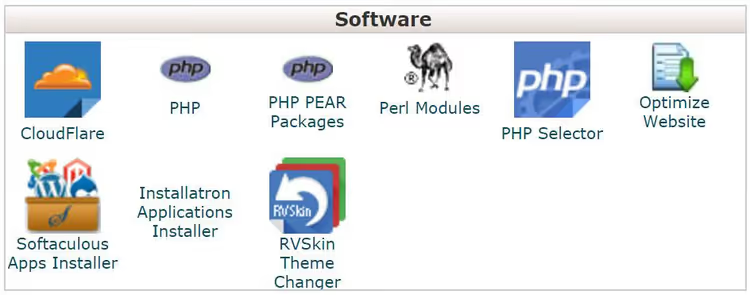
Manual WordPress installation is rare these days. An auto-installer is much faster. In 2026, almost every host includes Softaculous Apps Installer in cPanel, a tool that installs WordPress in 30 seconds.
Open Softaculous (usually in the "Software" category or as a separate widget at the bottom of the panel), select WordPress, and click "Install." Fill in four fields: domain (where to install), directory (leave empty for the site root), admin username, and password. Click "Install," and your site is ready in half a minute.
After installation, go to the admin panel at your-domain.com/wp-admin with the same credentials. First, go to "Settings → Permalinks" and select the "Post name" format. This is the foundation for SEO.
Besides WordPress, Softaculous can install dozens of other CMS platforms and applications: Joomla, Drupal, phpBB, Magento. If you decide to experiment, install on a subdomain (see the "Domains" section) so you don't affect the main site.
cPanel account settings
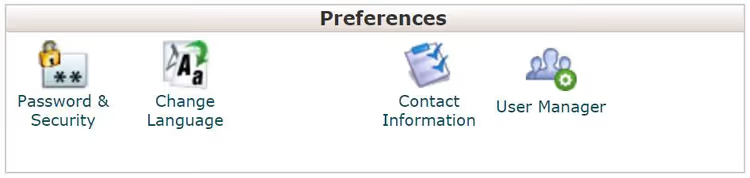
The "Preferences" category manages your own cPanel account.
Password. The first thing to do after buying hosting is change your cPanel password. Use the "Password & Security" tool: enter the old password, the new one (use the built-in generator, which suggests truly strong combinations), and save. Your cPanel password is the key to everything: files, databases, email. Take it seriously.
Interface language. By default, cPanel is in English. Want Russian? Use the "Change Language" tool, select from the list, and save. The change is instant.
Contact information. Here you specify an email for system notifications: disk overflow, suspicious activity, hosting payment expiration. It's best to enter two addresses: primary and backup. Don't use an email account on this same hosting account. If the server goes down, the notification won't arrive.
Adding users. If multiple people work on the site, give each one their own cPanel access. Use the "User Manager" tool: add a user, select permissions (you can limit access to email only or files only), and set a password. This way the accountant sees only email, the developer sees files and databases, and full access stays with you.
⁉️🤔 Frequently asked questions
How is cPanel different from the WordPress admin?
The WordPress admin handles site content and appearance: posts, pages, plugins, themes. cPanel handles everything under the hood: files on the server, databases, email, domains, security. A typical interaction scenario: in cPanel you create a database and install WordPress through Softaculous, then all daily operations (publishing posts, installing plugins, changing themes) happen in the WordPress admin. They complement each other: cPanel is the foundation, WordPress is the house built on it.
Can I get by without cPanel at all?
Yes, if you use managed WordPress hosting: WP Engine, Kinsta, SiteGround with their custom panel. Such hosts hide cPanel behind their own interface, which is convenient. But on classic shared hosting (which most beginners choose because of the low price), cPanel is the de facto standard. Not learning to use it means cutting yourself off from most affordable hosting plans. Managed plans start noticeably higher than regular hosting with cPanel, and on their proprietary panel you're limited to the tools the host provides. cPanel is universal: learn it once, work on any host.
Do I need a separate backup plugin if cPanel has Backup Wizard?
The short answer is yes. cPanel's built-in Backup Wizard takes a complete site snapshot right now. This is a one-time manual operation. If your site changes daily (new posts, comments, orders), a weekly manual backup won't save you. In case of failure, you lose all changes since the last copy. Plugins like UpdraftPlus make automatic daily backups and save them to the cloud. Set up daily database backups and weekly full backups, and keep copies in two places: locally and in Google Drive or Dropbox.
What should I do if my site gets hacked?
First, don't panic. Go to cPanel → Metrics → Visitors and see which IPs had suspicious activity. Block them through IP Blocker. Download a full backup (files + database). Replace all WordPress core files with fresh ones from wordpress.org. Check the database through phpMyAdmin: look for unfamiliar users in
wp_usersand suspicious entries inwp_options. Change all passwords: cPanel, FTP, database, WordPress admin. Enable ModSecurity. After that, install Wordfence to scan for remaining backdoors. Don't delay: every hour the site stays in an attacker's hands adds more work.
How do I migrate a site to another host through cPanel?
The full migration cycle: on the old host, download the files (through File Manager: select all → Compress → ZIP → Download) and the database (phpMyAdmin → Export → SQL). On the new host, create a database through MySQL Database Wizard, import the SQL, upload files to
public_html, and editwp-config.php(database name, user, password). For DNS, change the domain's A record to the new server's IP. Propagation takes up to 48 hours, usually 2-6 hours. During this time, the site may open from either the old or new server. This is normal.
What to do after reading this guide
Don't try to master everything at once. cPanel is a tool you'll return to as your site grows. Today you created email on your domain. Great. In a month you'll need a test subdomain, and you'll already know where to do it. Six months later the site slows down, and you'll check bandwidth statistics and think about upgrading your hosting.
The only thing worth doing right now: change your cPanel password and set up a contact email for notifications. These two minutes will save you from a late-night email from your host that you won't read because it went to an inbox you can't access.
And remember the main thing: cPanel is not an enemy or "complicated admin stuff." It's just a set of tools arranged in nine folders. Each does one specific thing. Master one, move to the next. In a month you'll wonder why this panel ever seemed scary.

A professional team of writers and editors specializing in creating quality content.