













 AIIllustrative image: AI-generated
🚀 How to load Google Fonts locally in WordPress and fix GTmetrix errors
Ran your site through GTmetrix and saw Google Fonts errors? You're not alone. External requests to fonts.googleapis.com slow down loading, and caching plugins like WP Rocket or WP Fastest Cache can't compress assets hosted on someone else's server.
Since 2022, there's another reason: a German court ruled that dynamically loading Google Fonts violates GDPR because visitor IP addresses are transmitted to Google servers in the US without consent. Self-hosting fonts solves three problems at once: GTmetrix performance, GDPR compliance, and full control over caching.
Below is a step-by-step guide. From choosing a font on Google Fonts to a clean GTmetrix report with zero external resource errors.
💡 Quick overview:
- Download the font weights you need from Google Fonts
- Convert.ttf to WOFF2 using Transfonter or google-webfonts-helper
- Upload the files to /wp-content/uploads/fonts/ via FTP
- Add @font-face rules to your theme's CSS and verify rendering
- Re-test your site in GTmetrix; Google Fonts errors should be gone
Why you should host fonts locally
When a browser loads a page, it goes to fonts.googleapis.com, fetches the CSS, then pulls the actual font files from fonts.gstatic.com. That's at least two external DNS lookups and two HTTP sessions you have no control over. Caching plugins are powerless here: you can't compress or defer loading of an external resource.
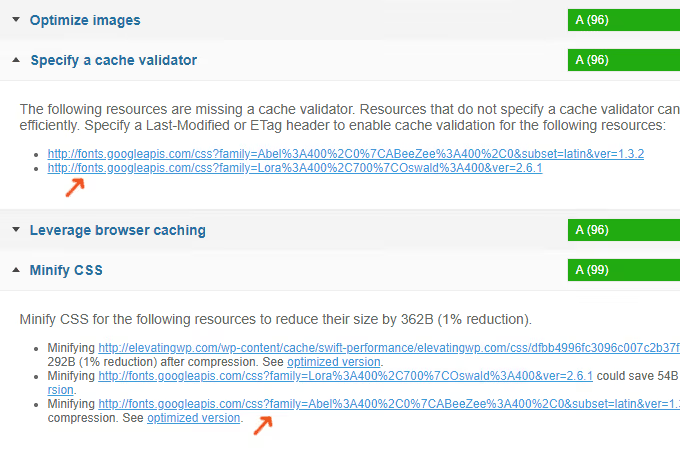
Local hosting changes the picture. Font files sit on your server, same domain, same CDN, same caching rules. The browser doesn't go anywhere external, and GTmetrix and PageSpeed Insights stop complaining about third-party resources.
And yes, GDPR. In January 2022, the Munich Regional Court ruled that dynamically loading Google Fonts without user consent violates GDPR. A wave of lawsuits swept across Europe, and site owners started switching to local hosting en masse. Hosting fonts yourself is the most reliable solution.
Step 1. Choose a font on Google Fonts
Go to Google Fonts and find the font you need. In this guide I'm using Roboto, one of the most popular web fonts, with Cyrillic support.
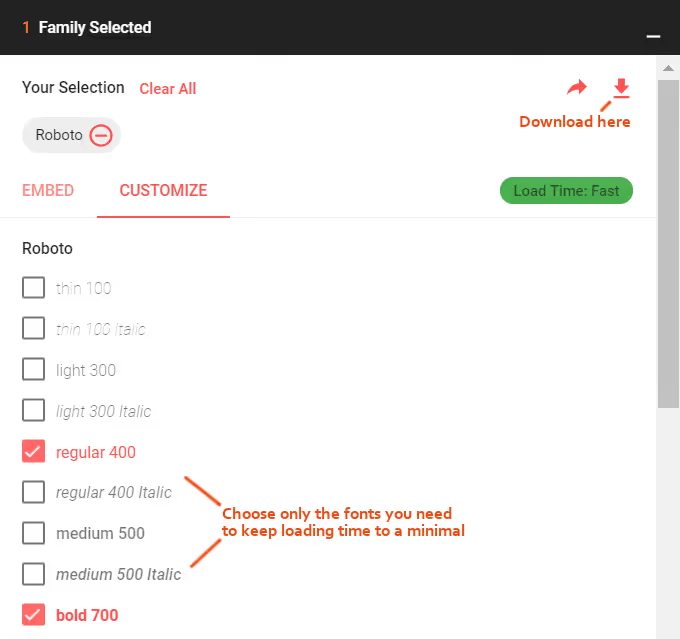
Two rules for staying lean:
- Minimum weights. Each weight (regular, bold, italic) is a separate file and a separate request. If your design only uses regular and bold, uncheck the rest.
- Minimum fonts. Stick to one or two fonts per site. A third is already overkill for performance, no matter how beautiful it looks.
I chose Roboto Regular (400) and Roboto Bold (700). That's it.
Step 2. Download the font
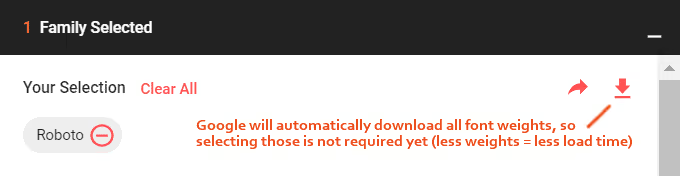
On the font page, click the "Download family" button. Google will package all weights into a ZIP archive. The weight selection doesn't matter at this stage; the archive contains the entire family anyway. We'll filter later.
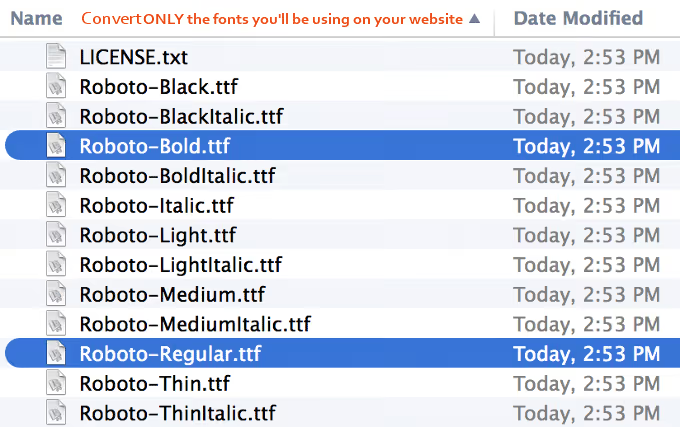
Unzip the archive. We need Roboto-Regular.ttf and Roboto-Bold.ttf.
Step 3. Convert fonts to web formats
Browsers don't use.ttf directly. You need WOFF and WOFF2 formats; they're compressed and load faster. There are two tools, both free.
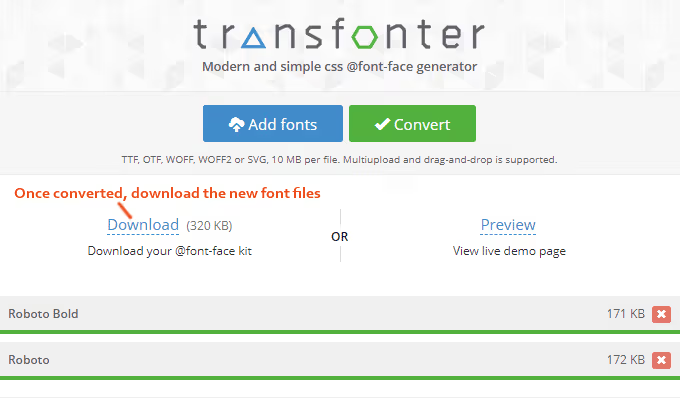
Transfonter is a classic: go to transfonter.org, click "Add fonts," and upload your.ttf files.
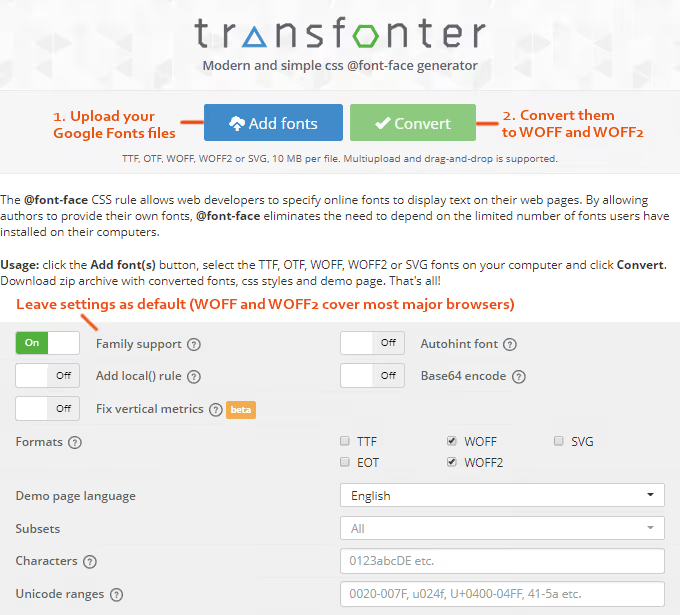
Leave the settings at default; WOFF and WOFF2 cover all modern browsers. EOT (for old Internet Explorer) isn't needed in 2026. Click "Convert."
Google-webfonts-helper is a more modern option specifically for Google Fonts. The service at gwfh.mranftl.com generates both WOFF2 files and ready-to-use CSS with @font-face. No need to upload fonts to a third-party server; everything happens locally in your browser. For licensed fonts and branded typefaces, this matters.
Which tool should you choose? Transfonter is simpler for a one-time task. Google-webfonts-helper is more convenient if you change fonts often or work with commercial typefaces you'd rather not upload to external servers.
Step 4. Upload web fonts to your server
After conversion, download the ZIP. Inside you'll find.woff and.woff2 files for each weight. For Roboto Regular and Bold, you get 4 files:
Upload them via FTP or your hosting file manager to /wp-content/uploads/fonts/. The path /wp-content/uploads/ was chosen deliberately: core and theme updates don't touch it, unlike the theme folder.
After uploading, verify by opening a direct link to the file in your browser:
https://your-site.com/wp-content/uploads/fonts/Roboto-Regular.woff2
The browser should start downloading. If not, check folder permissions (should be 755) and the path itself.
Step 5. Add @font-face to your CSS
The ZIP archive from Transfonter includes a stylesheet.css file, a ready-made template for connecting the font. Open it and copy the contents.
Paste the code at the very top of your active theme's style.css (or custom.css if your theme supports it). Use paths to files on your live server, not from the archive. Replace relative URLs with absolute ones:
Original code from stylesheet.css:
1 src: url('Roboto-Bold.woff2') format('woff2'), 2 url('Roboto-Bold.woff') format('woff');
Change to:
1 src: url('https://your-site.com/wp-content/uploads/fonts/Roboto-Bold.woff2') format('woff2'), 2 url('https://your-site.com/wp-content/uploads/fonts/Roboto-Bold.woff') format('woff');
Replace your-site.com with your domain. Repeat for each weight.
To make the font easy to use in your markup, add wrapper classes below:
1 .roboto_font { 2 font-family: "Roboto", "Arial", sans-serif; 3 } 4 5 .roboto_bold_font { 6 font-family: "Roboto", "Arial", sans-serif; 7 font-weight: bold; 8 }
Now any element with the class roboto_font or roboto_bold_font will display in Roboto.
Step 6. Verify rendering
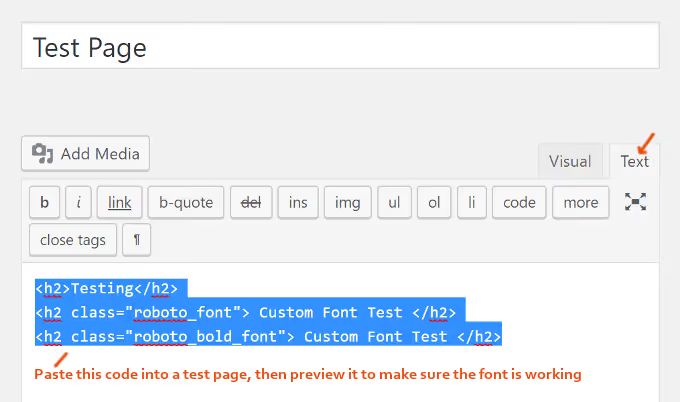
Create a test page (or open any existing one in draft mode) and paste this HTML in the text editor:
1 <h2>Default theme font</h2> 2 <h2 class="roboto_font">Roboto Regular — custom font</h2> 3 <h2 class="roboto_bold_font">Roboto Bold — bold weight</h2>
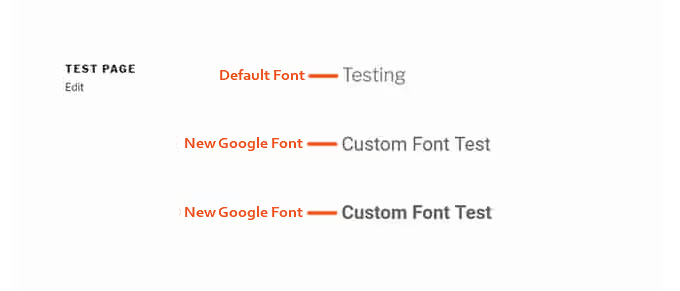
Open the preview. The first heading uses the theme's default font; the second and third use Roboto.
If the font isn't loading, open the browser console (F12 → Network) and check that WOFF2 files are loading from your domain, not from fonts.gstatic.com. The response code should be 200, and the type should be font/woff2.
Step 7. Make the font the default
To apply Roboto site-wide without adding classes to every heading, add this to style.css:
1 body { 2 font-family: "Roboto", "Arial", sans-serif; 3 }
Caution: if your theme already uses a custom font, find the font-family lines in style.css and replace them. Simply adding a body rule on top of an existing one creates a conflict. Make sure old declarations are removed or commented out.
Step 8. Set up a fallback font stack
Google Fonts aren't system fonts. If the browser can't load them (visitor is offline, ad blocker, temporary glitch), the page will have no text. The solution is a font stack.
Wrong:
1 font-family: 'Roboto';
Correct, with fallbacks:
1 font-family: 'Roboto', Arial, sans-serif;
The browser tries Roboto. If that fails, it falls back to Arial. No Arial? System sans-serif. The page is always readable, even if the custom font doesn't load.
Step 9. Re-test your site in GTmetrix
Run GTmetrix again. The "Waterfall" section should no longer show requests to fonts.googleapis.com or fonts.gstatic.com. The "Serve static assets with an efficient cache policy" error for fonts also disappears because those assets are now on your server and cached according to your rules.
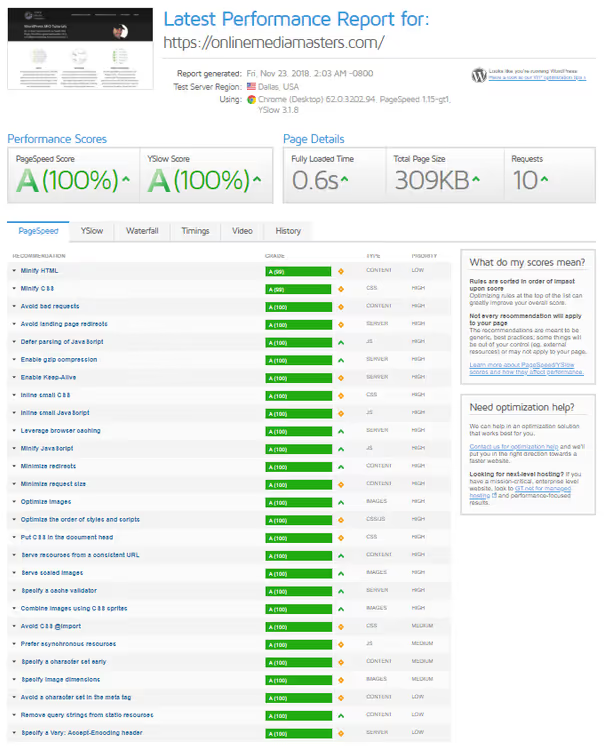
If errors remain, check the Waterfall tab. A theme or plugin (for example, Elementor) might still be pulling fonts from Google's CDN. The next section will help.
Alternative for the lazy: the Local Google Fonts plugin

If you don't want to deal with FTP and CSS, there's the Local Google Fonts plugin. It automatically finds all Google Fonts used by your theme and plugins, downloads them, and serves them from your server.
Pros: install, activate, forget. Cons: it only works with Google Fonts (not other external fonts) and doesn't offer fine-grained control over formats. For most WordPress sites, that's more than enough.
Helpful video on the topic
In English with a visual demonstration of every step, from choosing a font to the final CSS:
⁉️🤔 Frequently asked questions
Is self-hosting fonts mandatory in 2026?
From a legal standpoint, yes, if you have visitors from the EU. The Munich court in 2022 set a precedent, and since then dozens of German courts have confirmed: dynamically loading Google Fonts without consent = GDPR violation. From a performance standpoint, also yes: two extra DNS lookups and an uncacheable external resource don't make your site faster. Self-hosting fonts solves both problems at once. The Local Google Fonts plugin takes 5 minutes; the manual method with Transfonter takes 15. Choose based on your willingness to use FTP.
Google-webfonts-helper or Transfonter: which is better?
For a one-time connection of a single font, there's almost no difference. Transfonter is simpler: upload the.ttf, get WOFF2 and CSS. Google-webfonts-helper is more convenient when changing fonts frequently: it doesn't upload files to a third-party server and immediately generates ready-to-use @font-face with correct paths. For commercial licensed fonts, only google-webfonts-helper.
What if fonts aren't displaying after local upload?
Three typical causes. First, wrong path in
url(): check that the link opens in a browser and returns a file, not a 404. Second, CORS: if fonts load from a CDN or subdomain, the server must return theAccess-Control-Allow-Originheader. Third, theme conflict: open DevTools (F12 → Computed), find an element with your font, and see whichfont-familyis actually applied. Often the theme overrides it lower in the cascade.
Can I host fonts on a CDN instead of my own server?
Yes, but the CDN must be yours. The key principle is that fonts should be served from the same domain (or subdomain) as your site, with no cross-domain requests to third-party servers. Then caching works, and GDPR isn't violated.
How do I verify fonts are actually loading locally?
Open DevTools → Network → Font tab. Refresh the page. All font requests should go to your domain. If you see fonts.googleapis.com or fonts.gstatic.com, external loading remains somewhere. Most likely a theme or plugin is still using it. Check the settings or install Local Google Fonts.
What to choose: manual upload or plugin
If you've read this far, you probably care about your site's performance. And that's the right attitude. The difference between "seems fast" and "GTmetrix Grade A" often comes down to small details like external fonts.
For quick results, install Local Google Fonts. Five minutes, and external requests to Google disappear.
For full control over formats, caching, and fallback stacks, go with the manual method using Transfonter or google-webfonts-helper. Same 15 minutes, but you know every file on your server.
Either way, run a GTmetrix test before and after. "Before" and "after" screenshots are the best way to confirm you didn't do all this for nothing.

A professional team of writers and editors specializing in creating quality content.