













 AIIllustrative image: AI-generated
🖼 WordPress gallery in 5 minutes: setting up Photo Gallery by Supsystic
You open the WordPress media library, upload a dozen photos, and on the page they line up in a crooked column with no lightbox, no responsiveness, and no hint of style. The standard "Gallery" block in Gutenberg handles only the basic task of displaying images. Everything else (mobile responsiveness, navigation, click effects) falls on a separate plugin.
But installing a bulky builder with 50 settings just for three rows of photos is overkill. You need a tool that delivers a clean responsive gallery in 5 minutes without forcing you to read 30 pages of documentation.
Photo Gallery by Supsystic is a free plugin from the WordPress.org directory that covers exactly this scenario. Grid, masonry, slider, lightbox in Pro, no CSS hassle and no tie-in to a specific theme. Below is a step-by-step walkthrough: from installation to publishing your first gallery.
💡 Quick overview:
- Install Photo Gallery by Supsystic from the WordPress admin
- Create a new gallery and choose a display theme
- Add images through the WordPress media library
- Configure captions, sizes, and effects
- Insert the gallery into a page using a shortcode or the editor button
- Publish the post and check how it displays on mobile
What is Photo Gallery by Supsystic
Photo Gallery is a free plugin for creating responsive image galleries in WordPress. The developer is Supsystic studio, which has been releasing plugins since 2012. As of June 2026, the plugin has 497 reviews on WordPress.org; the latest update is version 1.16.2 dated May 31, 2026, with support for WordPress 7.0.
The free version includes three gallery types: grid, masonry, and slider. Basic settings for spacing, thumbnail sizes, and column count are available. The Pro version ($49/year or $149 lifetime) adds a lightbox with navigation, hover effects, category filters, and social media integration. For most websites, the free functionality is enough: the gallery looks neat on desktop and mobile without additional configuration.
The plugin is not tied to any specific page builder. It works with Gutenberg, Elementor, Divi, and the classic editor, anywhere you can insert a shortcode.
Step 1. Installing the plugin
Installation follows the standard process for any free plugin from the WordPress directory:
- In the admin panel, go to Plugins → Add New.
- In the search bar, type
Photo Gallery by Supsystic. - Click Install, then Activate.
After activation, a new item appears in the left admin menu: Photo Gallery by Supsystic.

The free version is ready to use immediately. You can activate a Pro license later; all created galleries will be preserved after upgrading.
Step 2. Creating your first gallery
After activating the plugin, let's create a test gallery:
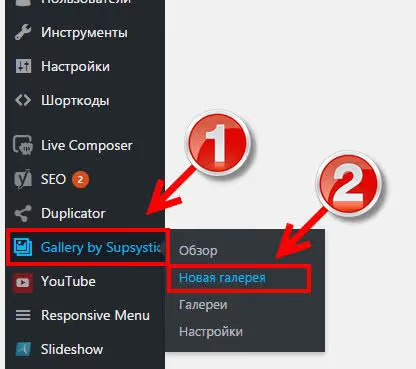
- Hover over Photo Gallery by Supsystic in the left menu.
- In the dropdown submenu, select New Gallery.
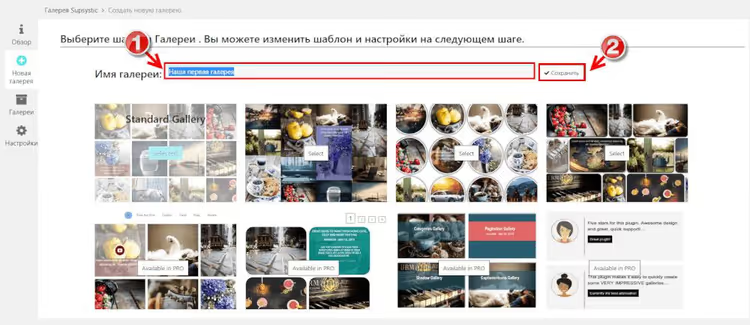
The plugin will prompt you to choose a display theme. The Standard Gallery option is the most popular: a simple grid with responsive thumbnails and no extra effects. Themes labeled "PRO" require a paid license and are not needed at this stage.
Enter a gallery name; I recommend using the name of the page or post where it will be inserted. This makes navigation easier once you have more than three galleries. In this example, we'll call it "Our first gallery." Click Save.
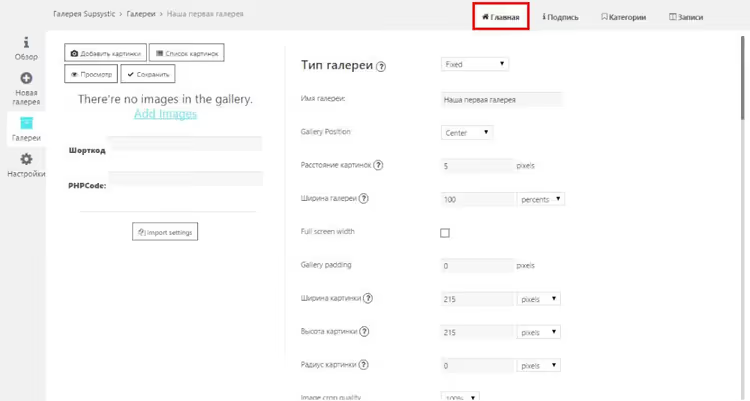
The page will refresh, and you'll see a panel with settings tabs. Let's briefly go through each one.
Step 3. Overview of settings tabs
Main tab
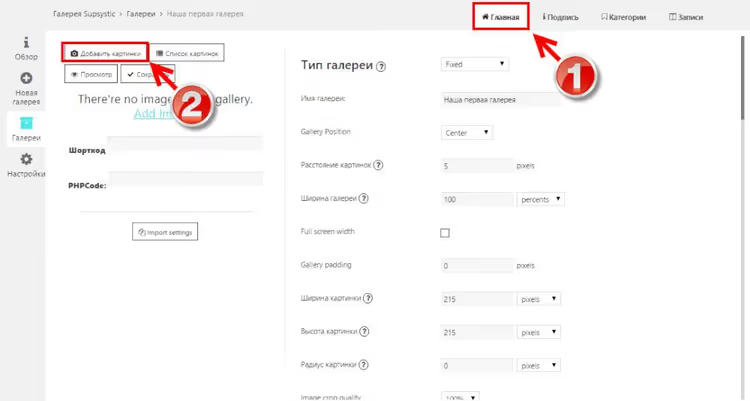
This tab contains the main display parameters: number of columns, thumbnail sizes, spacing between images. Images are also added from this tab via the Add Images button at the top of the screen.
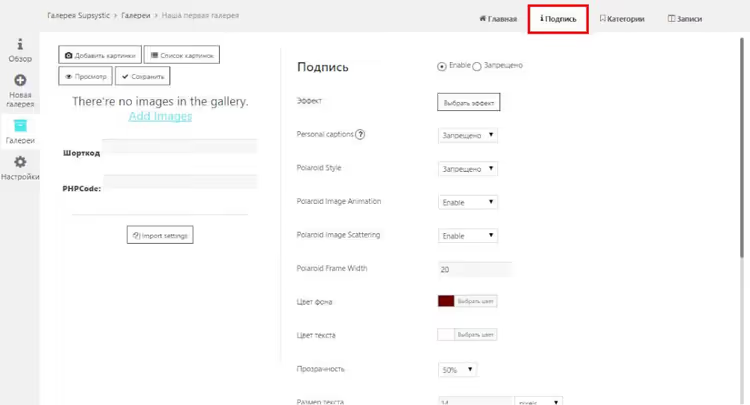
Caption tab
Controls how title and alt attributes are displayed under thumbnails. You can enable or disable captions globally, choose a font and alignment. In the free version, the settings are basic but sufficient for text captions under photos.
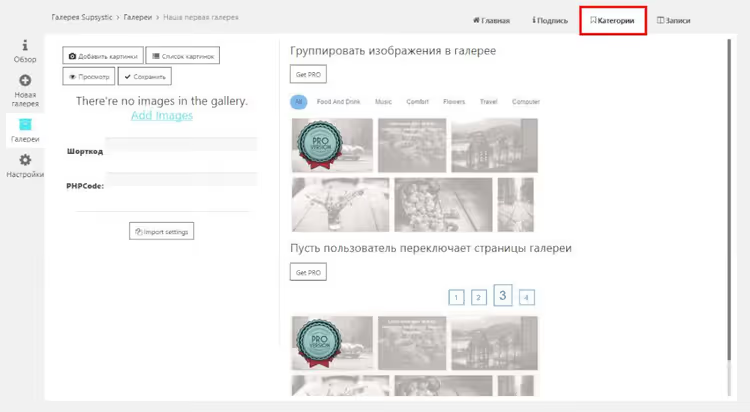
Categories tab
Available only after purchasing a Pro license. Allows grouping images by category and adding filters, useful for portfolios with many works.
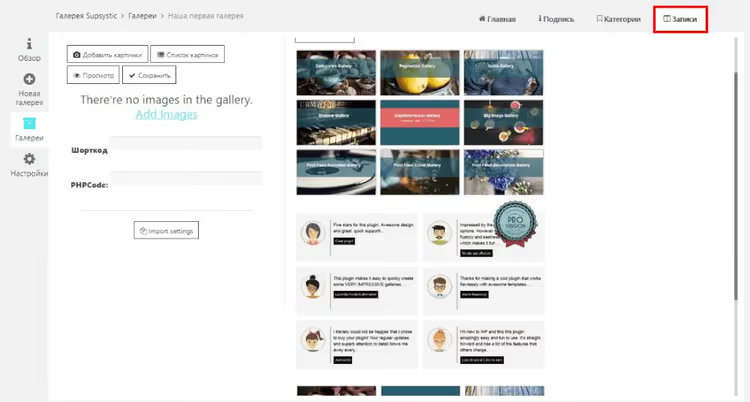
Posts tab
A tab for integrating the gallery with site posts, automatically pulling images from posts. Inactive in the free version; in Pro, it allows building dynamic galleries without manually selecting images.
Step 4. Adding images to the gallery
Return to the Main tab and click Add Images.
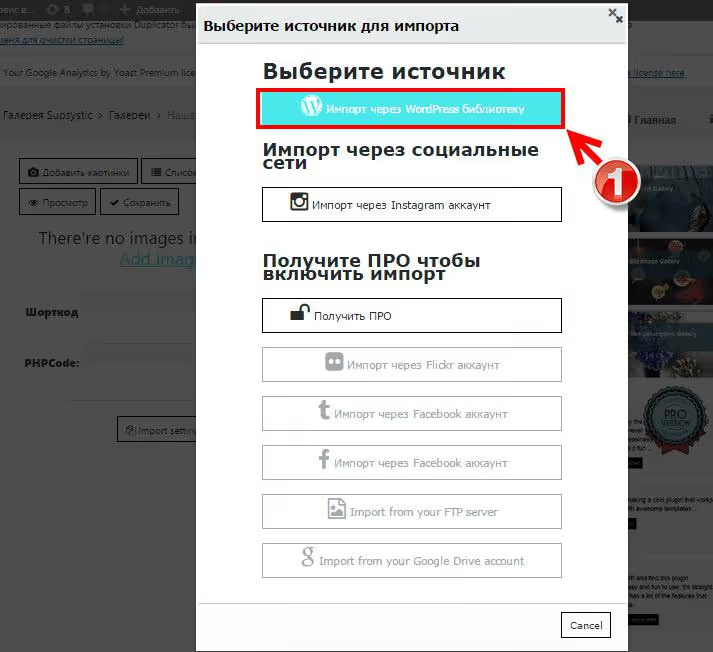
A popup window will appear with source options. The free version fully supports only the WordPress media library. Other sources (social networks, cloud storage) are Pro features.
Select Import from WordPress Media Library.
The standard media library page will open. You have two options here:
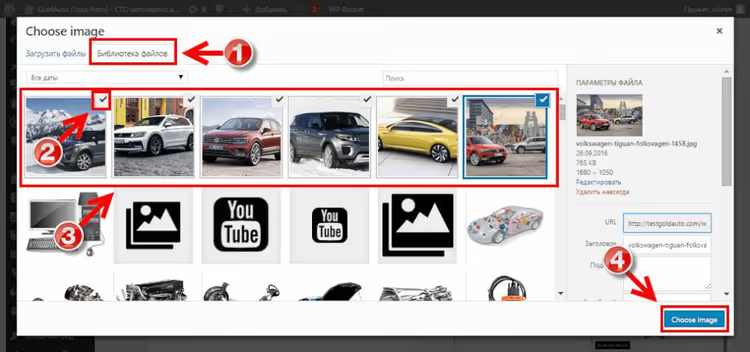
- Select already uploaded images by checking them.
- Upload new ones: go to the Upload Files tab, drag images into the window, or click Select Files.
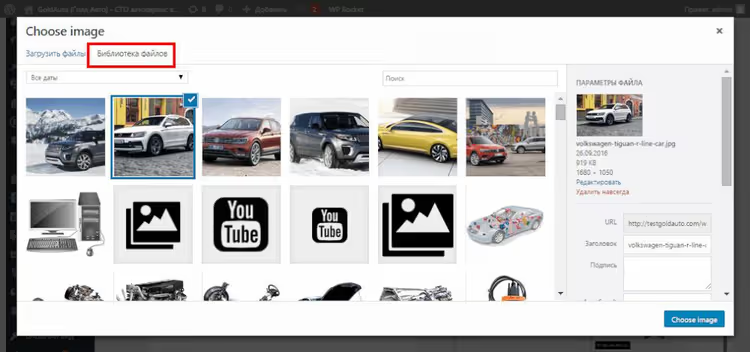
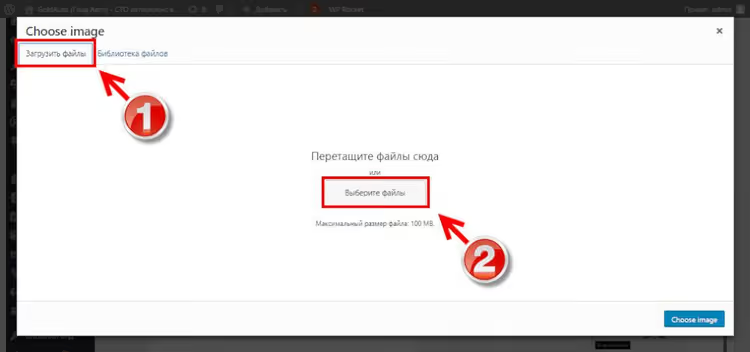
In this example, we'll work with already uploaded images. Hover over the top right corner of a thumbnail and a checkbox will appear. Check the images you need, then click Choose image.
The window will close and you'll return to the main gallery tab. Notifications about added images will appear on the light background; wait for the process to complete.
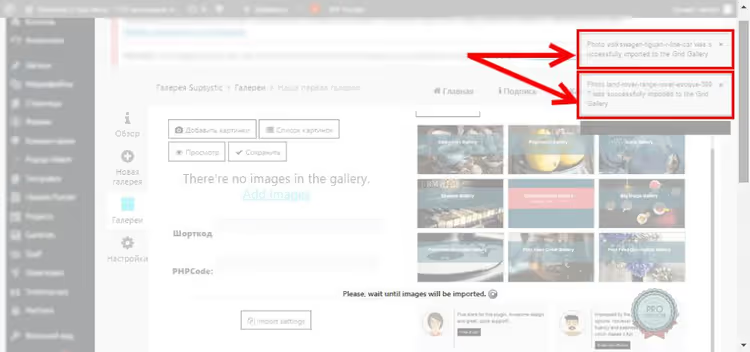
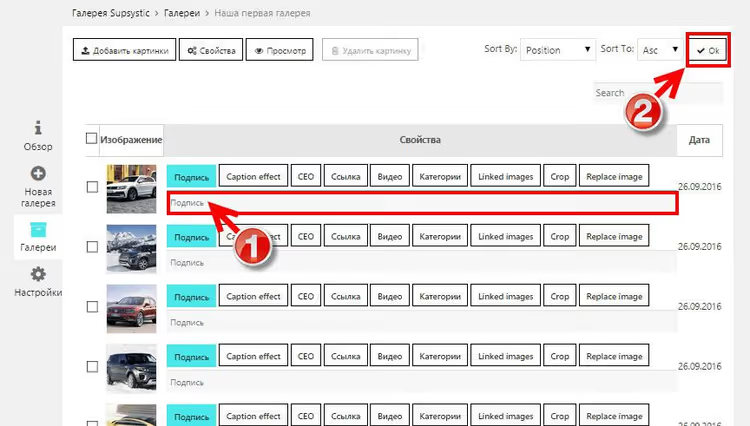
Photo captions
After uploading images, each one will have a caption field. Fill it in; the text will appear under the thumbnail in the gallery. When finished, click Ok.
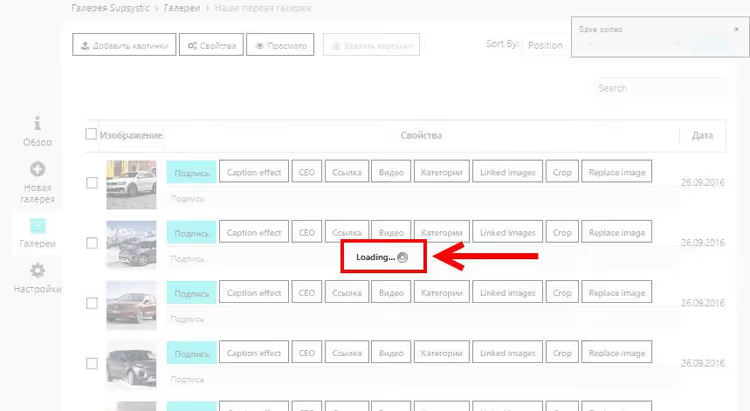
The screen will briefly turn white with a Loading message; this is the save indicator. Do not close the tab until it disappears.
The gallery is ready. All that's left is to insert it into a page.
Step 5. Inserting the gallery into a page or post
The plugin offers two ways to add a gallery to your content.
Method 1: through gallery properties
Open the finished gallery and click Properties.
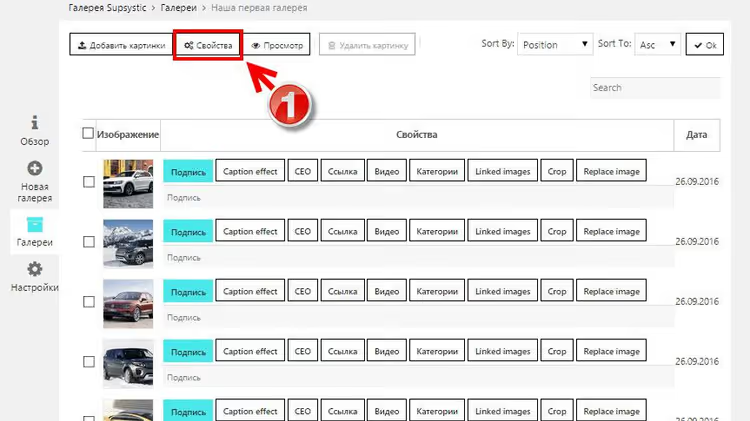
In the window that opens, copy the gallery shortcode.
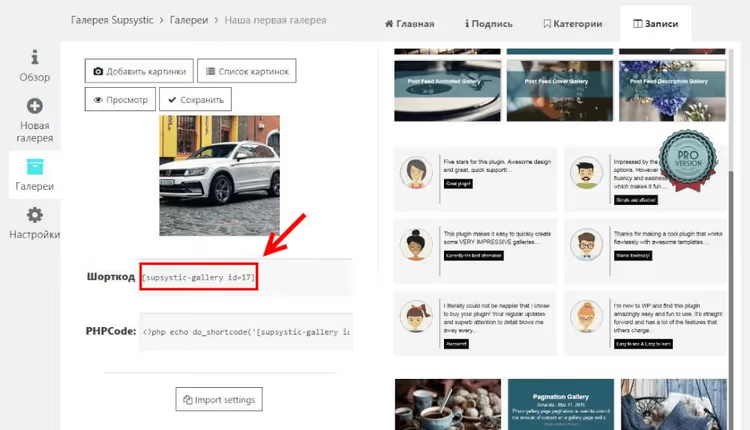
Paste the shortcode into the text editor of the page or post where you want the gallery to appear. It works in all editors: Gutenberg (the "Shortcode" block), Elementor, and the classic editor.
Method 2: through the editor button
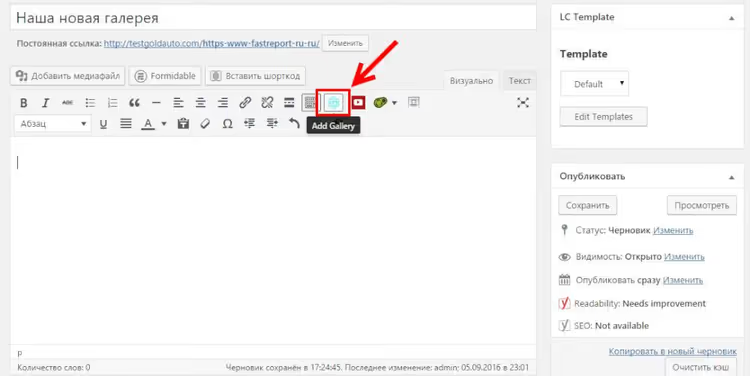
Open a page or post for editing. Above the visual editor, you'll see a Gallery by Supsystic button; click it.
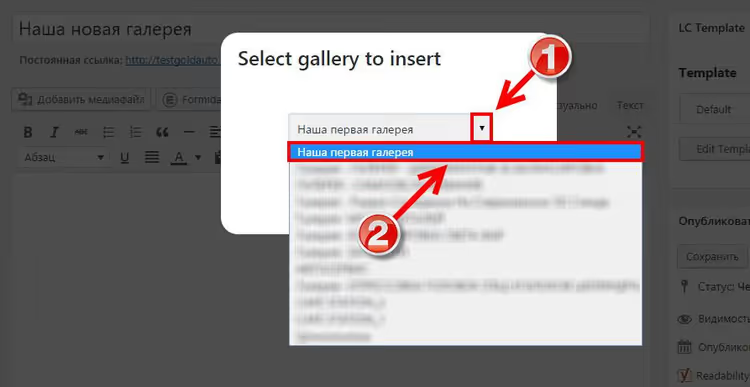
In the popup window, expand the dropdown list and select the gallery you need. New galleries usually appear at the top of the list.
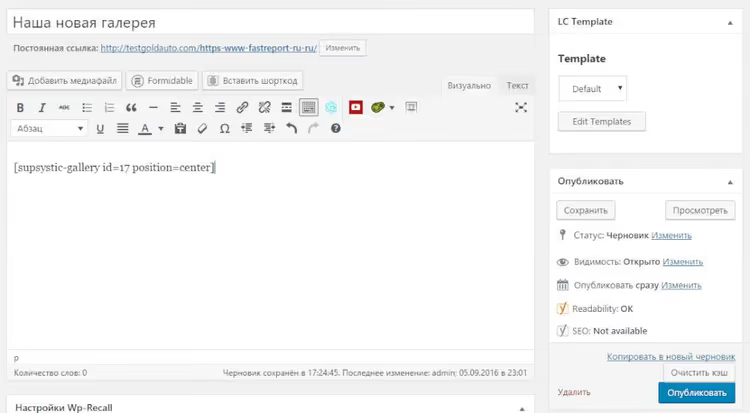
After selecting, a shortcode will appear in the editor, looking something like this:
Publish or update the page; the gallery is ready for viewing.
Step 6. Result on desktop and mobile
Here's how a standard gallery looks on a page, a neat grid that adapts to container width:

When clicking on an image in the Pro version, a lightbox opens with navigation between photos:
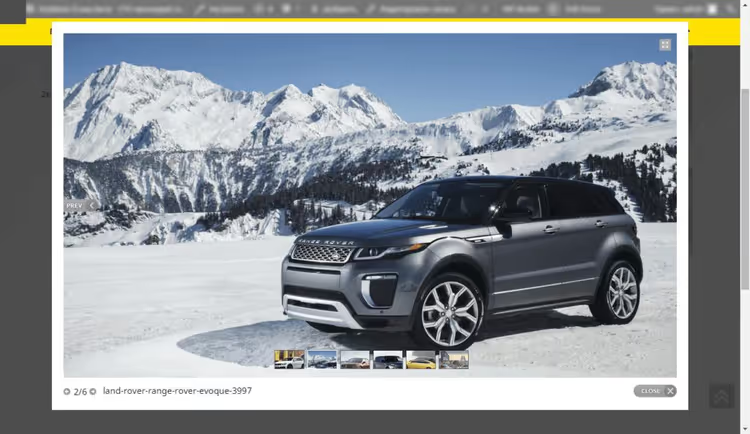
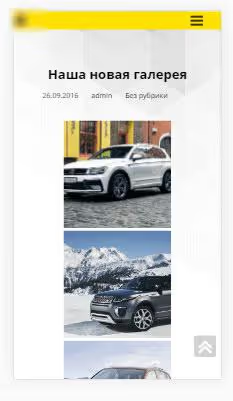
On mobile, the gallery automatically adapts to screen width. Columns collapse, spacing decreases, and no manual adjustments are required:
Watch a short video showing the entire process from installation to publishing in 4 minutes:
⁉️🤔 Frequently asked questions
Does the plugin work with my theme or page builder?
Photo Gallery by Supsystic is not tied to any specific theme or builder. The plugin is tested with each WordPress core release; version 1.16.2 from May 2026 is compatible with WP 7.0 and PHP 8.4. Gutenberg, Elementor, Divi, Beaver Builder, classic editor: the shortcode works everywhere.
Do I need to buy the Pro version for a basic gallery?
For a grid or masonry layout with thumbnails, the free version is sufficient. Pro makes sense when you need a lightbox with navigation, category filters, or hover effects. Pro pricing is $49/year for a single plugin or $149 lifetime. A bundle of all 12 Supsystic plugins costs $99/year.
Can I edit a gallery after creating it?
Yes. Images, captions, arrangement, and layout settings can be changed at any time. You don't need to update the existing shortcode on the page; it pulls the current state of the gallery.
Does the plugin slow down the site?
Supsystic loads scripts and styles only on pages where the gallery shortcode is inserted. On other pages, there is no overhead. The gallery serves images at the native WordPress media library resolution; additional copies are not created.
How do I migrate galleries to another site?
Standard WordPress export/import (Tools → Export / Import) transfers all galleries along with images and settings. Shortcodes on the target site will work automatically if page slugs match.
What should I do if the gallery doesn't display after a WordPress update?
After a major core update (for example, upgrading to WP 7.0), first check the plugin version; it should be at least 1.16.2. If the version is current but the gallery is missing, clear the cache (caching plugin + browser) and resave your permalink settings (Settings → Permalinks → Save).
Is Photo Gallery by Supsystic worth installing in 2026
The plugin addresses the main need: it delivers a responsive gallery in 5 minutes without CSS and without theme conflicts. Over 12+ years of development (since 2012), Supsystic has brought the product to a state where the basic version doesn't feel crippled: grid, masonry, and slider work without watermarks or "buy Pro" notifications.
If your site relies on photography (portfolio, case studies, work gallery, property catalog), the free version will suffice. Lightbox and filters in Pro become useful when you have more than 30 images and viewers need to navigate between them without returning to the page.
Download the plugin: Photo Gallery by Supsystic on WordPress.org. Documentation and video tutorials are available on the developer's website.

A professional team of writers and editors specializing in creating quality content.