














🦫 Beaver Builder guide: overview, pricing and step by step setup
Build a landing page in one evening without writing a single line of code? Sounds like marketing, but with the right tool this is routine, not magic. The default WordPress editor gives you text and images in a single field, which is enough for a blog but not for a services site or portfolio.
The Gutenberg block editor closed part of the gap. But when you need to move columns, overlay backgrounds, or assemble a grid of modules, it gives up. This is where page builder plugins take the stage. Beaver Builder stands apart among them: on the market since 2014, 300,000+ active installs on WordPress.org, a 4.5 rating, and a reputation as the most stable solution among agencies.
Below is a detailed breakdown: what Beaver Builder can do, how much it costs in 2026, and how to build your first page in half an hour.
💡 Quick overview:
- Install the plugin and open the visual editor
- Choose a starter template or start from scratch
- Edit modules: text, photos, buttons, forms, all by drag and drop
- Configure the layout: columns, spacing, mobile responsiveness
- Save the finished page and publish
What is Beaver Builder and why is it still relevant
This is what the classic WordPress editor looked like, one field for everything:
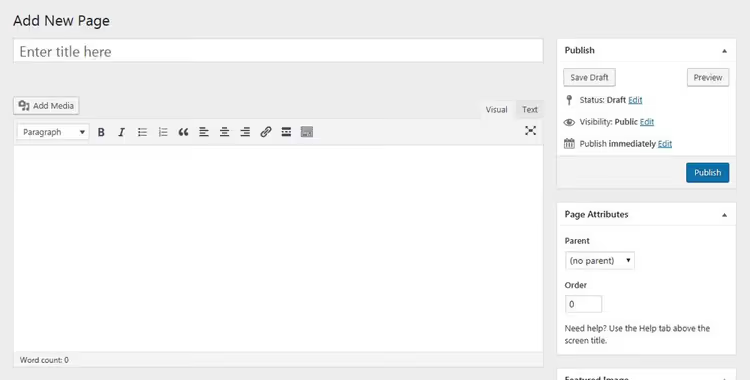
The system is simple but rigid. If you want a column with icons to the left of the text, you either write HTML by hand or install an additional plugin.
With the release of Gutenberg came the block approach:
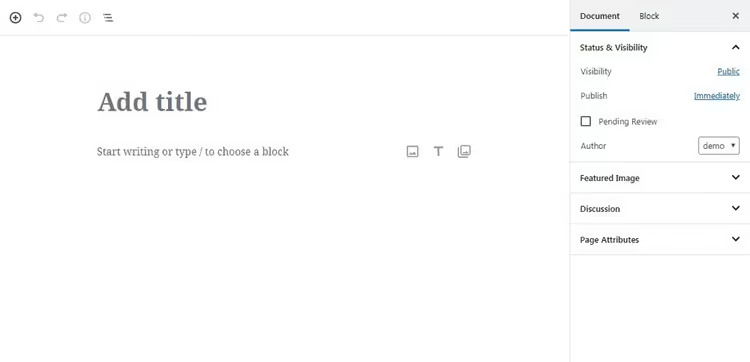
It looks nicer, but the block library is modest, and complex layouts are a headache. Essentially Gutenberg is a lightweight page builder that covers basic scenarios but loses to specialized tools in flexibility.
Every WordPress page builder works on the same principle: a set of ready-made elements assembled by dragging in a visual editor. The goal is to give site owners full control over layout without involving a developer.
Beaver Builder stands out from competitors in two ways: stability and predictability. It does not break layouts after updates, does not conflict with themes, and leaves clean code upon deactivation, unlike Elementor and Divi, which scatter shortcodes everywhere.
Main features of Beaver Builder
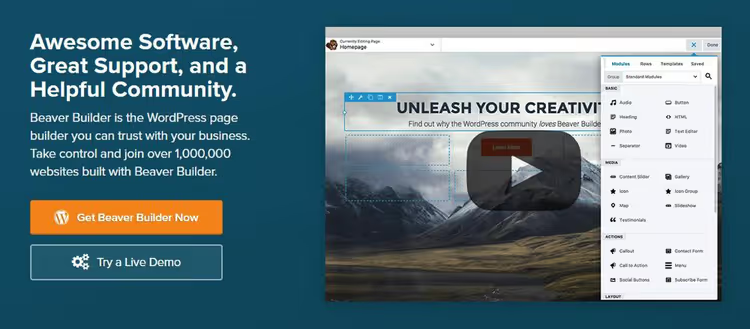
What you get out of the box in the premium version:
- Module library. Text, images, buttons, galleries, maps, contact forms, sliders, pricing tables, blog feeds, 30+ ready-made blocks. Each is configured through a visual menu: color, font, spacing, animation.
- Visual editor. Changes are visible immediately, no switching to preview. You edit the page exactly as the visitor will see it.
- Layouts and columns. Complex grids with multiple columns, width settings, spacing, and backgrounds are assembled by dragging.
- Ready-made templates. Dozens of landing pages, sections, and blocks you can use as a foundation and customize.
- Custom templates. Built a page? Save it as a template and reuse it on other pages of your site.
- Custom CSS and HTML. For advanced users: you can add your own classes and code without editing theme files directly.
The free version Beaver Builder Lite provides a basic set of modules without templates, import/export, or Beaver Themer. It is enough to understand the editor's logic and decide whether the Pro version is worth paying for.
Beaver Builder pricing: what everything costs in 2026
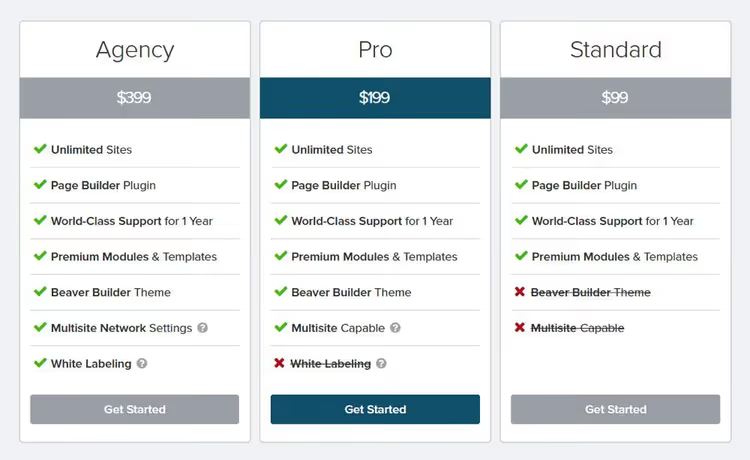
Prices and plan details from the official website:
Plan | Sites | Price per year | Best for |
|---|---|---|---|
Starter | 1 | $89 | Owner of one site: blog, portfolio, landing page |
Plus | 3 | $179 | Freelancer with a couple of client projects |
Professional | 50 | $299 | Agency or webmaster with dozens of sites |
Unlimited | ∞ | $546 | Studio needing white-label and multisite |
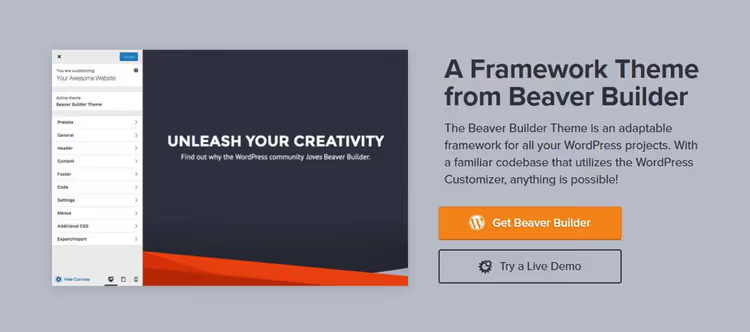
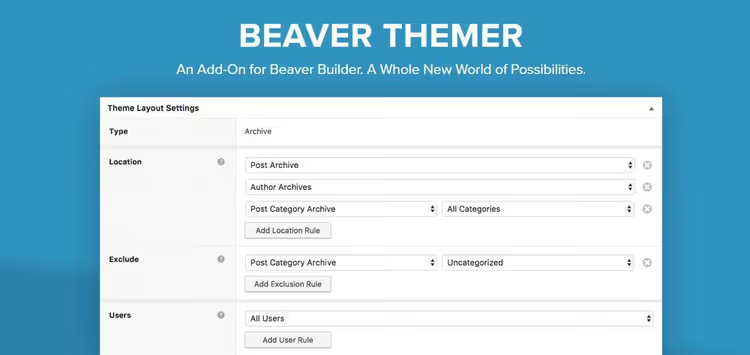
All paid plans include: the Beaver Builder plugin, Beaver Builder Theme, Beaver Themer addon, WooCommerce support, and Loop Builder for dynamic content. White-label (replacing the logo and name) and priority support are included in the Unlimited plan.
Money-back guarantee: 30 days. For this price you get not just a builder but an ecosystem: theme + builder + themer work together without conflicts.
How to get started with Beaver Builder: step-by-step guide
Installation is standard: Plugins → Add New → search "Beaver Builder" → Install → Activate. If you purchase premium, upload the zip from the site and activate the license key in settings. Next comes the editor itself.
Step 1: open the visual editor
After activation, a "Launch Beaver Builder" button appears on pages and posts:
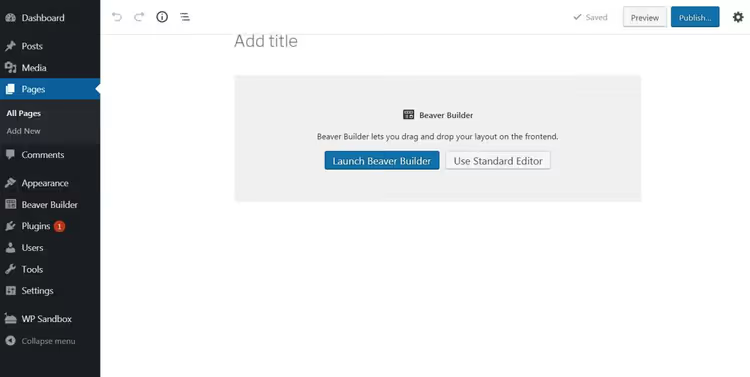
Click it and you enter the visual interface:
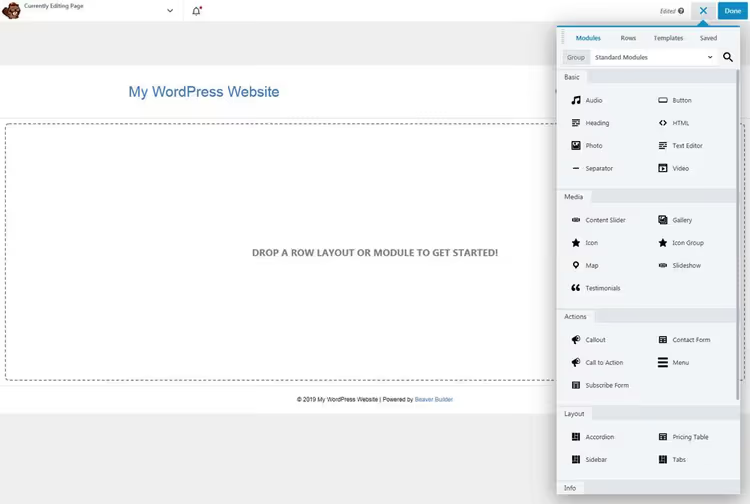
On the left is the page as the visitor will see it, on the right is the panel with modules, templates, and settings. No code, just drag-and-drop.
Step 2: choose a starter template
You can start from scratch. But it is faster to take a ready-made template. The "Templates" tab in the right panel shows dozens of options: landing pages, services pages, About, contacts. Click on a template and it loads into the editor:

The text and images in the template are placeholders. Replace them with your own and the page is ready to publish.
Step 3: edit individual modules
Every element on the page is a module. Hover over it and it is highlighted with a blue frame. Click and the settings panel opens:
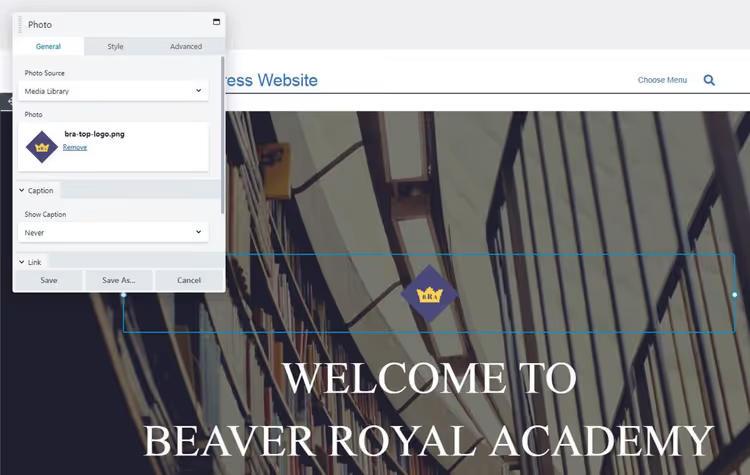
Each module has three tabs: General (content), Style (appearance), Advanced (spacing, visibility, custom classes). For the "Photo" module the Style tab looks like this:
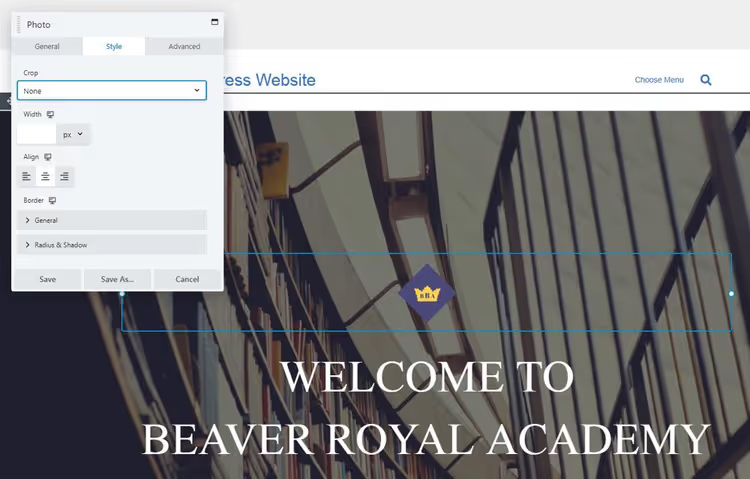
In the Advanced tab you can set spacing, hide the module on mobile, or add your own CSS class:
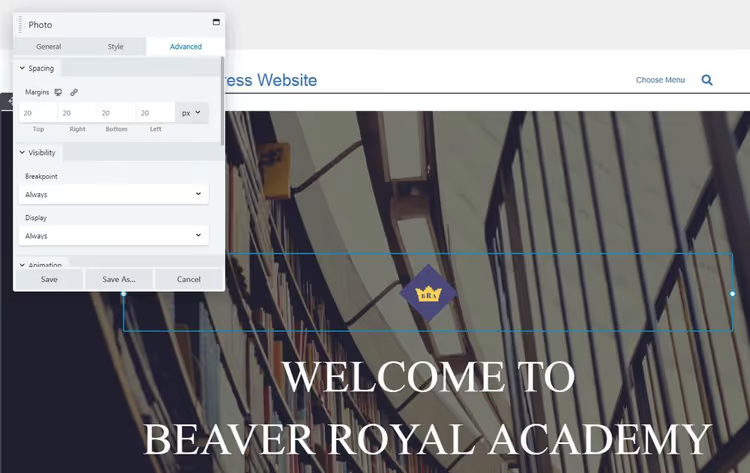
The logic is the same for all modules: select the element → configure content → adjust styles → restrict visibility by device. You can master it in half an hour.
Step 4: configure the layout and arrangement
Modules are dragged around the page with the mouse. To add a new one, grab it from the panel on the right and drop it where you need it:
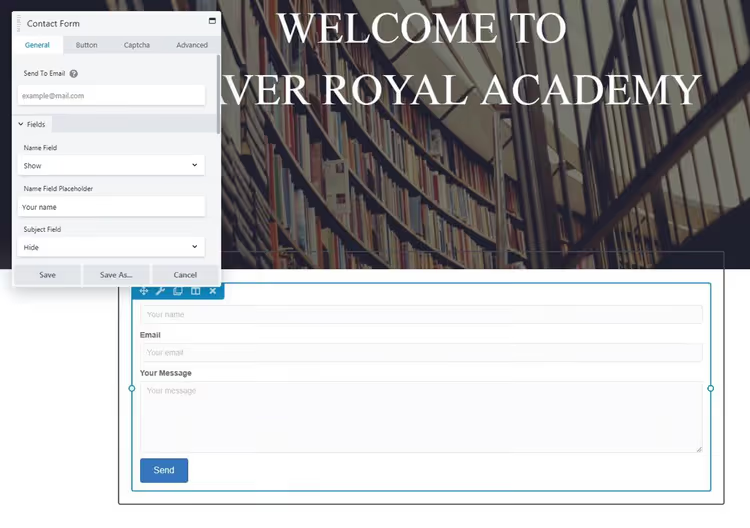
To delete, use the X on hover. To rearrange, drag higher or lower.
Columns and rows are configured separately. Click on a column → "Edit Column" → "Column Settings":
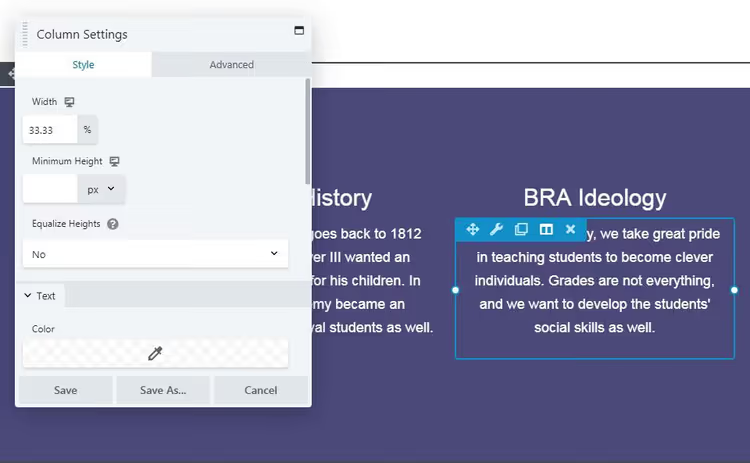
You can change the background color, spacing, column width, and border. For a row, there is a similar menu:
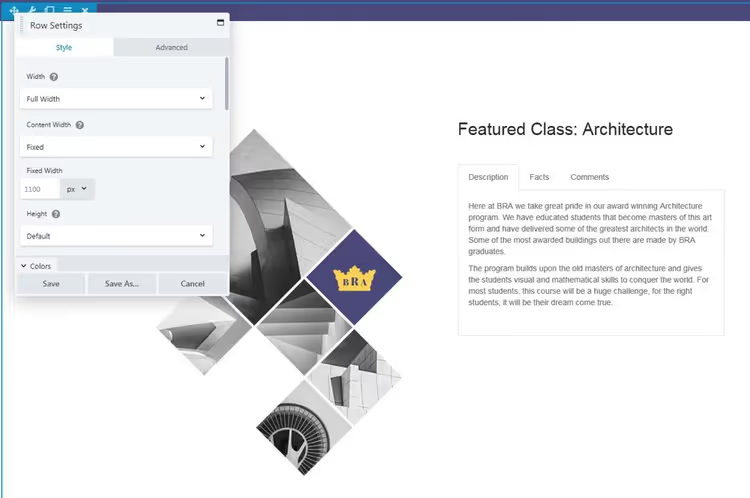
Here you also set fixed or full width, background image, video, or parallax for the entire row. Rows and columns are the framework on which modules are mounted.
Step 5: save and publish
When finished → click the "Done" button in the upper right corner → choose "Publish" or "Save Draft":

After publishing, the page looks exactly as it did in the editor. No surprises, and this is the main advantage of a front-end builder:
The result is clean, responsive, without junk shortcodes. If you deactivate the plugin, the content remains as regular HTML and nothing falls apart.
The entire procedure from installation to a finished page takes 20-30 minutes. The first time takes about an hour to get familiar with the interface.
The official Beaver Builder YouTube channel has a step-by-step tutorial for beginners: 10 minutes that will save you an hour of trial and error.
⁉️🤔 Frequently asked questions
How is Beaver Builder better than Elementor?
Elementor wins on the number of widgets and design capabilities, it has more. Beaver Builder wins on stability: it does not scatter shortcodes upon deactivation, conflicts with other plugins less often, and leaves clean HTML. For agencies and sites where long-term support without surprises matters, this is critical.
Can Beaver Builder be used with any WordPress theme?
Yes. Beaver Builder is compatible with most modern themes, including Astra, GeneratePress, Kadence, and default WordPress themes. The proprietary Beaver Builder Theme is optional. The plugin works best with themes that support full width without a sidebar.
Do I need to know how to code?
No. Basic pages are assembled by dragging without a single line of code. But if you know CSS, you can add your own classes and styles through the Advanced tab in each module. The HTML module lets you insert arbitrary code.
What happens to the content if I delete the plugin?
Text and images remain in the WordPress editor as regular HTML. Unlike Elementor and Divi, Beaver Builder does not wrap content in shortcodes, and this is its key advantage for long-term site maintenance.
Is there a free version and what are its limitations?
Beaver Builder Lite is available in the WordPress.org directory. It has only basic modules (text, photo, button, HTML), no templates, no import/export, and no Beaver Themer. But the editor interface is the same, so you can test the workflow for free.
Is Beaver Builder worth buying in 2026

In short: yes, if stability matters more to you than the number of bells and whistles.
Beaver Builder does not try to be "everything at once." It does one thing (visual page layout) and does it predictably. No conflicts, no junk code, no panic after a WordPress update. For a freelancer with a couple of client sites and for an agency with fifty projects, these are different in scale but identical in essence: build it, it works.
According to the official pricing, the breakdown is as follows:
- If you have one site and want to build a landing page without a developer, get Starter for $89 per year.
- If you manage several client projects as a freelancer, Plus for $179 covers three sites.
- If you are an agency or webmaster with dozens of installations, Professional for $299 with multisite and 50 licenses.
- If you need white-label and priority support, Unlimited for $546. All plans on the website
Start with the free Lite version, the interface is the same, and it is enough to understand whether this tool is right for you. And once you decide, check out the collection of the best page builders for WordPress to compare Beaver Builder with alternatives.

A professional team of writers and editors specializing in creating quality content.