














🚀 Bulk translation of .po files in Lokalise via browser console
When a WordPress theme or plugin ships without a Russian translation and the .po file contains a thousand or more strings, manually translating each one through Poedit turns into a multi-day slog. For many clients, machine translation is perfectly acceptable: Google Translate produces decent results for interface strings, and only a couple of dozen places need manual polish.
The problem is that Lokalise, a powerful translation management platform, does not offer a "translate everything at once" button out of the box. You have to click the Google Translate auto-translate button separately for every single string. That limitation is exactly what we will work around: a small script run in the browser console simulates clicking that button for the entire list of strings. The method has been tested on projects ranging from 200 to over 3000 strings.
💡 Quick overview:
- Prepare a PO file from a POT template in Poedit using English placeholder translations.
- Create a project in Lokalise, upload the source file, and add a target language.
- Copy the keys into the target language and run the script in the browser console.
- Account for AJAX lazy-loading: run the script as many times as Lokalise loads new batches of strings.
What Lokalise is and why use it for translating.po files
Lokalise is a Translation Management System (TMS) that supports .po/.pot files out of the box. The platform integrates with Google Translate, DeepL, and its own AI engine, letting you get a machine translation for any string with a single click. The catch is that one click per project is not enough: you have to press the auto-translate button for each string individually.
For small files of 50 to 100 strings, this is tolerable. But a real .pot from a plugin or theme rarely contains fewer than 500 strings, and large products (WooCommerce, themes with page builders) easily exceed 2000. The jQuery script in this article was written precisely for those cases: it "clicks" the translate button for every string currently visible on screen.
Step 1: create a.po file from a.pot in Poedit
Before working with Lokalise you need an English .po file generated from a .pot template. Download and install Poedit, a free translation editor for Windows, macOS, and Linux.
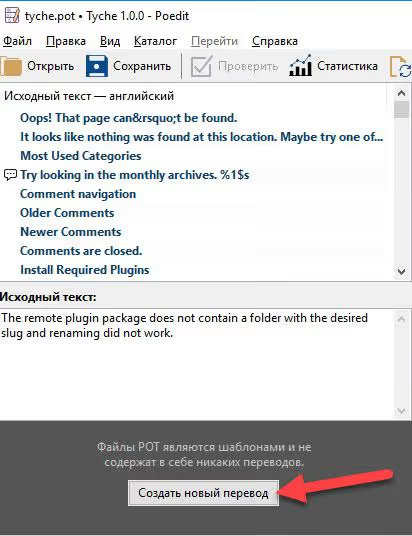
Open the theme or plugin .pot file in Poedit and click the "Create new translation" button:
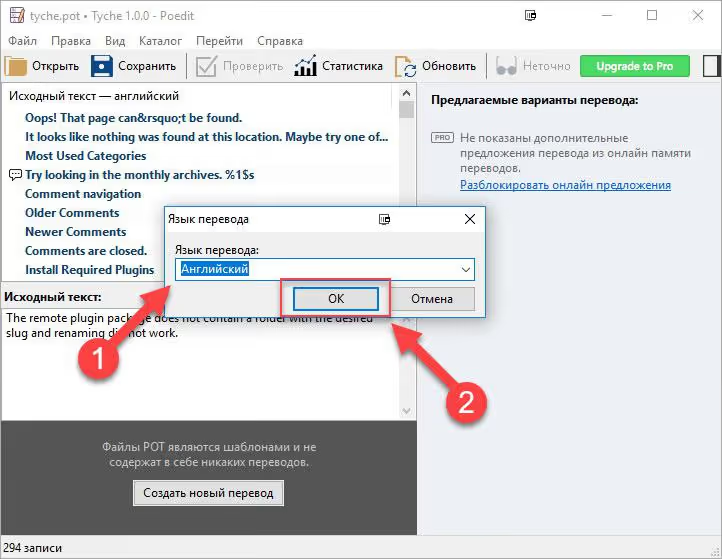
In the dialog that opens, select English; it will become the source language for Lokalise:
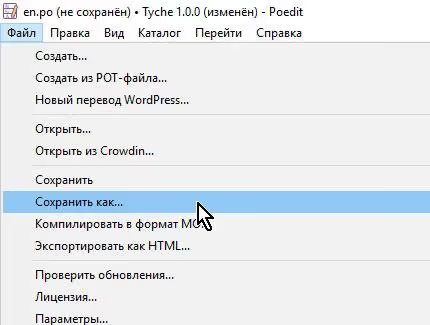
Click "Save as" and save the file with a .po extension. The actual content of the strings does not matter at this stage; we will not translate anything in Poedit, and all strings will remain in English as placeholders.
You now have a .po file with the original English strings. Let's move on to Lokalise itself.
Step 2: create a translation project in Lokalise
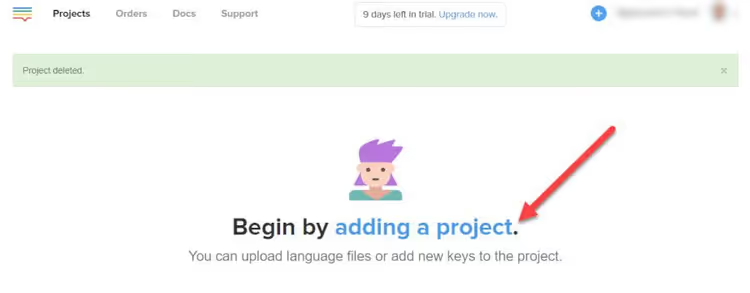
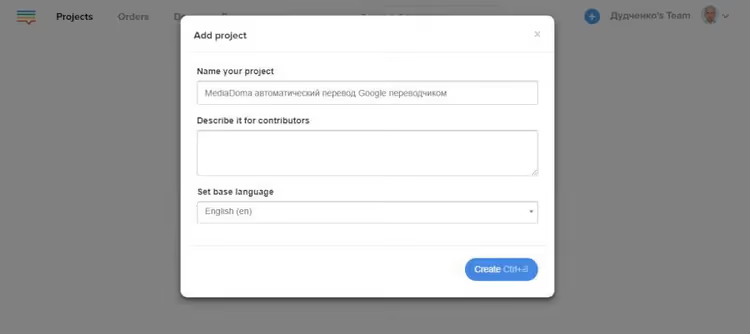
Sign up at lokalise.com; the free trial period is enough for a one-off translation. After logging in, click "Adding a project" in the center of the screen:
Fill in the fields: project name (anything you like, for example "Theme X translation") and select English as the base language. Lokalise will use it as the source for auto-translating into other languages. Click "Create".
Step 3: upload the prepared.po file
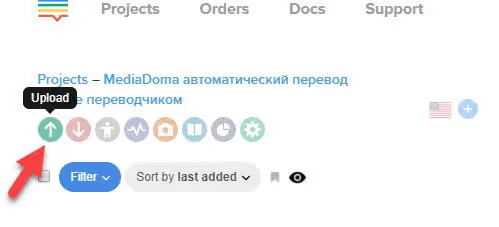
In the freshly created project, click the green button with an upward arrow to upload a file:
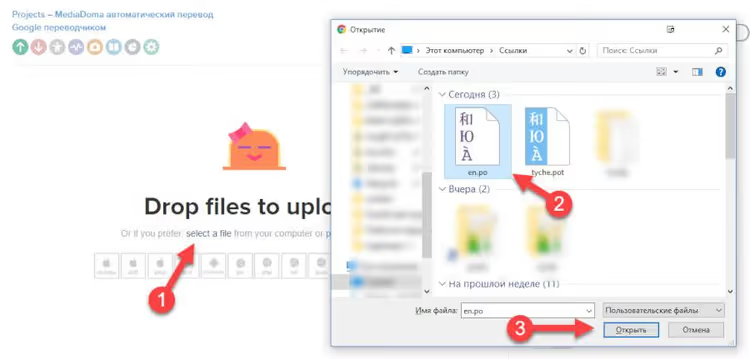
An upload dialog will appear. Drag and drop the .po file into it, or click the area to select a file via Windows Explorer:
Critical: set the file language to English. If the file language does not match the project's base language, the Google Translate auto-translate button will not appear because the platform cannot determine the source language.
Click "Import the files":
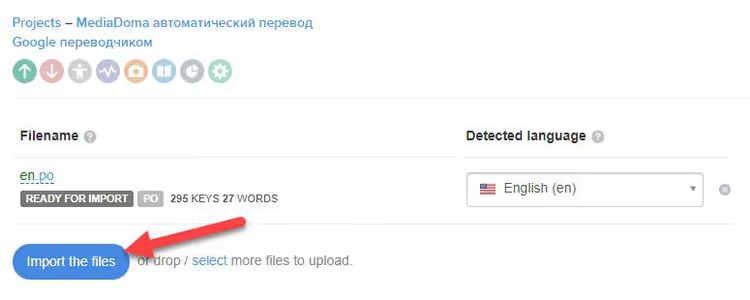
Once the import finishes, click "Go to project" to enter the workspace with the list of strings.
Step 4: add the target translation language
Click the plus icon in the language panel to add the language you want to translate into:
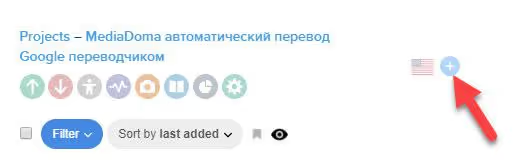
Select the language from the dropdown. For Russian, choose Russian:
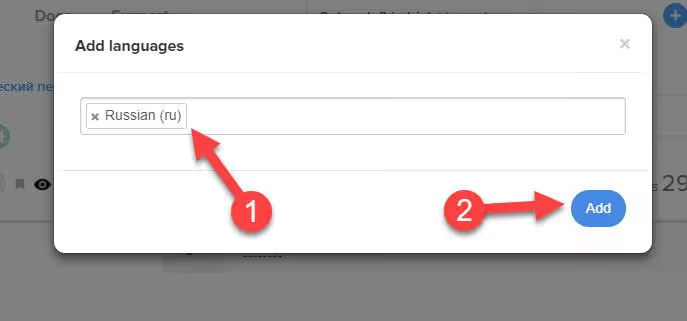
Step 5: copy keys into the target language
Right now you have a column of English strings, but the Russian column is empty. You need to copy the keys (original strings) there; the auto-translate will be applied to them.
Select all strings (Ctrl+A), click the action button that appears, and choose "Copy keys to translations…". In the dialog, select Russian and click "Copy":
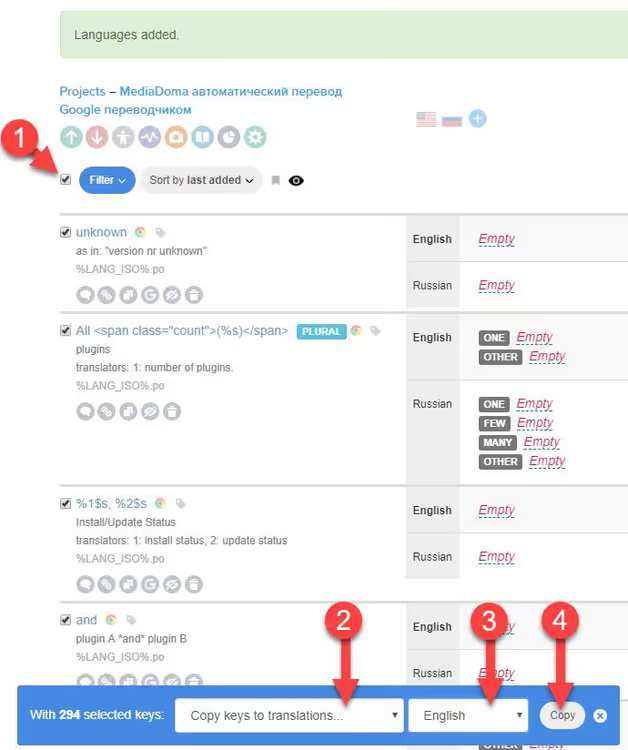
The Russian column now contains English placeholder strings that can receive auto-translation.
Step 6: bulk auto-translate via the browser console
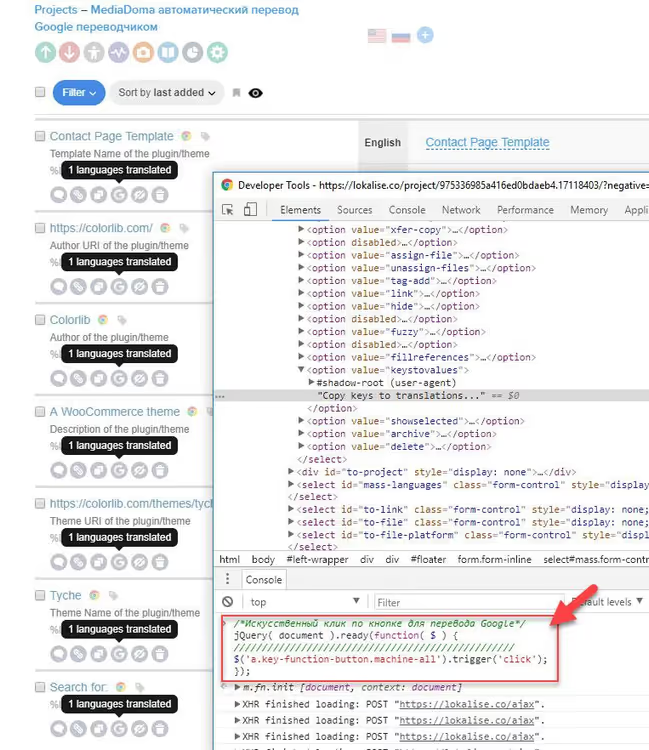
Open the developer console: Ctrl+Shift+I (Windows/Linux) or Cmd+Option+I (macOS). Below is the button our script simulates clicking. In the current Lokalise interface it looks like a Google icon:
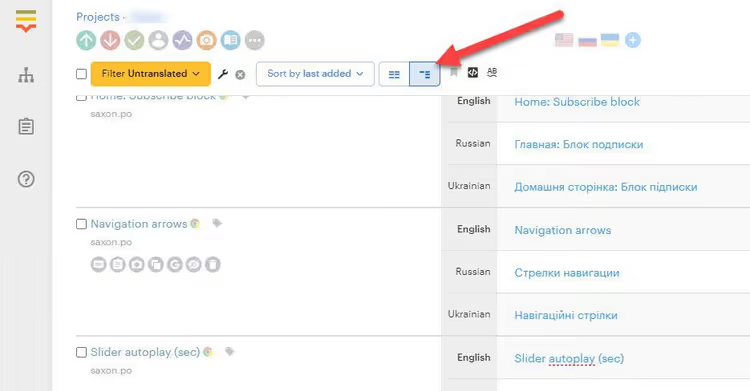
Here is the script that "clicks" this button for all visible strings:
1 /* Bulk Google Translate auto-translation in Lokalise */ 2 jQuery(document).ready(function ($) { 3 $('span.key-function-button.machine-all.fontello-google-circle').trigger('click'); 4 });
Copy the code, paste it into the console, and press Enter. Strings will start translating one by one.
Important note: Lokalise uses AJAX lazy-loading and displays strings in batches. After the script processes the visible strings, scroll the page down to load new, still untranslated ones. Paste the script into the console again and press Enter. Repeat until all strings are translated.
For the old interface version (if the auto-translate button looks different), use this variant:

1 /* Simulated click on the Google translate button (old interface) */ 2 jQuery(document).ready(function ($) { 3 $('a.key-function-button.machine-all').trigger('click'); 4 });
Once all strings are translated, be sure to scroll through the project to the very end and visually verify that every string in the translation column is filled. Missed strings either did not load (scroll again) or auto-translate failed for them (click the button manually).
The finished translation can be downloaded using the Download button in the project interface. You will receive a .po file ready to upload to WordPress.
Below is a short video showing the full workflow with .po files in Lokalise, from upload to export:
⁉️🤔 Frequently asked questions
The script does not translate strings. What is wrong?
First, verify that the source file language during import matches the project's base language. If the project is set to English but the file was uploaded as Russian, the Google Translate button will not appear. Second, open the console (F12) and check for errors. If jQuery is undefined, Lokalise has changed its structure and the selectors in the script need updating. Third, make sure you copied the keys into the target language (step 5); otherwise there is nothing to translate.
Can I translate using DeepL instead of Google Translate?
Yes, if DeepL is enabled in your project. The principle is the same: the auto-translate button changes, but you can adapt the script to a different CSS selector. Find the DeepL button element via the inspector (Ctrl+Shift+C), copy its class or attribute, and substitute it into the selector
$('button-selector').trigger('click').
How many strings are translated in a single script run?
Exactly as many as are currently displayed on screen. Lokalise loads strings in batches (typically 50 to 100), so after each scroll you need to run the script again. On a project with 2000 strings, expect 5 to 7 runs.
Is it safe to paste code into the console on someone else's site?
The script does exactly one thing: programmatically clicks a button you would otherwise click manually. No data is sent anywhere; the code runs only within your browser and only on the open Lokalise page. That said, a good rule of thumb is to always read code before pasting it into the console, especially if it does not come from official documentation.
What if some strings remain in English after translation?
Most likely you did not scroll the page all the way down and missed one of the AJAX loads. Scroll the project to the very bottom, wait for all string batches to fully load, and run the script again. If individual strings still are not translated, click the auto-translate button for them manually (this can happen if the Google Translate API returned an error for a specific phrase).
When console translation beats built-in automation
The console method is not a replacement for a full TMS workflow. If you do localization professionally, Lokalise offers built-in batch processing (pre-translate), integrations with CAT tools, and context-aware AI translation. But for the typical task of translating a single WordPress theme and moving on, the console approach delivers results in 5 to 10 minutes without a deep dive into platform documentation.
The entire process, from installing Poedit to the final .po file, fits into three steps: prepare the file, upload it to Lokalise, run the script. If the volume exceeds 500 strings, the time savings compared to manually clicking the button for each string amount to tens of minutes. With 2000+ strings, it is the difference between "done over a coffee" and "took half the day."

A professional team of writers and editors specializing in creating quality content.