













 AIIllustrative image: AI-generated
🚀 Local WordPress installation on Ubuntu via LAMP: a step by step guide 2026
A WordPress site doesn't start with buying hosting. Developers first build and test everything locally: no domain, no risk of breaking a live project, and no monthly server payments.
If you're on Ubuntu, the easiest way to spin up a local WordPress is through the LAMP stack. Four components: Linux (Ubuntu itself), Apache (web server), MySQL (database), and PHP (the language WordPress runs on). All free, open source, and installable from standard repositories.
Below is a step-by-step guide for Ubuntu 24.04 LTS and 26.04 LTS (Resolute Raccoon, released April 2026). The process is identical for any edition: standard Ubuntu, Lubuntu, Kubuntu, Xubuntu. In 20 minutes you'll have a fully working local WordPress where you can test plugins, try themes, break things and fix them with no consequences.
💡 Quick overview:
- Install Apache, MySQL, and PHP with a single terminal command
- Configure a virtual host for your site
- Download WordPress and create a database
- Complete the five-minute installation in your browser
- After the final step you'll have a working site at
http://localhost
What LAMP is and why you need it locally
LAMP stands for Linux, Apache, MySQL, and PHP. Linux is already installed (that's Ubuntu itself). You just need to add three components.
Apache handles HTTP requests and serves pages. MySQL stores posts, settings, and WordPress user credentials. PHP executes theme and plugin code on the server side. Alternatives like NGINX or LiteSpeed perform better under heavy load but are harder to configure. For local development Apache is exactly what you need: minimal configuration and full .htaccess compatibility.
A local installation gives you three concrete advantages. First, you can experiment with plugins and themes without risking a public site. Second, pages load instantly since there's no network latency. Third, search engines don't see your test domain, even if you forget to check the "discourage search engines" box.
If you prefer watching to reading, here's a complete video walkthrough covering the entire stack installation:
Step 1: Update the system and install Apache
Before starting, update your package lists. Open the terminal and run:
1 sudo apt update && sudo apt upgrade -y
Now install Apache. The package is called apache2:
1 sudo apt install apache2 -y
Once complete, Apache starts automatically. Verify it: open your browser and go to http://localhost. You should see the "Apache2 Ubuntu Default Page," which means the web server is running.
Two useful commands for managing Apache:
1 sudo systemctl status apache2 # check status 2 sudo systemctl restart apache2 # restart after configuration changes
Step 2: Install MySQL
Now install the database server. Ubuntu 24.04 repositories include MySQL 8.0, while Ubuntu 26.04 has MySQL 8.4 LTS (MySQL's first LTS release):
1 sudo apt install mysql-server -y
During installation the system will prompt you to set a password for the MySQL root user.
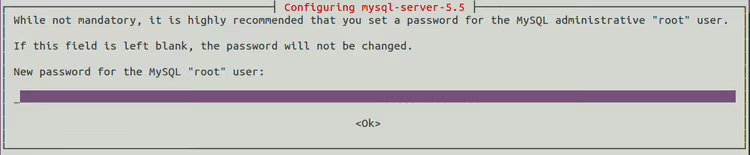
Enter a password you won't forget. For local development something simple like qwerty works fine. On a production server you would obviously use a strong password with numbers and special characters.
After installation, initialize the database:
1 sudo mysql_install_db
If you later forget the root password, don't panic. Stop MySQL, restart it with the --skip-grant-tables flag, and reset the password. The specific steps are in the official MySQL documentation (the procedure is the same for versions 8.0 and 8.4).
Step 3: Install PHP and required modules
WordPress requires PHP and several extensions. The package set depends on your Ubuntu version:
Ubuntu 24.04 (PHP 8.3):
1 sudo apt install php8.3 libapache2-mod-php8.3 php8.3-mysql php8.3-gd php8.3-xml php8.3-mbstring php8.3-curl php8.3-zip php8.3-intl -y
Ubuntu 26.04 (PHP 8.4):
1 sudo apt install php8.4 libapache2-mod-php8.4 php8.4-mysql php8.4-gd php8.4-xml php8.4-mbstring php8.4-curl php8.4-zip php8.4-intl -y
What each extension does:
php-mysql, connects to the databasephp-gd, image processing and thumbnail creationphp-xml, XML parsing, required for content import and exportphp-curl, HTTP requests from WordPress to external APIsphp-mbstringandphp-intl, proper handling of Cyrillic and multilingual contentphp-zip, unpacks plugin and theme archives
Now configure Apache to serve PHP index files. Open the configuration:
1 sudo nano /etc/apache2/mods-enabled/dir.conf
Make the contents look like this, with index.php first:
1 <IfModule mod_dir.c> 2 DirectoryIndex index.php index.html index.cgi index.pl index.xhtml index.htm 3 </IfModule>
Save (Ctrl+O) and exit nano (Ctrl+X).
Let's verify PHP works. Create a test file:
1 sudo nano /var/www/html/info.php
Paste this into it:
1 <?php 2 phpinfo(); 3 ?>
Restart Apache:
1 sudo systemctl restart apache2
Open http://localhost/info.php in your browser. You should see a purple table displaying PHP version information and loaded modules.
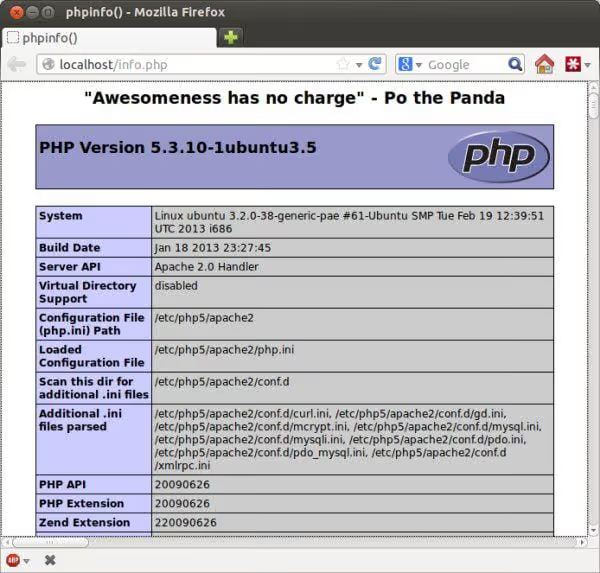
Once you've confirmed PHP works, delete the test file since it exposes server details and shouldn't remain on disk:
1 sudo rm /var/www/html/info.php
Step 4: Download and extract WordPress
Navigate to Apache's root folder:
1 cd /var/www/html
Download the latest WordPress version:
1 wget https://wordpress.org/latest.tar.gz 2 tar -xzf latest.tar.gz 3 rm latest.tar.gz
Now WordPress is in /var/www/html/wordpress/ and accessible at http://localhost/wordpress.
If you want the site to open directly at http://localhost without /wordpress, move the folder contents up one level or configure a virtual host. For local development the /wordpress path is simpler and doesn't cause any issues.
Step 5: Create a MySQL database for WordPress
WordPress needs its own database. Log into the MySQL console as root:
1 sudo mysql -u root -p
Enter the root password you set in Step 2. You'll see a mysql> prompt. Create a database called wpubuntu:
1 CREATE DATABASE wpubuntu;
Apply the changes:
1 FLUSH PRIVILEGES;
And exit MySQL:
1 EXIT;
The database is ready. A note on security: on a production server you would create a separate MySQL user with a password and grant that user permissions only on this database. For local development using root is acceptable since nobody can connect to port 3306 from outside.
Step 6: Complete WordPress setup in the browser
Open your browser and go to http://localhost/wordpress.
WordPress will detect that the wp-config.php file doesn't exist yet and offer to create it.
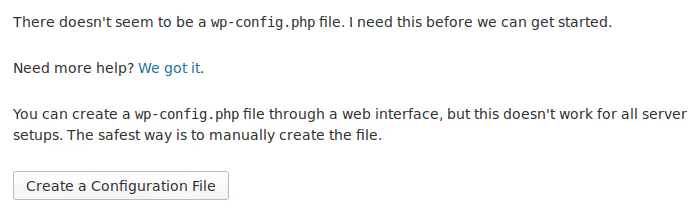
Click "Create a Configuration File," then "Let's go!" on the next step. Fill in the details:
1 Database Name: wpubuntu 2 Username: root 3 Password: qwerty (or whatever you set in Step 2) 4 Database Host: localhost 5 Table Prefix: wp_
Click "Submit." If all steps were completed correctly, you'll see a message confirming successful database connection.
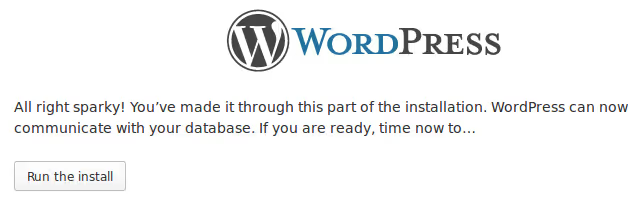
Next comes the classic "five-minute installation": set the site title, username, and password for admin access. Uncheck "Discourage search engines from indexing this site" since it's meaningless on a local machine.
Click "Install WordPress," and within a few seconds you'll see the login screen.
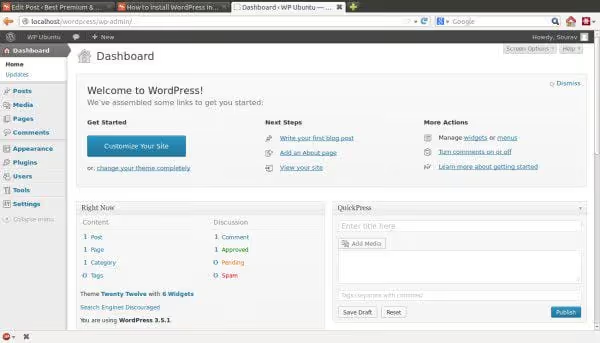
Log in with the credentials you just created. WordPress on Ubuntu is now running locally.
Common errors and how to fix them
Over the years we've compiled the five most frequent problems with local installations and how to fix them.
"Error establishing a database connection." Check whether MySQL is running: sudo systemctl status mysql. If not, run sudo systemctl start mysql. If it's running but the error persists, double-check the database name, username, and password from steps 2 and 5.
White screen when opening http://localhost/wordpress. Most likely a required PHP module is missing. Run php -m and compare against the list from Step 3. Install any missing modules via sudo apt install.
Apache returns "403 Forbidden." Open /etc/apache2/apache2.conf, find the <Directory /var/www/> block, and make sure the directive reads Require all granted rather than Require all denied. After editing: sudo systemctl restart apache2.
WordPress asks for FTP access when installing a plugin. This is a folder permissions issue. Run:
1 sudo chown -R www-data:www-data /var/www/html/wordpress 2 sudo chmod -R 755 /var/www/html/wordpress
Now WordPress can write files directly without FTP.
"Five-minute installation" completed, but the site shows 404 on all pages. Most likely the mod_rewrite module isn't enabled. Enable it:
1 sudo a2enmod rewrite 2 sudo systemctl restart apache2
Then go to the WordPress admin, Settings → Permalinks, and simply click "Save Changes." This regenerates the .htaccess structure.
What about a production server
LAMP works great locally, but for a public site we recommend a different approach. On a production server NGINX with PHP-FPM delivers better performance under load, and managed hosting (Cloudways, Rocket.net) handles package updates and security configuration for you.
If you're on Windows or macOS, we have separate guides: WordPress on Windows via WAMP and WordPress on macOS via MAMP. For a general overview of local environments check out our comparison of WAMP, MAMP, and XAMPP.
In the meantime, feel free to experiment on your local version: install any plugins, try different themes, break things and fix them. The experience you gain on a local site pays off the first time something goes wrong in production.
⁉️🤔 Frequently asked questions
Can I install WordPress without LAMP by just downloading a ZIP archive?
No. WordPress isn't a desktop application. It requires a web server (Apache or NGINX) to process HTTP requests, PHP to execute code, and MySQL to store data. Without these three components WordPress won't run locally or on any hosting.
Do I have to use MySQL specifically? Can I use MariaDB?
Yes, MariaDB works exactly the same way. It's a MySQL fork that's fully compatible at the command and protocol level. In Ubuntu, MariaDB installs via the
mariadb-serverpackage. All commands in this guide, includingCREATE DATABASE,FLUSH PRIVILEGES, andmysql -u root -p, work without changes.
How long does the entire installation take?
On a modern computer with an SSD, 15-20 minutes including package downloads. Most of the time is spent typing commands rather than execution. With practice you can do it in 10 minutes.
What should I do after installation: which plugins to install first?
Three plugins we install on every new site: UpdraftPlus (free cloud backups), Rank Math SEO (search engine indexing), and Wordfence Security (basic firewall and hack protection). All three have fully functional free versions.
How do I delete the local WordPress and start over?
Two commands:
sudo rm -rf /var/www/html/wordpress(deletes files) andmysql -u root -p -e "DROP DATABASE wpubuntu;"(deletes the database). After that you can repeat steps 4-6, and a clean installation is ready in 5 minutes.
Can I migrate the local site to hosting later?
Yes, this is the standard development workflow. Plugins like All-in-One WP Migration or Duplicator pack the site into a single file that deploys on hosting via a web interface. Keep two things in mind: you need to replace all mentions of
localhostwith your real domain in the database, and file permissions on hosting are usually stricter than locally.
WordPress locally in 20 minutes: what's next
WordPress on Ubuntu via LAMP isn't "one of many approaches" but the standard for local PHP project development. You get an environment identical to a production server with no hosting costs and no risk to your public site.
Once you've mastered local installation, keep moving forward. Enable WP_DEBUG in wp-config.php, set up version control for your theme, deploy a test multisite. The foundation is already in place.
Try it right now: open your terminal and run the first command from Step 1. In 20 minutes you'll have a working local site. If something goes wrong, let us know in the comments and we'll help you find the cause.

A professional team of writers and editors specializing in creating quality content.