














🖥 Installing WordPress on Windows with WampServer: a step by step guide
A client's site crashed after a plugin update. You open the admin panel and see a white screen. Sound familiar? A local server on your PC eliminates this risk: you test updates, new themes, and code changes on your own machine before pushing them to the live site. No "sorry, the site is temporarily unavailable" messages for visitors.
WampServer remains one of the easiest ways to set up a full web server on Windows: Apache, PHP, MySQL/MariaDB in a single installation. In this guide, we'll walk through the entire process from download to a fully working WordPress installation on localhost. No VPN, no hosting account, no internet required after setup.
💡 Quick overview:
- Download WampServer from the official site and install on Windows 10 or 11
- Verify the server is running: the tray icon should turn green
- Create a MySQL database through phpMyAdmin
- Download WordPress from wordpress.org and extract to the www folder
- Launch the WordPress installation through your browser at localhost
Installation takes 10-15 minutes. Below, each step with details and screenshots.
Step 1. Installing WampServer
First, download the installer from the official site wampserver.aviatechno.net. Note that the old domain wampserver.com is no longer updated; current WampServer 3.4.x versions with PHP 8.3 are released on aviatechno.net. The distribution is about 350 MB and includes Apache 2.4, the latest stable PHP, and MariaDB.
Run the installer. The process is intuitive, but there are several points where you should pay attention:
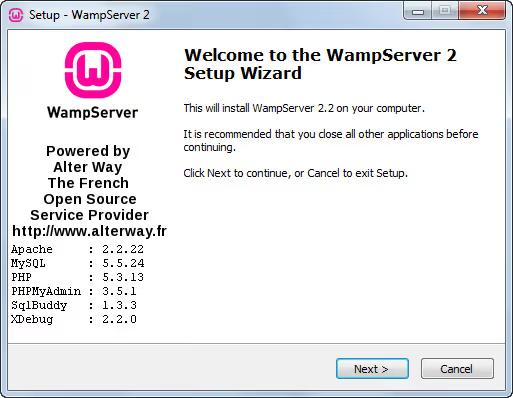
Installation directory should be left at default,
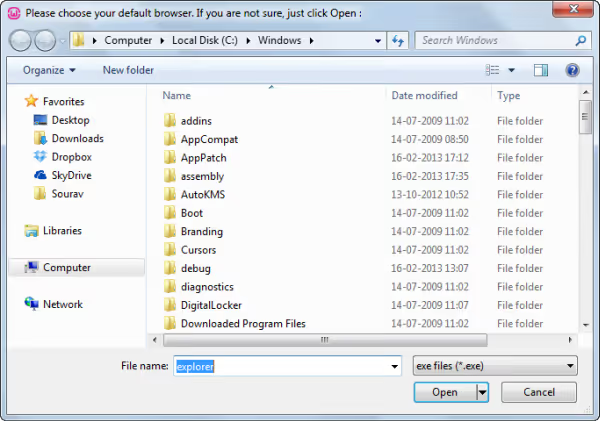
C:\wamp64(orC:\wampfor the 32-bit version). Moving to another drive can create path issues for PHP and Apache.When the installer asks about the default browser, it will suggest explorer.exe. Click "Open" and the system will pick up your main browser.
- When prompted to install the new WampServer homepage, click "Yes."
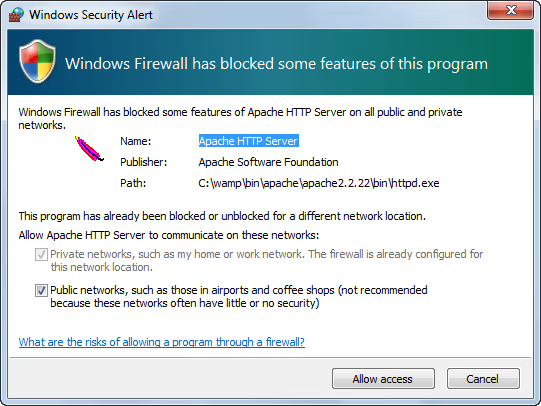
Windows Firewall may request permission for Apache HTTP Server; add the exception, otherwise the server will not be accessible even locally.
Leave SMTP and email settings as they are. For local development, you do not need a mail server; WordPress on localhost does not send emails without an additional plugin like WP Mail SMTP.
After installation completes, check the "Launch WampServer" checkbox and click "Finish."
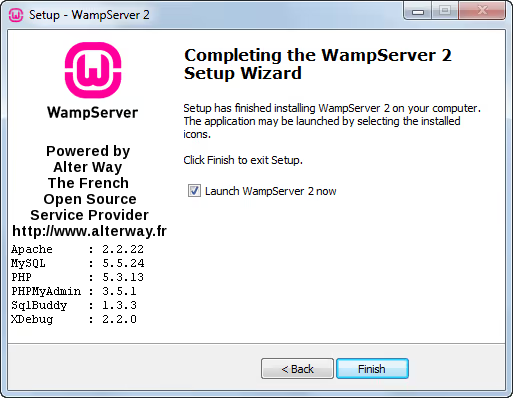
A WampServer icon will appear in the tray (the letter W). Through it you control the server: start, stop, switch PHP versions, and access tools like phpMyAdmin.
Step 2. Verifying WampServer is working
The WampServer icon in the system tray changes color, which is the main indicator of server status. Three variants:
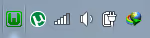
Red means the server is not running. This happens after a Windows restart if WampServer is not added to startup. Open WampServer manually from the Start menu. If that does not help, check whether port 80 is occupied by another program (Skype, IIS, TeamViewer).
Orange means Apache is running, but the MySQL/MariaDB service is still loading or has crashed. Wait 30 seconds. If the icon does not turn green, left-click on it and select MySQL → Service → Start/Resume. A common cause of orange: another MySQL instance is already installed on the machine (from XAMPP, Laragon, or a standalone installation).
Green means the server is fully online and ready to work.
Verification: open your browser and go to http://localhost (or http://127.0.0.1). You should see the WampServer homepage with a list of tools, phpMyAdmin, Adminer, and information about loaded projects. This confirms that Apache is working and the www folder is accessible.
If localhost does not open but the icon is green, check whether a port is specified in the Windows hosts file (C:\Windows\System32\drivers\etc\hosts). The line 127.0.0.1 localhost should not have a hash mark at the beginning.
Step 3. Creating a database through phpMyAdmin
WordPress stores everything (posts, settings, users) in a MySQL database. Before installing WordPress, you need to create an empty database.
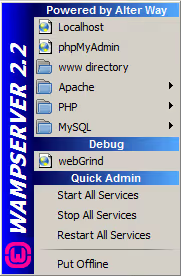
Left-click on the WampServer icon in the tray and select phpMyAdmin (second item from the top). The MySQL web interface will open. Go to the Databases tab.
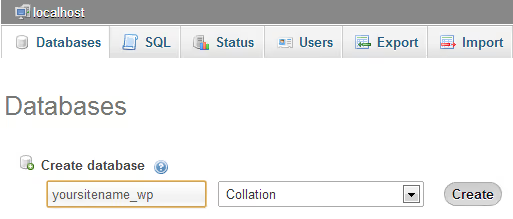
In the "Create database" field, enter a name (for example localsite_wp) and select the collation utf8mb4_general_ci for full support of Cyrillic characters and emojis. Click "Create."
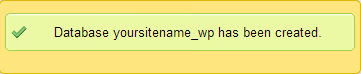
You will need the database name in step 5 when WordPress requests connection details. The default database user is root with an empty password. This is sufficient for local development, but if you plan to expose the site externally, set a root password through phpMyAdmin (User accounts tab).
Step 4. Downloading and extracting WordPress
Close phpMyAdmin. Go to wordpress.org/download and download the latest version of WordPress; it is a ZIP archive of about 25 MB.
Extract the archive to the folder C:\wamp64\www (or C:\wamp\www for the 32-bit version). After extraction, a wordpress folder will appear. This is the root of your future site.
You can rename the folder, for example, to testsite or client-project. The site address on localhost will correspond: http://localhost/folder-name. Do not use Cyrillic characters or spaces in the folder name; some plugins and themes stumble on such paths.
If you plan to maintain several projects on one WampServer, create a separate folder for each. Switching between them is simply a different URL in the browser.
Step 5. Installing WordPress through the web interface
Connecting to the database and creating the configuration file.
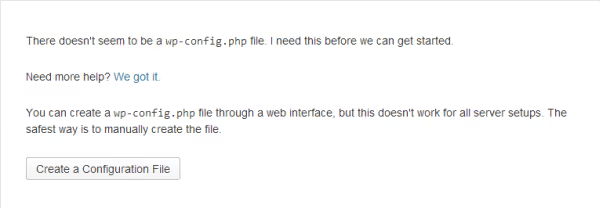
Open your browser and go to http://localhost/wordpress (or whatever folder name you set in step 4). WordPress will greet you with a language selection screen. Select your language and click "Continue."
On the next screen, click "Let's go!".
Now, enter the database connection details:
- Database name:
localsite_wp(the one you created in step 3) - Username:
root - Password: leave empty
- Database host:
localhost - Table prefix: replace
wp_with something custom, for examplemytst_
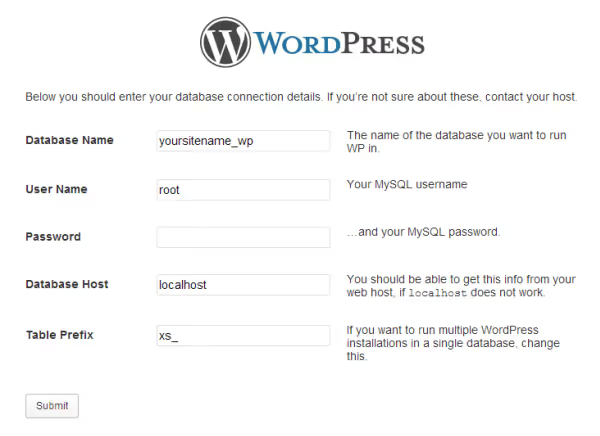
The table prefix is a simple but useful security measure. The standard prefix wp_ is the first target for SQL injections. Even on a local server, make it a habit to use a non-standard prefix.
Click "Submit". If the database connection was successful, you will see a confirmation:
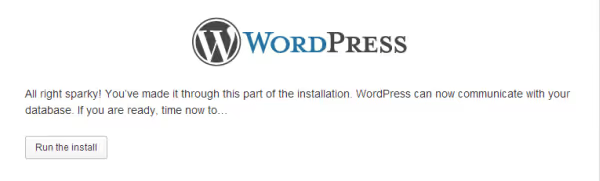
WordPress will create all necessary tables in the database. On the next screen, fill in:
- Site title, anything, you can change it later in settings
- Username, NOT
admin(this is a standard target for brute force attacks). Choose a unique name - Password, WordPress will generate a strong one, save it
- Email, a working one, useful for password reset

The checkbox "Discourage search engines from indexing this site" does not matter on a local server since search engines cannot reach your localhost anyway. But if you plan to migrate the site to hosting, it is better to leave it checked until you finish development.
Click "Install WordPress". Final screen:
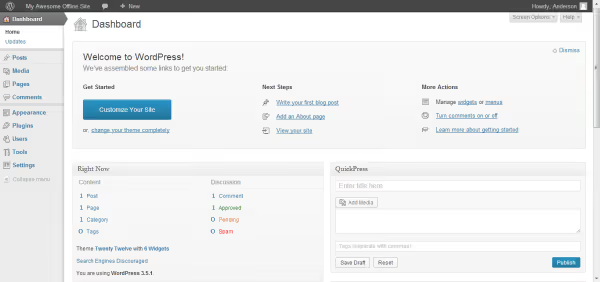
Done. Click "Log In," enter your username and password, and you are in the WordPress admin panel. A fully functional site is running on your computer, without hosting or internet.
⁉️🤔 Frequently asked questions
How does WampServer differ from XAMPP and Laragon?
WampServer is easier to set up and closer to a typical hosting environment (Apache + MySQL). XAMPP comes with a larger set of components but is heavier and more often conflicts with ports on Windows. Laragon is faster and more convenient for everyday development: auto-creation of hosts, quick restart, built-in terminal. But for a first introduction to a local server, WampServer is more intuitive.
Can I install multiple PHP versions on one WampServer?
Yes, this is one of WampServer's strengths. Through the tray icon menu (WampServer → PHP → Version), you can switch between installed PHP versions (from 7.4 to 8.3) in a couple of clicks. The versions themselves are downloaded as add-ons from wampserver.aviatechno.net. In practice, this is needed when testing a theme or plugin for compatibility with different PHP versions.
Do I need to set a password for root in MySQL on localhost?
For local development, it is not necessary since the server is not visible from the external network. But if you have ever opened ports on your router or plan to show the site to a client via ngrok/LocalWP, set a password. This is done in phpMyAdmin: "User accounts" tab → "root" → "Edit privileges" → "Change password."
Why doesn't localhost open even though the WampServer icon is green?
Most likely, port 80 is occupied. Check this: open Command Prompt as administrator and run
netstat -ano | findstr :80. You will see a process with a PID; find it in Task Manager. Typical culprits: Skype, IIS, TeamViewer, VMware. Solution: stop the conflicting program or change the Apache port in WampServer (menu → Apache → httpd.conf, changeListen 80toListen 8080, then the site will be available athttp://localhost:8080/wordpress).
Can I transfer a site from localhost to live hosting?
Yes, this is a standard scenario: you develop on localhost, then migrate to hosting. Two steps: export the database through phpMyAdmin ("Export" tab) and copy the WordPress folder from
wwwto hosting via FTP. After the transfer, you need to replace URLs in the database (fromhttp://localhost/wordpresstohttps://your-domain). The fastest way to do this is with the Better Search Replace plugin on the target site.
What's next: the step after installation
Installing WordPress on WampServer took 10-15 minutes. Next comes configuring the site for your specific task.
If you are building a theme, install a starter like the _s starter theme or create a child theme from the default one. If you are testing plugins, start by enabling WP_DEBUG in wp-config.php: add the line define('WP_DEBUG', true); right after the opening <?php tag. Debug mode will show all errors and warnings that plugins and themes generate on the fly.
For those who found WampServer cumbersome, take a look at Laragon. It installs in 2 minutes, automatically creates virtual hosts with nice domains like testsite.test, and switches PHP versions with one button. For everyday WordPress development on Windows, this is currently the best tool. But if you need an environment as close as possible to live hosting, WampServer is your choice.
Your own site on localhost is a safe sandbox for any experiments. Break things, fix them, update boldly because your live site will not suffer from any of it.

A professional team of writers and editors specializing in creating quality content.