














🚀 How to migrate a WordPress site from localhost to a live server
Developing a site on a local server is standard practice for those who value speed and security. No hosting limitations, instant file saving, convenient debugging. When the site is ready, the question arises: how do you transfer all of this to a live domain without breaking anything?
The process of migrating WordPress from localhost to a production server intimidates beginners. Files, database, paths, wp-config: it seems like a mistake at any step will take the site down. In practice, the task can be solved three ways: built-in export, a plugin, or manual transfer. Each suits its own scenario.
💡 Quick overview:
- Export content using the built-in WordPress tool if the target server has a clean installation without posts or pages
- Install a migration plugin (Duplicator or BackupBuddy) to transfer the entire site with automatic URL replacement
- Transfer files and database manually via phpMyAdmin and SFTP for complete control over each step
- After any method, go to "Permalinks" and click save, otherwise pages will return 404
Prerequisites for migration
Before migrating, make sure three things are in place.
Your local WordPress site must be fully functional. If you haven't set up the environment yet, check out our guide on installing WordPress on Mac via MAMP or the material about Local by Flywheel, a tool that sets up a local server in just a few clicks.
A hosting plan with PHP and MySQL support. Almost any modern hosting will work: most providers have automatic WordPress installers. Check the database size limits, as a local dump may weigh more than you expect.
SFTP access to the server and a client like FileZilla. The alternative is the cPanel file manager, but it doesn't show the local directory structure. SFTP is more reliable: you see both sides and drag files with your mouse.
Method 1: built-in WordPress export and import
The simplest path is using WordPress's native export tool. It works if the target server has no content yet. Import doesn't overwrite existing posts but adds to them, so a fresh installation is required.
Open your local WordPress admin panel and go to "Tools → Export." Select "All content" and click the download button.
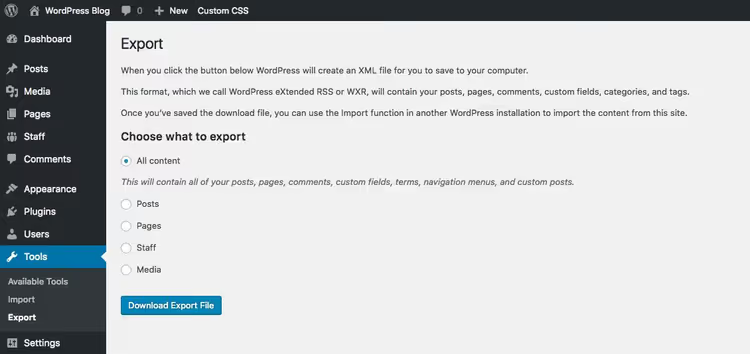
You'll get an XML file with all posts, pages, media files, and menus. The file contains content only; themes and plugins are not included.
Now log into the live site's admin panel. Activate the theme and plugins you used locally. Then open "Tools → Import."
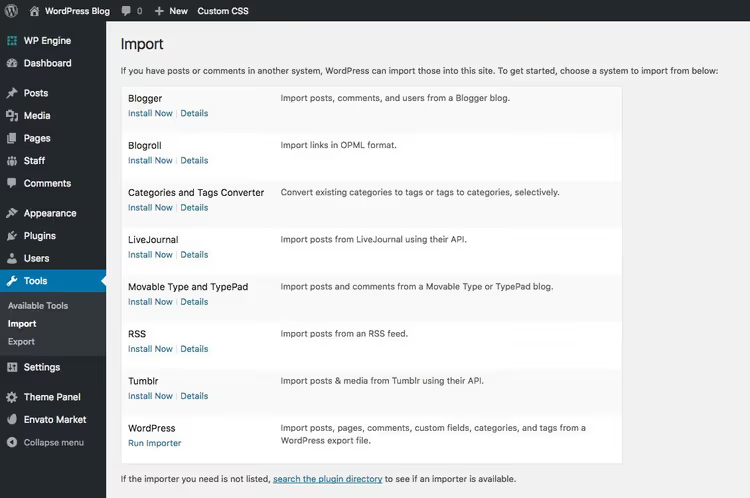
Install the WordPress importer (the system will prompt you on first launch), then activate it. Click "Run Importer" under the WordPress heading.
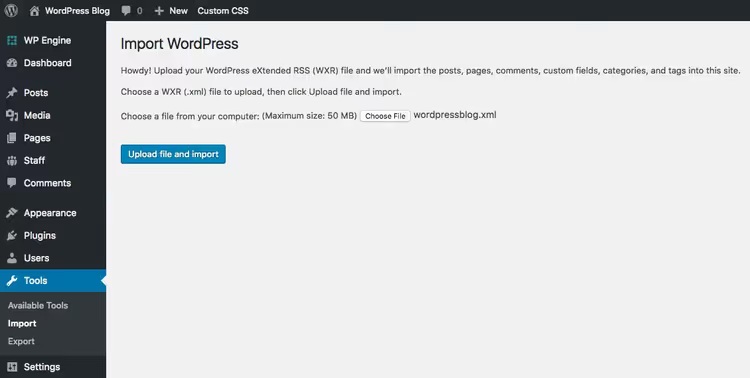
Use the "Choose File" button to select the downloaded XML and start the import. Wait time depends on content volume and hosting plan.
This method transfers posts, pages, media, and menus. Menu placement and widgets will need to be set up again, but that's five minutes of work. The main advantage: no additional plugins and no manual database edits.
Method 2: migration plugins
Plugins handle migration completely: they package the site into an archive, transfer files and database, and automatically replace URLs. Three proven options.
DesktopServer
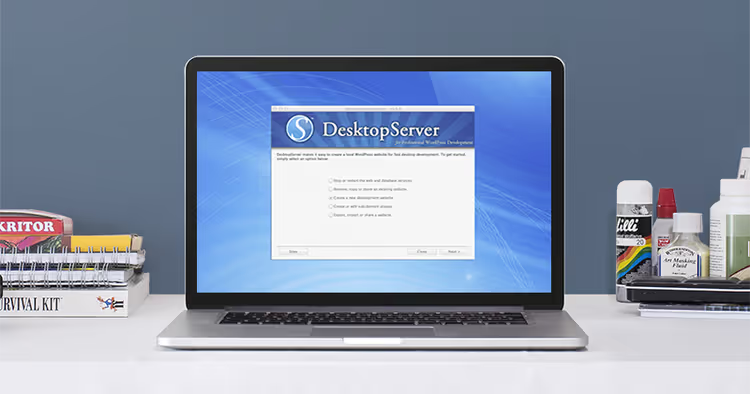
DesktopServer is a combination of a desktop application and a free plugin. The application runs local sites on Mac and Windows, while the plugin exports them to a live server. During export, check the "Get live hosting server data" option, and the plugin will automatically pick up the target host settings. The downside: the desktop part hasn't been updated in a long time, and the plugin was last tested with WordPress 4.x. For newer WP versions, Duplicator is a better choice.
BackupBuddy
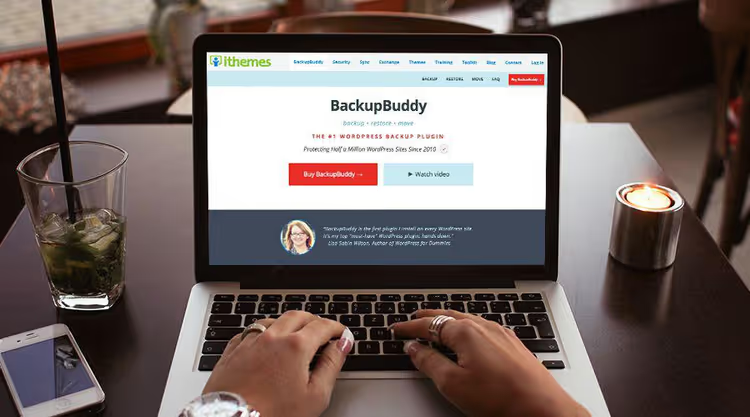
BackupBuddy from iThemes (now SolidWP) is a premium plugin focused on backup. It can create full site backups, schedule them, and store copies locally or in the cloud (Stash). For migration, use the ImportBuddy feature: it replaces domains in the database, fixes URLs, and deploys the site to a new server. Pricing starts at $99 per year for one site. Worth it if you regularly sync a dev version with production.
Duplicator

Duplicator is the most popular free migration plugin. Install it on your local site, create a package (content + themes + plugins), download the archive and installer.php, upload both files to the target server, and run installer.php through your browser. The plugin will unpack the site, replace URLs in the database, and configure wp-config.
Duplicator Pro adds scheduled backups, cloud storage (Dropbox, Google Drive, Amazon S3), multisite support, cPanel API, and email notifications. Subscription starts at $49.50 per year, a reasonable price for automation.
Method 3: manual file and database transfer
Full control over every step. This method requires access to phpMyAdmin and SFTP, but it works in any environment, from cheap shared hosting to VPS.
Exporting the database from the local server
Start your local server and open phpMyAdmin, usually at localhost/phpmyadmin. The example below uses XAMPP:
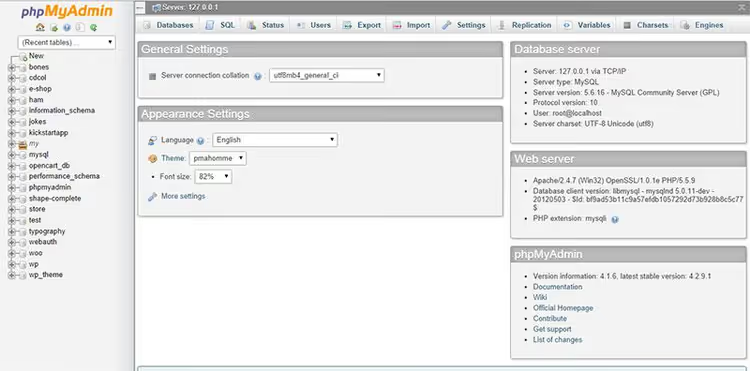
In the left panel, find your WordPress site's database. Select it and click "Export" in the top menu. Leave the method as "Quick" and format as SQL.
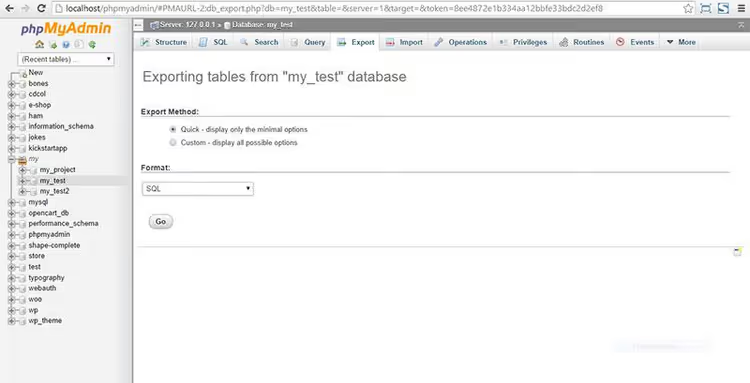
The SQL file will save to your downloads folder.
Replacing local URLs in the dump
The local site uses absolute paths: all links in the database start with http://localhost/. After uploading to the live server, they must point to your domain, otherwise images won't load and pages will be assembled from broken paths.
Open the SQL file in a code editor (VS Code, Sublime Text, Notepad++). Use find and replace: http://localhost/your-site → https://yourdomain.com. If the site was in a subfolder locally, replace the path completely, including the folder name.
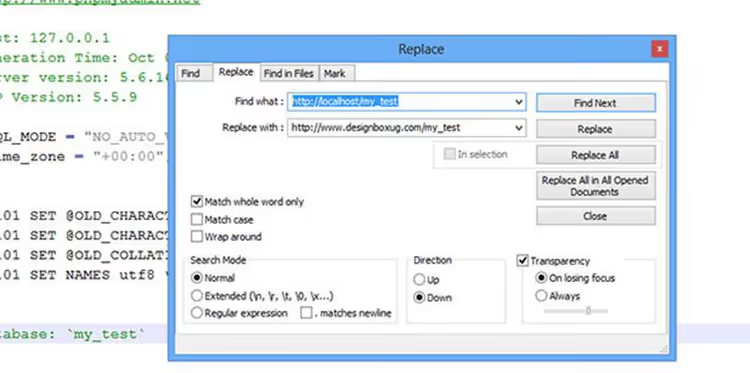
Save the file after replacement. Double-check that home and siteurl in the wp_options table point to the new domain.
Creating a database on the hosting
Log into your hosting control panel. If using cPanel, open the "MySQL Databases" section.
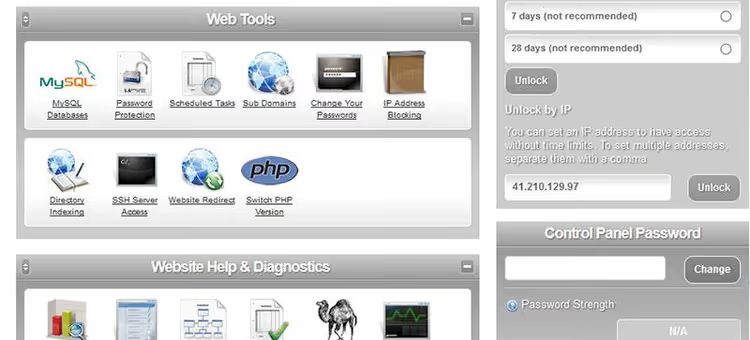
Create a new database, user, and password. Remember all three values; they're needed for wp-config. On most shared hosting, the database name matches the username.
On managed hosting without cPanel, the interface looks different. You add a new WordPress installation through the provider's panel, and the database is created automatically along with the site.
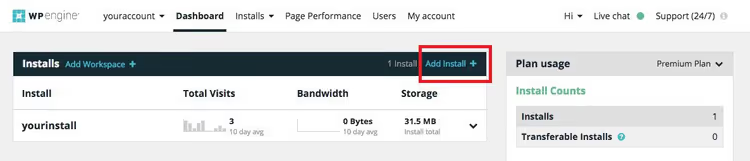
Fill in the fields: site name, domain (you can specify a technical one if the main domain isn't connected yet), admin login and password.
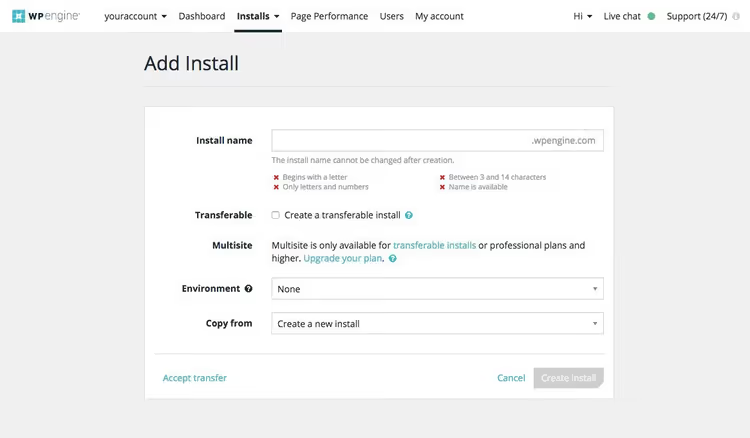
After submitting the form, the site and database are ready for content import.
Importing the database
Return to phpMyAdmin (now on the hosting side), select the newly created database, and open the "Import" tab. Select the edited SQL file and start the import.
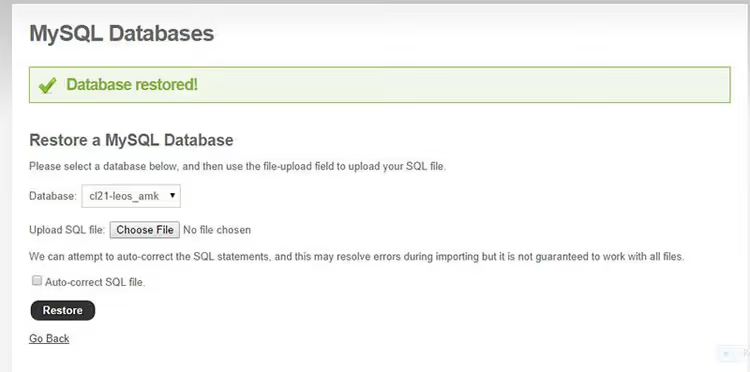
If phpMyAdmin is unavailable, some hosts offer an alternative: "Database Restore" in the MySQL section. The function is the same: you select the SQL file and upload.
Editing wp-config.php
Open wp-config.php in the root of your local WordPress installation. Find and replace four constants:
1 define('DB_NAME', 'your_database_name'); 2 define('DB_USER', 'database_user'); 3 define('DB_PASSWORD', 'database_password'); 4 define('DB_HOST', 'localhost');
DB_HOST usually remains localhost; the host will clarify if an IP address is needed. Save a copy of the old values: if something goes wrong, rolling back will be easier.
Uploading files via SFTP
Connect to the server via an SFTP client (FileZilla, WinSCP). Connection credentials are in the hosting panel; they often match the cPanel login and password.
Navigate to the site's root folder, usually public_html, www, or htdocs. Transfer all files from the local WordPress folder to this directory, including the edited wp-config.php.
Resetting permalinks
The final step. Log into the live site's admin panel: "Settings → Permalinks." Don't change the structure, just click "Save Changes." WordPress will rebuild .htaccess and internal routes. Without this, pages other than the homepage will return 404.
⁉️🤔 Frequently asked questions
What should I do if the database is too large to import via phpMyAdmin?
The standard phpMyAdmin limit is around 50 MB. Split the dump into parts by tables (wp_posts and wp_postmeta are often the heaviest) or use WP-CLI with the
wp db importcommand. Some hosts accept compressed.sql.gzfiles, which reduces size by 3-5 times.
Is it mandatory to edit URLs in the SQL dump manually?
No. The
WP-CLI search-replaceutility does this with a single command:wp search-replace 'http://localhost/site' 'https://domain.com'. If WP-CLI is unavailable, migration plugins from method 2 replace URLs automatically during deployment.
Can I migrate the site without taking the old one down?
The built-in export (method 1) runs without downtime; the old site continues working. Manual transfer (method 3) requires care: while you're uploading files and the database, visitors see the old version. Migration plugins usually create an instant snapshot and don't require downtime.
How do I verify that the migration was successful?
Go through all page types: homepage, post, category, page with images. Open the browser console (F12 → Console); there should be no 404 errors or mixed content. Check the admin panel: "Tools → Site Health" will show problems with paths and permissions.
What should I do if images don't load after migration?
Most likely, local URLs remain in the database. Run find and replace again, this time directly in the live database via Better Search Replace or WP-CLI. Make sure the
wp-content/uploadsfolder was completely copied to the server.
Migrating WordPress from localhost: which method to choose
Three methods cover any scenario. A fresh installation without content: use the built-in export, it will take five minutes. Regular syncing of a dev version with production: a plugin like Duplicator Pro or BackupBuddy pays for itself on the second transfer. A one-time move with full control: the manual method via phpMyAdmin and SFTP gives you understanding of every line in the database and every file on the server.
Before any migration, make a full backup of your local site. And don't skip the final step with permalinks: without it, even a perfectly migrated site won't open.

A professional team of writers and editors specializing in creating quality content.