














🚀 How to migrate a static HTML website to WordPress: a step-by-step guide
A static HTML site worked flawlessly for five, seven, or even ten years. But at some point you catch yourself thinking: adding new content through an FTP client has become unbearably tedious, launching a blog is impossible without jumping through hoops, and the design breathes nostalgia for the jQuery and Web 2.0 era. Sound familiar?
WordPress has long outgrown the "blogging engine" label. According to 2026 statistics, it powers 42.5% of all websites on the internet, from corporate portals to online stores and media outlets like TechCrunch. And migrating from static HTML to WordPress is not a catastrophe for your content. You won't lose search rankings, won't rewrite the site from scratch, and won't sacrifice design. But there's a catch: all of this only works if you follow the correct sequence of steps.
Below is a migration methodology refined through practice. No panic, with specific tools and copy-ready code snippets.
💡 Quick overview:
- Create a checklist: document your domain, URL structure, content volume, third-party services, and hosting requirements before starting
- Deploy WordPress in a test environment and disable indexing for search engines
- Transfer content: manually for small sites, through the built-in importer for known CMS platforms, through a script or CSV import for non-standard cases
- Set up the appearance: a ready-made theme from the directory, a premium theme with demo import, building your own theme from an HTML template, or a theme framework
- Restore functionality with plugins: SEO, security, caching, forms, backups
- Configure 301 redirects from old URLs to new ones through the Redirection plugin or
.htaccess - Check all pages, enable indexing, point the domain, and launch
Checklist: what to consider before starting migration
No migration goes smoothly without a plan. And this plan doesn't start with installing WordPress, but with reviewing what you already have. Document six items before pressing any buttons.
Domain. Are you keeping the current one or getting a new one? If the domain stays the same, migration is transparent for users. Alternative: install WordPress in a subdirectory yourdomain.com/wordpress/, and after everything is ready, redirect the domain to that directory. This way you can work on the new site calmly without touching the old one.
URL structure. HTML files usually live at addresses like /about.html, /blog/post-title.html. After moving to WordPress, URLs will become clean: /about/, /blog/post-title/. Changing the structure is normal, but you must be ready to set up permanent 301 redirects. Without them, search traffic will drop to zero within days.
Content volume. Count pages, posts, images, JS files. Up to 20-30 pages means manual transfer will take a couple of hours. Hundreds of pages and media files require automated import or a developer who will write a parser script.
Third-party services. Mailchimp newsletter form, chat widget, payment gateway, CDN: all of this must work on the new site too. Check whether there's a ready WordPress plugin or at least a code snippet for each service.
Admin panel. If the HTML site uses a custom admin panel, its functions need to be recreated through WordPress plugins. User management, SEO fields, custom post types: there are ready solutions for all of this in the WordPress.org directory.
Hosting. On a cheap shared plan, WordPress works but is slow. When migrating, it makes sense to move to hosting optimized for WordPress. Look for plans with PHP 8.3 or higher, MariaDB 10.6+ (or MySQL 8.0+), and support for current Apache or Nginx. Many providers offer one-click WordPress installation directly from the control panel.
Important: before any actions, make a full backup of the HTML site (all files and database if used). And don't touch the working site until the new one is fully ready and tested.
Step 1: installing WordPress

You can install WordPress in two ways: locally for development and testing, or directly on hosting. A local environment is convenient: you experiment without the risk of breaking a live site. For Mac, MAMP works well; for Windows, Local by WP Engine or classic XAMPP.
If you're installing directly on hosting, most providers offer a WordPress auto-installer in the control panel. Three clicks, and the platform is ready to go.
After installation, go to the WordPress admin: Settings → Reading and check the box "Discourage search engines from indexing this site." While you're transferring content and testing, search engines shouldn't see the intermediate version. When the site is ready, you'll uncheck it with one click.
At this same stage, configure permalinks: Settings → Permalinks → Post name. This gives you clean URLs (/post-name/) instead of the default /?p=123. Don't postpone this: redirect configuration in the following steps depends on the URL structure.
Step 2: importing content
Site content (text, images, meta fields) moves to WordPress in one of three ways, depending on the original situation.
Site without a CMS (pure HTML). Content is transferred manually. Open the HTML file, copy the text, paste it into the WordPress editor using the "Paste as plain text" button (it removes old formatting). Upload images through the media library. Create pages in Pages → Add New, posts in Posts → Add New. For a site of 10-15 pages, this takes an hour or an hour and a half. For 50+ pages, the process is already tedious, and it makes more sense to hire a freelancer or write a Python script to parse HTML and programmatically create posts via the WP REST API.
Site on a known CMS. WordPress offers a built-in import tool: Tools → Import. There you'll find ready modules for Blogger, Joomla, Drupal, Squarespace, Tumblr, and a dozen other platforms. Run the needed module, specify the export file from the old CMS, and posts, pages, and media files appear in WordPress automatically. See the full list of supported CMS platforms in the official WordPress content import documentation.
CMS exists, but there's no importer. A developer writes a converter script that reads the database or API of the old CMS and creates posts via wp_insert_post() or WP CLI. Alternative: export content to CSV and import via the WP All Import plugin.
Tip: during the transfer, maintain a table mapping old and new URLs. Column A:
/about.html, column B:/about/. This table will save you hours during redirect configuration.
When content is transferred, create a navigation menu: Appearance → Menus. Add main pages, specify the menu location in the theme. Five minutes of work, but without a menu, the site looks like a draft.
Step 3: site design
Content is in place; now the site needs to look presentable. There are four options:
Take a ready theme from the directory. WordPress.org has nearly 14,000 free themes. Filter by industry, layout, and features. Installation takes one click.
Buy a premium theme. On ThemeForest and independent marketplaces, the selection numbers in the tens of thousands. Premium themes usually include demo import: press a button, and your site looks like the developer's screenshot. Then just replace the content with your own.
Build from scratch or rework an HTML template. This approach is for developers. Take your HTML site's layout and format it as a WordPress theme: split it into
header.php+footer.php+single.phpand connect WordPress hooks. Labor-intensive, but gives full control over every detail.Use a theme framework. Genesis, GeneratePress, or Kadence provide a solid foundation, and a child theme adds custom styles. Less code, higher performance.
If you're working with WordPress for the first time, take a ready theme with good reviews and active updates. Leave custom design for later, when you're comfortable with the admin panel. Site functionality (forms, galleries, SEO fields, caching) is added through plugins, and that's the logical next step.
Step 4: restoring functionality with plugins
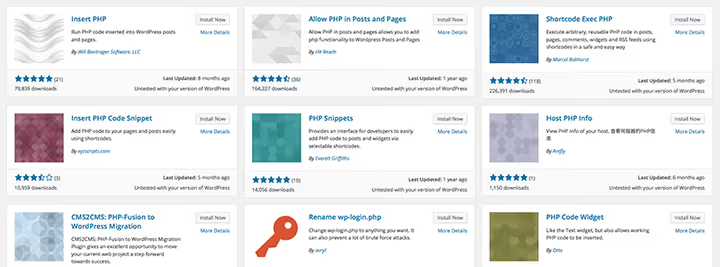
Your old site could send forms, display a map, collect newsletter emails. All of this needs to be recreated on WordPress, and this is where the ecosystem of 61,000+ plugins in the official directory comes into play.
The principle is simple: one function, one plugin. Don't install a monstrous all-in-one combo: it will bloat the admin panel and slow down the site. Here's a minimal starter set that covers the basic needs of any site after migration:
- SEO: Rank Math or Yoast SEO for meta tags, XML sitemap, Open Graph, schema markup.
- Security: Solid Security (formerly iThemes Security) for two-factor authentication, brute force protection, logging.
- Caching and speed: WP Rocket (premium) or W3 Total Cache (free) for compression, CSS/JS minification, lazy loading.
- Forms: WS Form or WPForms as a contact and registration form builder.
- Backup: UpdraftPlus for automatic backups to Google Drive, Dropbox, or FTP.
Specific needs are addressed separately: online store with WooCommerce, multilingual support with Polylang or WPML, forum with bbPress.
Rule: install plugins only from the official WordPress.org directory or from a verified developer's site. A plugin that hasn't been updated in a year is a red flag. A plugin from a "torrent bundle" is a guaranteed security hole.
Step 5: setting up redirects
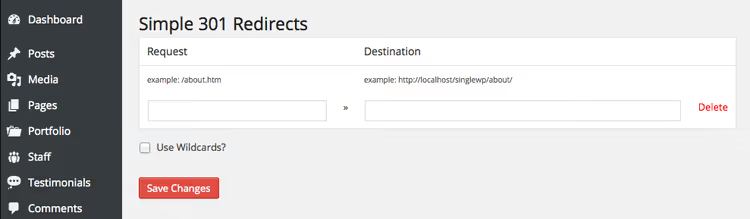
The most dangerous thing in migration is losing search traffic due to broken URLs. Google has indexed your HTML pages for years, and each of them has ranking value. After switching to WordPress, /about.html becomes /about/, and without redirects, visitors get a 404.
This is solved with two tools. For most sites, the Redirection plugin is sufficient: 2 million active installations, management through the WordPress admin, logging of all transitions. Add a rule "old URL → new URL," and the plugin does the rest. For monitoring broken links, additionally install Broken Link Checker: it will scan the site and show all problem areas.
If you prefer manual control, redirects are written in the .htaccess file (for Apache servers) in the site root. The syntax is simple:
1 Redirect 301 /about.html https://yourdomain.com/about/ 2 Redirect 301 /folder/page.html https://yourdomain.com/page/
The first part is the path to the old page relative to the site root; the second is the full URL of the new page (with the https:// protocol). If pages were in a subdirectory, specify the full file path: /folder/page.html.
After redirects are configured, visit the main old URLs in a browser and make sure they correctly forward to the new address. This is 15 minutes of work that saves you from disaster after launch.
Step 6: launch and final check

The final push consists of six actions that transform a test site into a production one:
Check all pages. Go through the homepage, contact page, services page, blog. Make sure the layout didn't break, images loaded, and forms submit.
Scan for broken links. Run Broken Link Checker or an external service like W3C Link Checker. Every 404 is a lost visitor.
Set up SSL. If your old site didn't have HTTPS, now is the time. Most hosts provide a free Let's Encrypt certificate with one click.
Enable indexing. Settings → Reading → uncheck "Search engine visibility." Add the site to Google Search Console and submit the XML sitemap for recrawling.
Point the domain to the new site. If WordPress was on a subdomain or in a subdirectory, update DNS records (A record at your registrar or in the hosting panel). DNS propagation takes up to 24-48 hours, but usually 1-2 hours.
Make a final backup. One of the old HTML site (archive for memory), another of the fresh WordPress site (in case something breaks on the first edit).
After launch, monitor Google Search Console for the first two to three weeks. If you see a spike in 404s, promptly add redirects for missed URLs.
The entire process from start to finish is shown clearly in this video:
⁉️🤔 Frequently asked questions
How long does it take to transfer an HTML site to WordPress?
A site of 10-15 pages without a CMS takes 4-6 hours of turnkey work: installation, content transfer, theme and plugin setup, redirects. A site on a CMS with a ready import tool takes 1-2 hours. A large site with hundreds of pages takes from several days to a week, depending on volume and automation complexity. Times are for someone who has already worked with WordPress. Beginners should allow extra time for learning the admin panel as they go.
Will I lose Google rankings after migration?
Brief position fluctuations during the first two weeks are normal for any migration. But with properly configured 301 redirects, preserved content, and prompt XML sitemap submission to Search Console, rankings recover and often even improve. WordPress is SEO-friendly out of the box: clean URLs, fast server response with caching, schema markup through plugins. The main mistake is forgetting about redirects or configuring them incorrectly. The second is leaving the test site with
noindexafter launch. Check both.
Can I keep my HTML site's design when migrating?
Yes. Your HTML template converts to a WordPress theme. To do this, you need to split the layout into standard theme files (
header.php+footer.php+functions.php+style.css) and replace static content with WordPress function calls:wp_title()for the title, the WordPress loop for displaying posts,wp_nav_menu()for menus. A developer experienced in integrating layouts into WordPress does this in 1-2 days for a typical site.
What do I do with JavaScript functionality from the old site?
JS scripts are connected in a WordPress theme via
wp_enqueue_script()infunctions.php. This is the correct approach because WordPress manages load order and resolves jQuery conflicts. Don't connect scripts with bare<script>tags inheader.php; you risk breaking plugin functionality. If the functionality is complex (calculator, interactive map, custom player), look for a ready plugin that reproduces it. Writing from scratch makes sense only if there really are no alternatives.
Do I need to change hosting when switching to WordPress?
Not necessarily, but highly advisable. WordPress recommends PHP 8.3 or higher, MariaDB 10.6+ (or MySQL 8.0+), and
mod_rewritesupport for pretty URLs. If your current shared hosting meets these requirements, keep it. If not, move to a plan optimized for WordPress. The difference in page load speed between regular and WordPress-optimized hosting can be 2-3 times.
Migration without panic: what to do after launch
Migrating from static HTML to WordPress is not a technical catastrophe but a refined six-step process. You make a backup, install WordPress in a test environment, transfer content, design the site, configure redirects, and launch. The key points where people most often stumble: forgotten 301 redirects (goodbye, search traffic), an unblocked test environment for indexing (hello, duplicates in Google), and plugins from dubious sources (welcome, hack).
If the content volume is small, you'll handle it yourself in an evening. You just need attention and a URL mapping table. If there are many pages, don't be a hero: hire a developer for conversion or import. An hour of a specialist's time costs less than a week of your time on routine copying.
And most importantly: don't view migration as "moving the same thing to a different platform." This is an opportunity to refresh content, polish the design, and lay a foundation for growth (a blog, newsletter, portfolio). WordPress provides tools that static HTML never had. Start with installation today, and in a couple of days you'll have a site that's easy to manage without an FTP client and text editor.

A professional team of writers and editors specializing in creating quality content.