














🎮 First game with Pygame: writing in Python from scratch
Want to write your first game but don't know where to start with game development? Pygame removes that barrier. You write in pure Python and immediately see the result on screen: a moving sprite, keyboard input response, living mechanics. No heavy engines, no thousands of lines of boilerplate code.
The problem with most tutorials is they either bury you in 40 pages of theory or leave you with "finish it yourself." Here we'll take the middle path: explain just enough so you understand every line, and immediately build a working game with a character that moves across the screen using WASD. The entire code fits in 60 lines.
💡 Quick overview:
- Install Pygame via pip and create a game file, it takes a couple of minutes
- Understand the game loop: events, calculations, rendering, three phases that live in an endless
while True - Write a player class and bring it to life: WASD keys move the sprite, the screen redraws 60 times per second
- Understand the coordinate system and color handling, two cornerstones that support any 2D graphics
What is Pygame and why choose it
Pygame is a library for Python that wraps the multimedia SDL (Simple DirectMedia Layer) in a convenient Python API. SDL handles low-level graphics, sound, and input device work, while Pygame provides access through familiar classes and methods. The current version, 2.6.0, is actively maintained and works on Windows, macOS, and Linux.
For beginners, Pygame has three undeniable advantages. First, low barrier to entry: you use ordinary Python code, no new language or visual editor. Second, instant feedback: you write pygame.draw.rect(...) and a rectangle appears on screen, no magic. Third, understanding the foundation: Pygame doesn't hide the game loop and event queue from you, you see how any game works inside. After Pygame, moving to Godot or Unity will be easier because you already know what delta time and event polling are.
The library doesn't try to be a game engine. It has no scene system, physics, or built-in level editor, and that's a deliberate decision. You control every pixel and every tick, which means you learn to think like a game developer, not like an operator of someone else's tool.
Installing Pygame in two minutes
Already have Python 3.9 or newer? Then open a terminal and run one command:
1 pip install pygame
For project isolation, it's better to create a virtual environment:
1 python -m venv game_env 2 game_env\Scripts\activate # Windows 3 source game_env/bin/activate # macOS / Linux 4 pip install pygame
Check that the library is installed:
1 import pygame 2 print(pygame.version.ver)
If you get 2.6.0 in response (or newer, you can check the current version at pygame.org), you're ready. Create a project folder, put any 80×80 pixel sprite image named player.png in it, and a text file game.py, we'll start with that.
How the game loop works: events, calculations, rendering
The heart of any game is the main loop. While the game is running, inside an endless while True, three phases alternate:
Event processing, what happened since the last frame? Key pressed? Mouse moved? Window closed? Pygame collects all events in a queue, and we iterate through it with
for event in pygame.event.get().Logic calculation, how did the world change in response to events? Player pressed W, increase Y coordinate. Bullet collided with asteroid, mark both for removal.
Rendering, draw everything that should be on screen. Fill the background, place sprites at new coordinates, call
pygame.display.update(), and the player sees a frame.
These three steps repeat 60 times per second, exactly the framerate (FPS) we'll set on the timer. The illusion of movement is built on the sprite shifting a couple of pixels between frames, while the eye perceives this as continuous animation.
Writing first code: moving a sprite across the screen
Here's the complete game code. Save it as game.py and place player.png in the same folder:
1 #!/usr/bin/env python3 2 3 import pygame 4 import sys 5 6 WIDTH, HEIGHT = 360, 480 7 WHITE = (255, 255, 255) 8 9 class Player(pygame.sprite.Sprite): 10 11 def __init__(self, image_path): 12 super().__init__() 13 self.image = pygame.image.load(image_path) 14 self.x = WIDTH / 2 15 self.y = HEIGHT / 2 16 self.speed = 5 17 18 def move(self, dx, dy): 19 self.x += dx 20 self.y += dy 21 22 def main(): 23 pygame.init() 24 screen = pygame.display.set_mode((WIDTH, HEIGHT)) 25 pygame.display.set_caption("First Game on Pygame") 26 27 clock = pygame.time.Clock() 28 fps = 60 29 30 player = Player("player.png") 31 dx, dy = 0, 0 32 33 running = True 34 while running: 35 for event in pygame.event.get(): 36 if event.type == pygame.QUIT: 37 running = False 38 39 elif event.type == pygame.KEYDOWN: 40 if event.key == pygame.K_d: 41 dx = player.speed 42 elif event.key == pygame.K_a: 43 dx = -player.speed 44 elif event.key == pygame.K_w: 45 dy = -player.speed 46 elif event.key == pygame.K_s: 47 dy = player.speed 48 49 elif event.type == pygame.KEYUP: 50 if event.key in (pygame.K_d, pygame.K_a): 51 dx = 0 52 elif event.key in (pygame.K_w, pygame.K_s): 53 dy = 0 54 55 player.move(dx, dy) 56 screen.fill(WHITE) 57 screen.blit(player.image, (player.x, player.y)) 58 pygame.display.update() 59 clock.tick(fps) 60 61 pygame.quit() 62 sys.exit() 63 64 if __name__ == "__main__": 65 main()

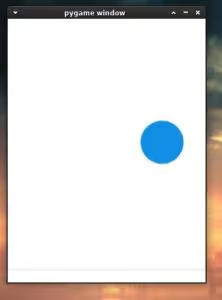
Run python game.py, a window with a white background and your sprite in the center will open. Hold W, A, S, or D, the character moves. Release it, it stops. This is already a real game, albeit minimal.
What's improved compared to classic tutorials: KEYUP handler is added for key release. Without it, the sprite would travel off screen forever after the first press. And the code is wrapped in the if __name__ == "__main__" construct, a good practice that allows importing the file as a module without launching the game.
Coordinate system and color handling
In Pygame, coordinates are counted from the top left corner: (0, 0), the very top left. Moving right increases X, moving down increases Y. This differs from the school coordinate system where Y grows upward, just remember it and check yourself on the first two runs: pressed S, sprite moved down, pressed W, up.
Color is specified by a tuple of three numbers (R, G, B), each from 0 to 255. White corresponds to (255, 255, 255), black corresponds to (0, 0, 0), red corresponds to (255, 0, 0). The screen.fill(WHITE) method fills the entire screen with the selected color before rendering each frame. If you don't do this, the sprite will leave a trail of previous positions.
What happens under the hood: line by line breakdown
The Player class inherits from pygame.sprite.Sprite, Pygame's built-in class for game objects. In the constructor, we load the image via pygame.image.load() and set the starting position at screen center: WIDTH / 2 and HEIGHT / 2. The move(dx, dy) method receives displacement and adds it to current coordinates, pure arithmetic, no magic.
The main() function brings everything together. pygame.init() starts internal subsystems. pygame.display.set_mode() creates a window, and screen is a Surface we draw on. pygame.time.Clock() creates a timer: its tick(fps) method at the end of the loop tells Pygame "wait until 1/60 of a second has passed since the last frame," this is how we fix the framerate and don't waste CPU.
The main loop while running spins until the running flag becomes False. Inside, the three phases we talked about above:
In the for event in pygame.event.get() loop, we poll the event queue. pygame.QUIT is the signal "user clicked the window close button": set running = False, and on the next iteration the loop will end. pygame.KEYDOWN fires when a key is pressed, and KEYUP when released. For D and A we change dx, for W and S we change dy. When the key is released, we zero the corresponding velocity component, the sprite stops.
screen.blit(player.image, (player.x, player.y)), the method that "overlays" one image onto another. In our case, the player sprite onto the main screen surface at current coordinates. pygame.display.update() refreshes the window, and the player sees the finished frame.
Note: player.move() is called before screen.fill(). If you swap them, the sprite will be erased the same millisecond it appears, you simply won't see it on screen. The order of operations in the game loop is critical.
Click the close button, pygame.quit() correctly unloads Pygame subsystems, and sys.exit() terminates the Python process. Without pygame.quit() the window can freeze on close, a small detail, but code should be clean.
Short video on the topic
If the text instruction doesn't quite click, here's an excellent video course in English where they build Space Invaders on Pygame step by step. All concepts from the article are shown live:
⁉️🤔 Frequently asked questions
Do I need to know OOP for Pygame?
Yes, at a basic level. Classes, methods, inheritance, and
selfyou'll need from day one: player, enemies, bullets, and bonuses naturally fit into an object model. If you've completed any introductory Python course that explainedclassand__init__, that's enough. You'll pick up the rest as you go: Pygame doesn't require design patterns, ordinary inheritance fromSpriteis sufficient for dozens of prototypes. A game object in Pygame is a class inherited frompygame.sprite.Sprite. In the constructor, you load the sprite viapygame.image.load(), set initial coordinates and speed. Theupdate()method (or your own, likemove()) changes position every frame. The main loop callsupdate()on all objects, then renders them viascreen.blit(). No magic, just calling methods in the right order 60 times per second.
Does Pygame slow down on complex 2D graphics?
With a reasonable number of sprites, no. Surfaces in Pygame live in RAM, and
blitis fast pixel copying, not software rendering. With a thousand simultaneously moving objects you might hit Python's performance limit, but for a platformer, top-down shooter, or tower defense there's headroom. If you need to squeeze out maximum performance, usepygame.sprite.Groupwith automatic rendering and dirty rectangles for partial screen updates.
Can I add sound and music in Pygame?
Yes, out of the box. The
pygame.mixermodule can play WAV and MP3. A gunshot sound is launched viapygame.mixer.Sound("shoot.wav").play(), and background music is loaded viapygame.mixer.music.load("theme.mp3")andpygame.mixer.music.play(-1)(the-1flag loops it). The only caveat:pygame.mixer.init()needs to be called before loading sounds, and for MP3 on Linux you might need thelibmpg123library.
Is there any point learning Pygame in 2026 when there's Godot and Unity?
Absolutely. Pygame isn't a Godot competitor, it's an educational tool and lightweight layer for 2D prototypes. You don't learn C# just to move a square, and you don't figure out the node system for Pong. Pygame gives you an understanding of how games work at a lower level: game loop, frame buffering, collisions. Programmers who started with Pygame have an easier time with Unity and Godot because they see the living mechanics behind the engine's abstractions. Real indie projects are written in Pygame, including commercial ones, a small platformer or puzzle can be released on Steam without touching C++.
What to do if the sprite goes off screen?
Add boundary checking to the
move()method: ifself.x < 0, set it to 0; ifself.x + sprite_width > WIDTH, set it toWIDTH - sprite_width. Same for Y. This is called clamping, and without it the character will eventually travel to an invisible area. In more advanced games, boundaries are level walls defined via a tile grid or collision array.
Ready to launch your first game?
Copy the code from the "Writing first code" section, save it as game.py, place any sprite image next to it, and in a few seconds you'll see a window with a moving character. This is the entry point into game development: not reading, but launching and starting to tweak parameters.
Change WIDTH and HEIGHT, the window will get bigger. Set player.speed = 10, the character will speed up. Replace WHITE with (35, 35, 35), you'll get a dark background. Experiment, and you'll understand that a game program is not magic, but a sequence of steps you control.
Once you've mastered movement, tackle collisions (pygame.sprite.collide_rect()), animation (sprite sheet frame switching), and procedural level generation. To start, one game.py file and the desire to understand how it works is enough.

A professional team of writers and editors specializing in creating quality content.