














🍿 How to create a user quiz on WordPress in 7 simple steps
You launched a blog, filled it with articles, but readers arrive, skim through, and leave. No comments, no subscriptions. Sound familiar?
Visitors need a reason to stay. One of the simplest and most underrated tools for this is a quiz or trivia game right on your WordPress site. This isn't an exam or a school test: a fun quiz entertains, gathers opinions, and along the way reveals what your audience finds interesting and what they don't.
You can do this in seven steps. For free. Without code. Here's how.
💡 Quick overview:
- Install the Quiz and Survey Master (QSM) plugin, with over a million active installations and a 4.9 rating on WordPress.org.
- Create your first quiz using the visual wizard: title, questions, answers, points.
- Customize the appearance to match your brand and embed the quiz with a shortcode or block in any post.
- Collect results, review statistics, and adjust your content based on real data.
Step 1. Install Quiz and Survey Master
The fastest path to a quiz on WordPress is the Quiz and Survey Master plugin (formerly called Quiz Master Next). The free version is enough for full-featured quizzes with a dozen question types, and the plugin runs lightweight without slowing down your site.
Go to Plugins → Add New, type Quiz and Survey Master in the search box, and click Install Now → Activate. Or download it from the official page on WordPress.org and upload it manually.
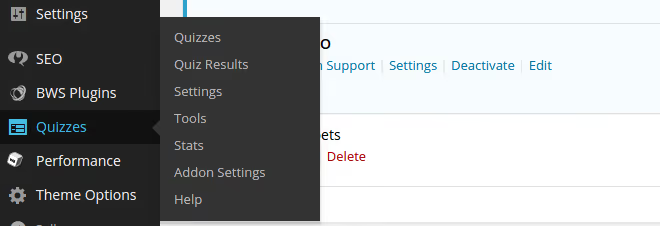
After activation, a Quizzes/Surveys section will appear in the sidebar menu. Open it and click Add New.

Enter a quiz title, anything that will help you recognize it later in the list. Click Create Quiz, and the quiz will appear in the main table. To start adding content, click Edit under the title.
Step 2. Add questions
The Add Question button opens a window with new question settings. This is the creative part: decide exactly what you want to ask your audience.
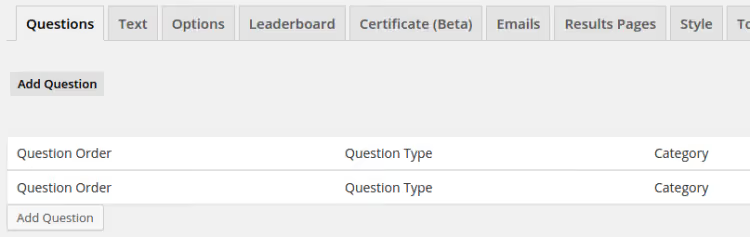
The plugin supports over a dozen formats: single choice, multiple choice, dropdown, short text, fill in the blank, file upload, number, and even reCAPTCHA. For each question, you can set:
- question text and answer options;
- correct answer (optional);
- points for the correct answer;
- message the user sees for a correct or incorrect answer;
- hint that appears if the participant gets stuck.
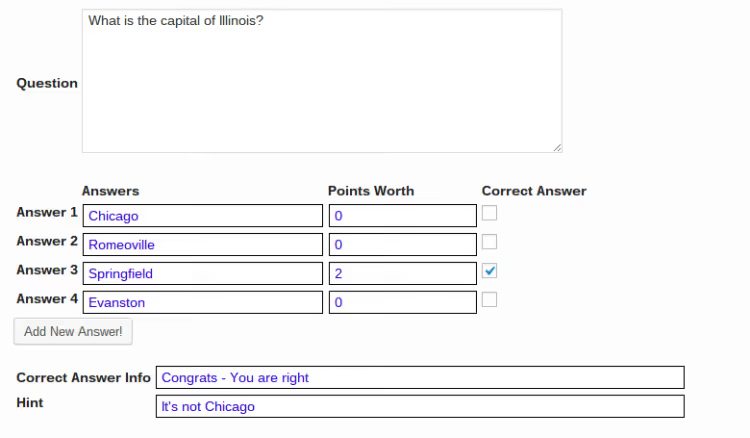
In practice, three to five questions are enough for a light quiz, and ten to fifteen for a serious survey. Once you've filled in one question, click Create Question and repeat for the next.
Step 3. Publish the quiz on your site
When the questions are ready, return to the quiz list (Quizzes/Surveys → All Quizzes). Shortcodes appear to the right of each quiz title: these are the key to publishing.
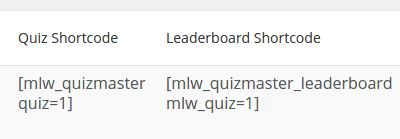
Copy [qsm quiz=X] (where X is the quiz number) and paste it into any post, page, or widget. The plugin also provides a leaderboard shortcode [qsm_leaderboard quiz=X], useful if you want to add a competitive spirit. In the current version, a native Gutenberg block is also available: find "QSM" in the block editor and select the quiz you need.
Click Publish or Update, and the quiz is live on your site.
Step 4. Customize the appearance
The default QSM layout looks clean and minimalist, but the plugin offers flexible style settings so the quiz fits your brand.
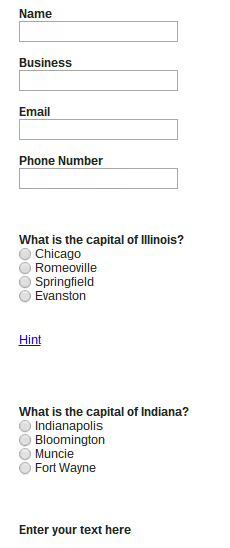
The Style tab lets you configure colors, fonts, backgrounds, and button border-radius. The Pro version adds premium themes: Fortune, Breeze, Ivory, Pool, and others. But the free options are enough to make the quiz look polished without clashing with your site's design.
Step 5. See what participants see
Before inviting readers, take the quiz yourself. Open the page with the shortcode, answer the questions, and submit the form. The user immediately sees: how many points they scored, which answers were correct, and (if the leaderboard is connected) their ranking.

This is the basic interaction cycle: the reader had fun, and you got a contact and data. Now it's time to understand how to analyze that data.
Step 6. View submitted results
Go to Quizzes/Surveys → Quiz Results. All submissions are collected here: name, email, phone (if requested in the contact form), percentage of correct answers, and the specific options chosen.

Click View on any row to open the full participant card with answers to each question. This is a direct feedback channel: you can see which topics resonate and which fall flat. If you've connected Mailchimp or ActiveCampaign (through Pro add-ons), contacts automatically go to your mailing list.
Step 7. Analyze statistics
The final step is the Quizzes/Surveys → Statistics page. Once you have at least a couple dozen submissions, the numbers will tell you more than intuition.
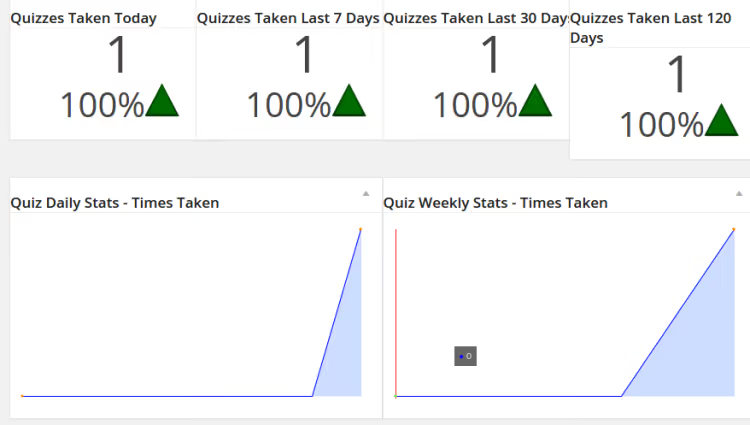
The plugin shows the number of completions by day and week, average score, and completion rate. A downward trend signals it's time to revisit your questions or presentation. Growth confirms the format is working. Note that QSM also tracks which question participants drop off on most often: this marks a question that's too difficult or boring.
⁉️🤔 Frequently asked questions
How does QSM differ from Gravity Forms for quizzes?
Gravity Forms is a powerful form builder with flexible logic, but quizzes and surveys aren't its main specialty. To create a full-featured quiz with scoring, leaderboards, and statistics, you'll need to purchase add-ons and configure them manually. QSM is designed specifically for quizzes out of the box: scoring, results pages, grading scales, all free. Gravity Forms makes sense if you already have a license and you're creating more of a questionnaire with a few conditional branches rather than a quiz.
Can you create a quiz without a plugin?
Technically, yes. A couple of fields in an HTML form, some JavaScript for scoring, a script for submission. But in practice, you'll spend hours on implementation and end up with functionality that QSM provides in five minutes. Secure result storage, protection against cheating, responsive layout: the plugin has already solved all of this. If your goal is a quiz (not a programming exercise), use QSM.
How do you get readers to take the quiz?
Three rules that work in practice. First: the quiz title should promise specific value, not "Take our survey" but "Find out what type of entrepreneur you are in 2 minutes." Second: the result must be interesting. A dry percentage of correct answers is boring; a personalized verdict with a recommendation is not. Third: place the quiz where it will be seen, in the sidebar, in the middle of a long article, or as a standalone page promoted on social media.
Does QSM work with multilingual sites?
Yes, the plugin is compatible with WPML and its extensions. Question text, answers, messages, and results pages are translated using standard WPML tools. The admin interface remains in English, but the frontend is fully localized to the site's language.
Are there limitations in the free version?
The free version doesn't limit the number of quizzes, questions, or participants. What's not included: advanced question types (matching pairs, radio grid), export to Google Sheets, branching logic, email service integrations, premium themes, and proctoring (cheat protection via camera capture). For an entertainment quiz or simple survey, the free version is more than enough.
Is QSM worth installing in 2026?
In short: yes, it's one of the most stable free plugins for quizzes on WordPress. A million installations, 4.9 stars in the repository, regular updates. Over seven years of existence, the plugin changed its name but didn't abandon development: the latest version was released in 2026 and is fully compatible with the current WordPress.
The process of launching your first quiz fits into half an hour: installation (2 minutes) → questions (15 minutes) → styling (5 minutes) → publishing (2 minutes). After that, just watch the statistics and refine your content.
If you need advanced branching logic, CRM integrations, or certificates for completed quizzes, take a look at the Pro version of QSM or Gravity Forms with the Quiz add-on. For everything else, the free QSM is more than sufficient.
Try launching a quiz this week. In practice, the hardest step isn't technical but creative: coming up with questions your audience will actually want to answer.

A professional team of writers and editors specializing in creating quality content.