













💡 Importing multilingual content into WordPress: WPML and WP All Import integration (2026)
You migrated a site, changed the domain, or assembled content on a staging environment, and now you're facing a spreadsheet with hundreds of records that need to be uploaded to a multilingual WordPress. Manually transferring each post and its translation takes days, not hours. And if your team doesn't have a developer, writing your own script for the WP REST API and REST translation linking isn't an option.
The combination of WPML + WP All Import Pro solves this problem in 20 minutes. One CSV file per language, a shared identifier for linking, and translations are connected automatically without manual clicking in the admin panel.
💡 Quick overview:
- Prepare a CSV file for the primary language with columns for Title, Content, WPML Language Code, and Connector
- Import the primary language through WP All Import, specifying Connector as the unique identifier
- Prepare a translation CSV file with the same Connector and import it; WPML will link the translations automatically
- Verify that posts in both languages are linked correctly
What you'll need
Three plugins need to be installed and activated on your WordPress site:
- WPML Multilingual CMS (current version 4.9.1), the multilingual core. Without it, there's no way to create translations.
- WP All Import Pro (version 5.0.6), a powerful plugin for bulk content import from CSV, XML, and Excel. It pulls data from your spreadsheet and creates posts.
- WPML All Import (version 2.3.2), the bridge between WP All Import and WPML. It adds a language selection field to the import interface and the logic for linking translations.
And as a bonus: alert eyes, a cup of coffee, and 20 minutes of your time. Seriously: once the spreadsheets are ready, the import itself takes exactly that long.
The method described below is universal: it works for any post types, including custom ones (CPT), and is suitable not only for fresh imports but also for migrating existing multilingual content between sites.
The official video tutorial from the WPML team clearly demonstrates the entire process from CSV preparation to final verification of linked translations. We recommend watching it before you start; 7 minutes will save you an hour of experimentation.
Step 1. Prepare the CSV file for the primary language
Let's assume we have content in Russian that needs to be uploaded to the site and then linked to its English translation. We start with the Russian CSV.
Create a file in Excel (or Google Sheets) with the following columns:
Column | Purpose | Example value |
|---|---|---|
Title | Post title |
|
Content | Post body |
|
WPML Language Code | Language code |
|
Connector | Unique identifier for linking translations |
|
The key column is Connector. This is an arbitrary unique number (or string) that you assign to each post. The same post in Russian and English receives the same Connector; this is how WPML understands they are translations of each other.

After filling in the data, save the file as CSV. Important note: the encoding must be UTF-8 without BOM. Excel adds a BOM signature by default, and WP All Import may stumble over the invisible character at the beginning of the file. The simplest fix is to open the saved CSV in Notepad++ and select "UTF-8 without BOM" through the "Encoding" menu, then save.
After this, the Russian CSV (RU_import.csv) is ready for import.
Step 2. Import the primary language through WP All Import
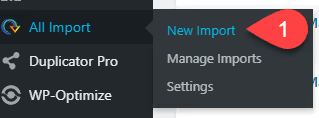
Go to the WordPress admin panel: WP All Import → New Import.
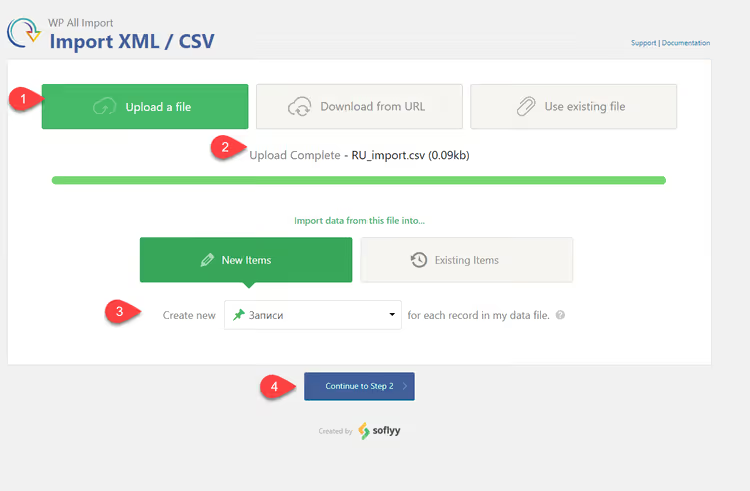
Upload our CSV file. WP All Import will automatically detect the delimiters and show a data preview:
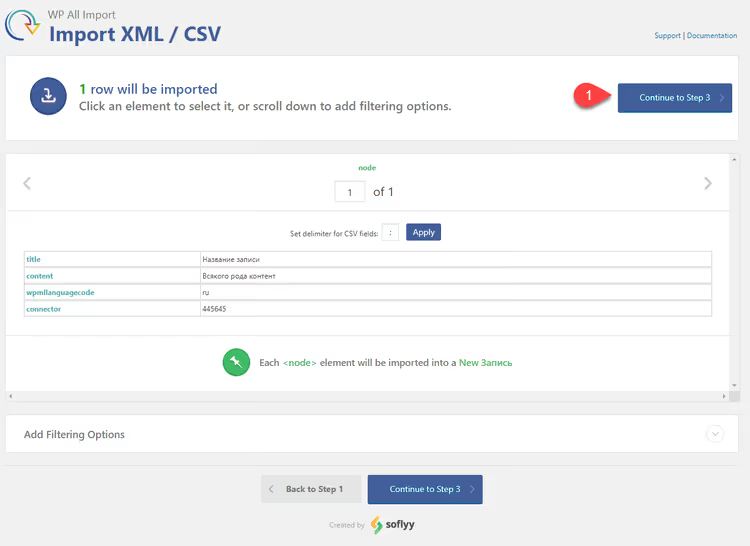
On the next step, simply click "Continue to Step 2":
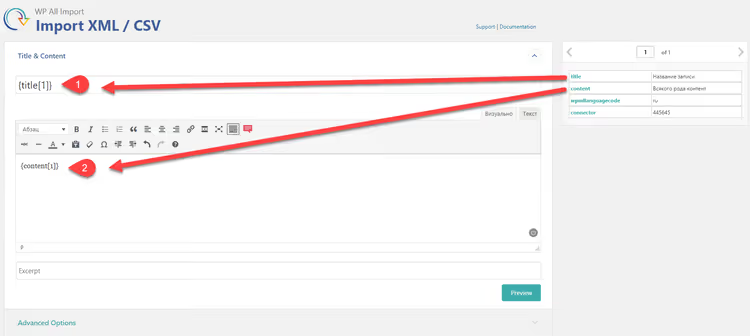
Now comes the most critical part: mapping columns. Drag the shortcodes from the right panel into the corresponding fields:
{Title[1]}→ "Title" field{Content[1]}→ "Content" field
Don't touch the Connector field yet; it will be needed during the unique identifier setup step.
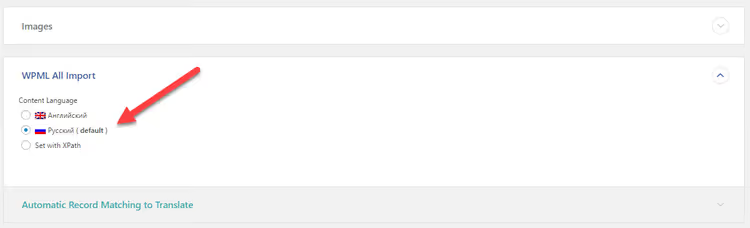
Below, in the WPML All Import plugin section, specify the content language: Russian. This setting determines which language version of the site the created post will be assigned to:
Click "Continue to Step 4":

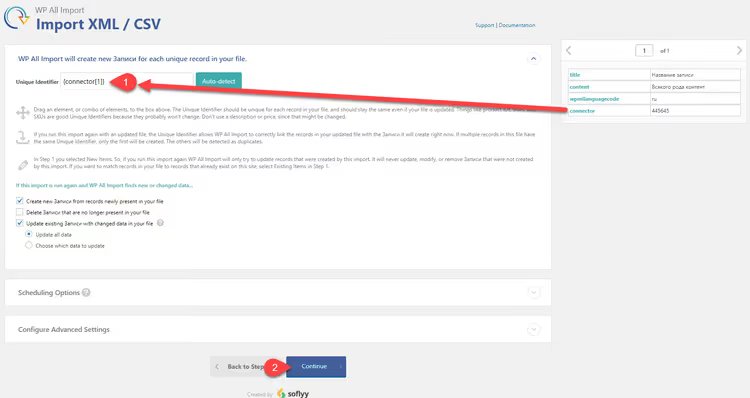
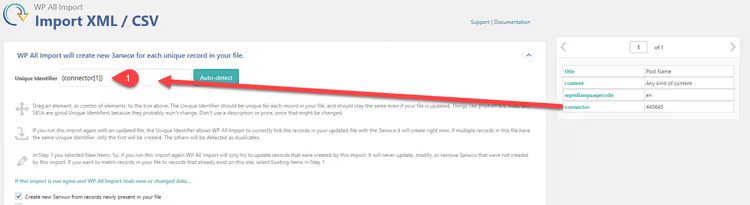
On step four, Unique Identifier. In this field, you need to specify our Connector column. Drag the shortcode {Connector[1]} into the unique identifier field:
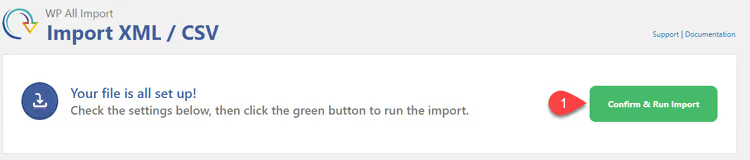
And launch the import:
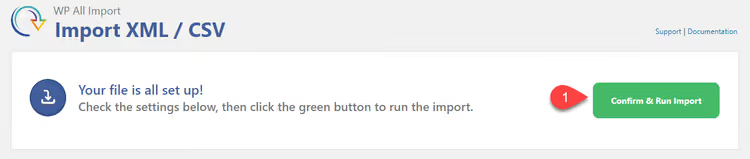
After completion, you'll see a green page indicating successful import:
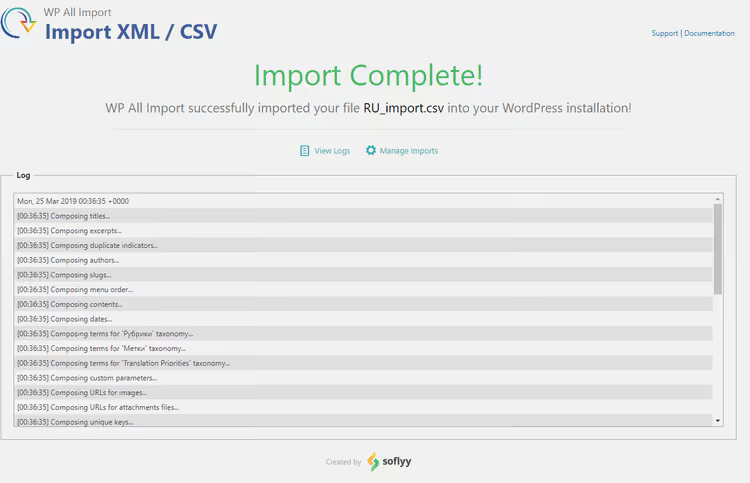
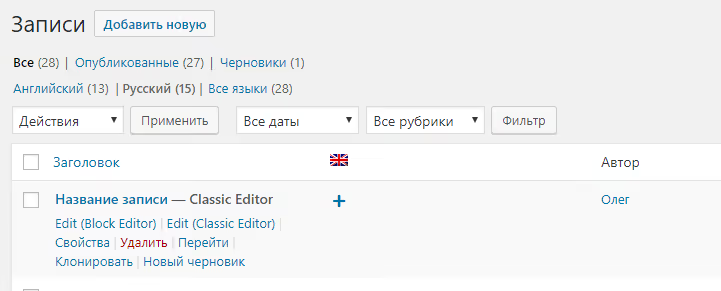
Let's verify: Russian posts have appeared in the admin panel:
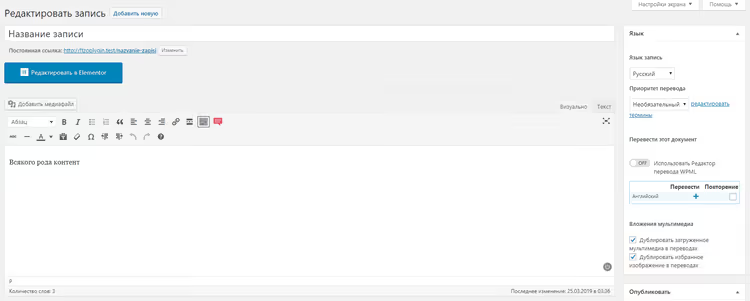
Open any one of them: the content is there, the title is correct:
The primary language version is uploaded. Now for the translation.
Step 3. Prepare and import the translation
Create a second CSV for English content. The column structure is the same: Title, Content, WPML Language Code, Connector. But now:
- In the WPML Language Code column, specify
en - In the Connector column, use the exact same identifiers as in the Russian file; this is critical for linking

Save as EN_import.csv, and again check for UTF-8 without BOM encoding.
Start a new import in WP All Import and upload the English CSV. The upload steps and "Next" button clicks are identical to the Russian import; we'll stop at the key moment: content and language configuration.
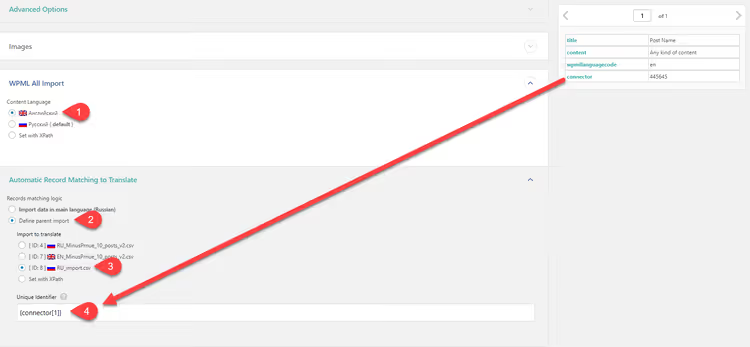
Three rules for this step:
- Map Title and Content exactly as you did for the Russian file.
- In the WPML All Import section, select English as the language.
- Drag
{Connector[1]}into the unique identifier field.
If you mix up the language or forget the Connector, the translations won't link, and each language will exist independently.
Proceed to import. At this step, verify once more that the Unique Identifier field contains {Connector[1]}:
Launch:
Green page, done:

Go to the English posts list and see the magic: translations are in place, and each one already "knows" about its Russian original:

Open a post: the content is in English, and the Russian version is linked in the WPML language switcher:
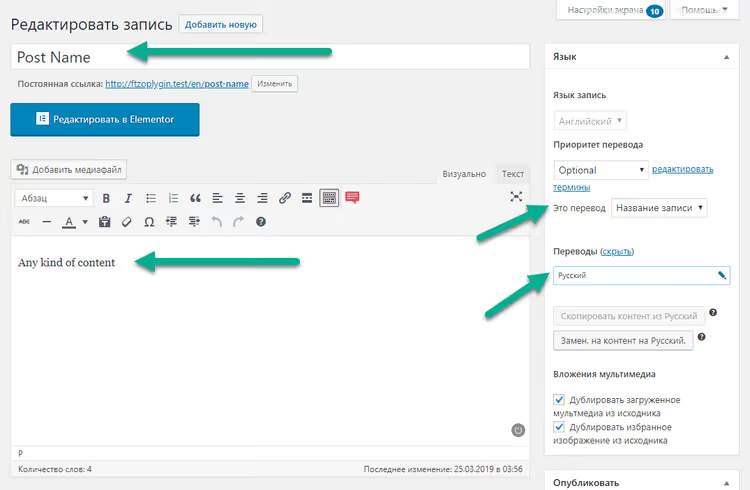
Done. Russian and English content are uploaded and linked, all in one pass.
⁉️🤔 Frequently asked questions
What should I do if WP All Import doesn't see the CSV columns?
Open the file in Notepad++ and check the encoding; it must be strictly UTF-8 without BOM. Also make sure the delimiter is a comma, not a semicolon (this depends on Excel's regional settings). If the problem persists, re-save the CSV through Google Sheets: "File → Download → CSV (UTF-8)". Google Sheets doesn't add BOM and correctly handles Cyrillic characters, unlike some versions of Excel.
Is it mandatory to use Connector, or can translations be linked by title?
Connector is the only reliable method. Titles can match across different posts, can be modified during import, and WPML requires a unique identifier. Come up with a simple numbering scheme (1, 2, 3…) or use IDs from your old database; what matters is that the value is identical in the Russian and English CSV files. In practice, we use numeric identifiers: they're impossible to confuse, and they don't depend on the content language.
Does this method work for custom post types (CPT)?
Yes, fully. WP All Import Pro supports any registered post types; select the one you need from the dropdown on the first import step. The Connector linking works identically for posts, pages, WooCommerce products, and CPTs. The author tested this method specifically on a custom post type, and it worked.
Do I need WP All Import Pro, or is the free version sufficient?
The free version of WP All Import supports basic import, but for linking translations through a unique identifier and for custom fields, you need the Pro version. If you're importing 5-10 posts and are willing to link translations manually, the free version will suffice. For regular work with dozens or hundreds of posts, Pro pays for itself after the first import.
Where do I get the Content column for translation if the content hasn't been translated yet?
Translate it beforehand using any convenient method: through translation services (DeepL, Google Translate), professional translation agencies, or AI auto-translation. The key is that by the time of import, the English CSV already contains the final text in the Content column. WPML and WP All Import don't translate for you; they only upload and link ready content.
Will this method work for your project
This method is working, tested, and documented in the official WPML guide. Once you've set up a CSV template, you'll be able to import content in two, three, or more languages in minutes, not days.
But it's not the only option. If your volumes are small (up to 20 posts), you might find it more convenient to create Russian posts through WP All Import and handle translations through WPML's standard translation interface, either manually or with auto-translation. And for massive amounts of content (thousands of posts, dozens of languages), it makes sense to look into WP CLI or a custom script using the WP REST API.
Try it on a test copy of your site, experiment with one or two posts, and only then run the full import. This rule saves hours of rollbacks.

A professional team of writers and editors specializing in creating quality content.