














⚡ How to optimize images in WordPress with EWWW Image Optimizer
A slow website is frustrating. But it's even more annoying when the bottleneck isn't your code or hosting, just images that nobody bothered to compress. Google PageSpeed Insights flags "optimize images" in red on every audit, and you lose search rankings along with visitor patience.
Since 2015 Google has used speed as a ranking factor. Images account for more than half of the average page weight, so compressing them delivers the fastest and most noticeable performance boost. A single plugin handles this task completely.
EWWW Image Optimizer, a free tool with 1+ million active installs, compresses JPG, PNG, GIF and WebP right on your server without third-party APIs or limits. This guide walks you through setup step by step, from installation to bulk optimization and verifying the results.
💡 Quick overview:
- Install EWWW Image Optimizer and check server compatibility; the plugin will show what's missing
- Configure compression levels: lossless for PNG/GIF, JPG quality 80; PageSpeed will stop complaining about images
- Enable WebP conversion and add the rewrite rules; Google's format cuts size by 60% with no quality loss
- Run Bulk Optimizer on all existing images and verify the result in PageSpeed Insights
1. Installation and server compatibility check
Install the plugin through the WordPress admin or by downloading the ZIP from wordpress.org. Right after activation go to Settings → EWWW Image Optimizer.
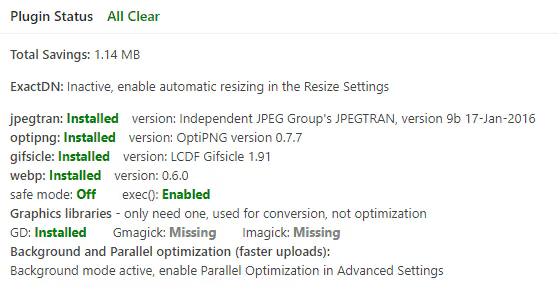
The first thing you'll see is the "Plugin Status" block. Green checkmarks mean everything required is installed. Missing modules are highlighted in red: jpegtran for JPG compression, optipng for PNG, gifsicle for GIF and cwebp for WebP conversion. Most hosts enable them by default, but if something is missing contact your host's support. The plugin also offers cloud optimization via Compress API when local utilities are unavailable.
At this point it's worth checking the section on WordPress loading speed; image optimization is just one of 21 techniques that together put you in PageSpeed's green zone.
2. Basic plugin configuration
The "Basic Settings" tab is where you set the foundation for how the plugin works.
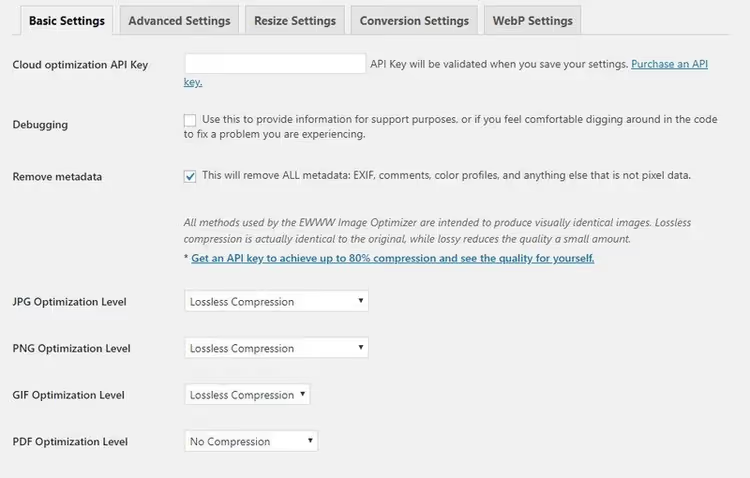
API key for cloud optimization. Optional. The developer provides free credits for testing the cloud mode in exchange for your consent to send anonymous usage statistics. Local utilities work just as well with no limits, and for most sites that's all you need.
Remove metadata. Enable this. Smartphones and cameras embed EXIF/IPTC tags in files: shooting coordinates, device model, date. That's extra weight and a potential privacy leak. Clients often have no idea their photos store GPS coordinates.
Compression levels. For JPG, PNG and GIF choose "Lossless." According to the developer, average savings with lossless compression are 8% of the original size. Leave PDFs uncompressed: first, it's a premium feature; second, PDFs are typically offered for download and their size doesn't affect page load speed.
3. Advanced settings and JPG quality
The "Advanced Settings" tab contains parameters that directly affect PageSpeed Insights results.
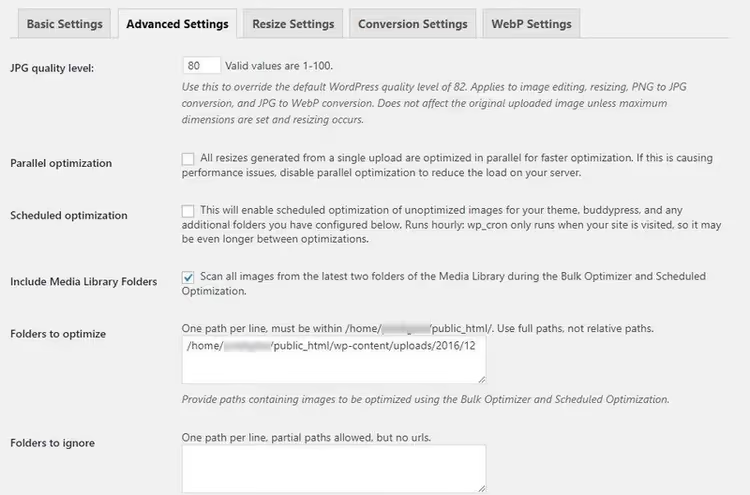
JPG quality. WordPress compresses JPG at level 82 by default. I recommend setting it to 80; the difference is invisible to the eye, and PageSpeed stops complaining about "unoptimized images." Across dozens of sites this setting has never produced a false positive.
Parallel and scheduled optimization. If you have a business site with infrequent image uploads you can leave these options alone. Manually running Bulk Optimizer as needed is a sufficient workflow. On a powerful server with frequent posts, enable scheduled optimization.
Folders to optimize. During bulk runs the plugin scans the two most recent media library folders. That's almost always enough. If you find folders that were missed, add them manually, but click "Save" immediately afterward. Switching to another tab before saving resets the paths you entered; this is a known quirk of the plugin.
The options "Enable embedded help" and "Allow usage tracking" are up to you.
4. Image resizing
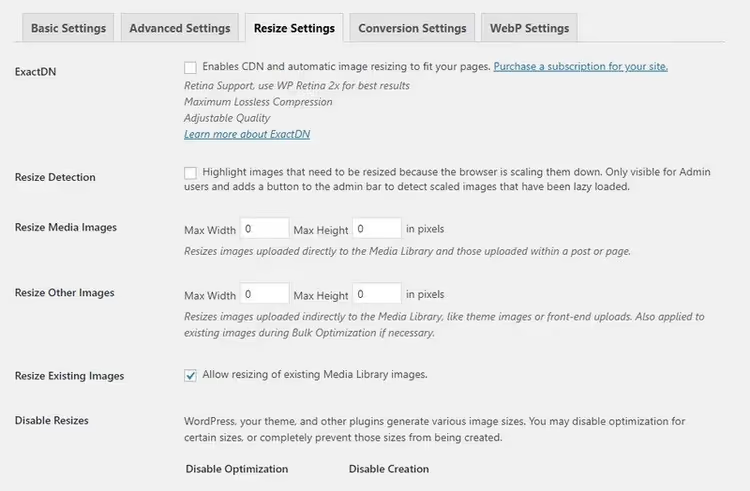
The main option to enable is "Enable resizing of existing images." If a 2000-pixel-wide image is inserted into a 480-pixel column, CSS scales it visually, but the browser still downloads the full-size file. This setting crops the actual dimensions to what's needed.
Image Detective is a useful feature for auditing. When enabled, you see (while logged in) images on the site that load at a higher resolution than they display. It's a quick way to find resize candidates without manually combing through the media library.
5. Converting to WebP
WebP is a format from Google that weighs 25-35% less than JPG and up to 60% less than PNG at comparable quality. All modern browsers support it. EWWW can automatically generate WebP versions for every uploaded image.
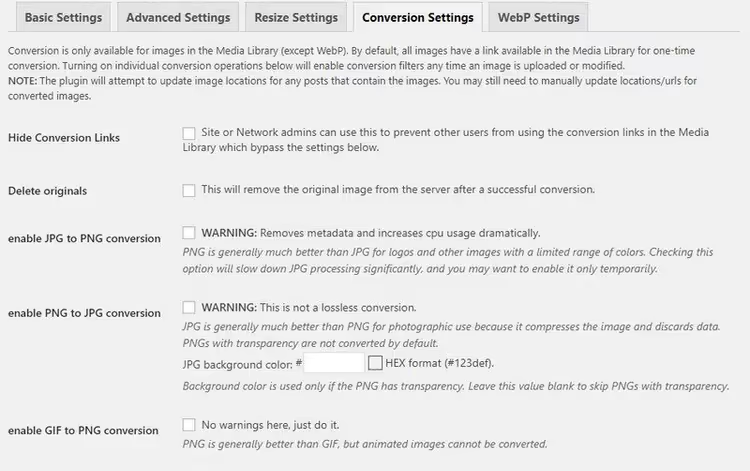
Enable the "JPG/PNG to WebP" option. Leave Force WebP, WebP URLs and Alternative WebP Rewriting empty; the standard mechanism is enough for most configurations.
The key step is to click "Insert Rewrite Rules." The plugin adds directives to .htaccess that serve the browser a WebP version of the file when it supports the format. After successful insertion the indicator changes from a red "PNG" to a green "WEBP."
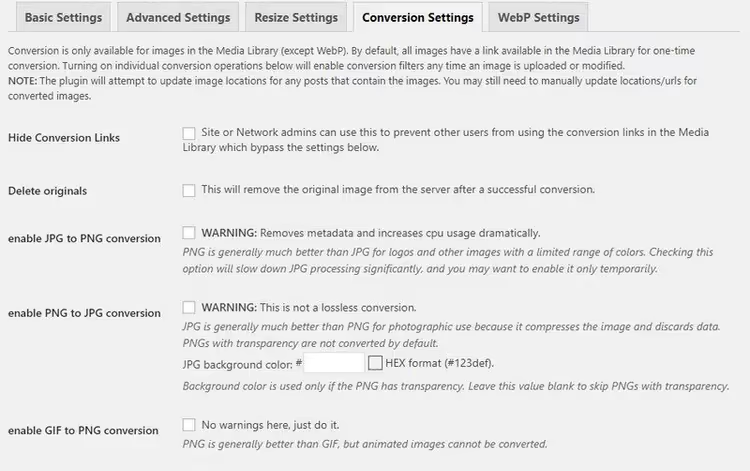
On the "Conversion" tab I recommend enabling "Preserve original images." The plugin replaces a file with the optimized version only if it's smaller than the original. A few dozen megabytes for backups is a reasonable insurance against mistakes.
6. Bulk optimization with Bulk Optimizer
All settings are configured; now we compress the existing media library.
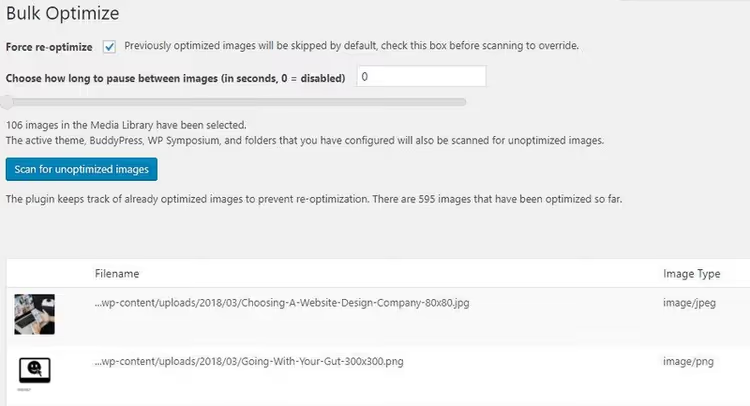
Go to Media → Bulk Optimizer. On the first run you don't need the force re-optimization or pause-between-images flags. Click "Scan for unoptimized images" and a progress bar will appear.
The plugin goes through the media library, theme folder and any preconfigured directories. For a site with a couple hundred images the process takes minutes. You see the savings for each file and a cumulative total.
If PageSpeed still flags certain files after the run, copy the path to the folder and add it to the list of folders to optimize, then run the scan again.
7. Verifying the result
Open Google PageSpeed Insights and enter the URL of a few pages on your site. The audits "Serve images in next-gen formats" and "Efficiently encode images" should show green status.
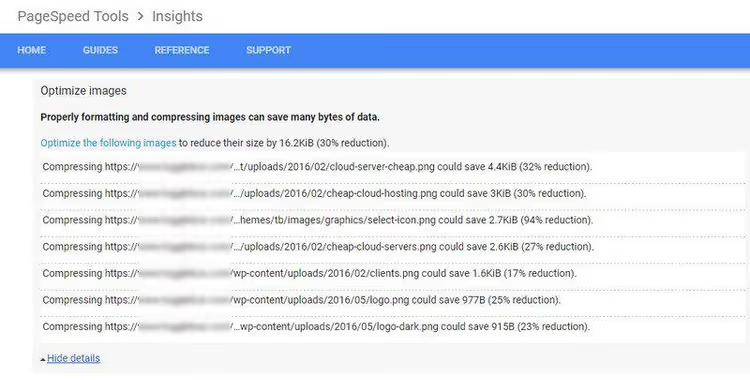
The numbers may look modest: 16-30 KB saved per image. But multiply that by 50 images on a page and thousands of pageviews per month, and the cumulative effect is measured in megabytes of traffic and seconds of load time. For mobile visitors on a slow connection that's the difference between "stay" and "close the tab."
If you want to dig deeper, here are 21 techniques for speeding up WordPress that cover not only images but also caching, scripts, fonts and the database.
The video below shows a hands-on installation and setup of EWWW Image Optimizer in 8 minutes.
⁉️🤔 Frequently asked questions
Does the plugin compress originals or create copies?
By default EWWW replaces the original file with the optimized version, but only if it is SMALLER than the original. The plugin will never make an image heavier. On the "Conversion" tab you can enable backup storage; originals will remain in a separate folder
wp-content/ewww/backup/.
What if my server doesn't support local compression utilities?
Enable the cloud Compress API. It's free for lossless JPG compression and WebP conversion. You just need to allow anonymous usage statistics in the settings. If that option doesn't work either, consider alternatives like ShortPixel or Smush.
How do I verify that WebP is being served to the browser?
Open DevTools (F12) → Network tab → filter by type Img. In the Type column for your site's images you should see
webp. Alternatively, in the browser address bar open a direct link to an image from the site; Chrome and Firefox will show the WebP version if it exists.
Bulk Optimizer froze halfway through. What should I do?
Refresh the page and start again. The plugin remembers progress and will resume from the same point. If the problem repeats, increase the pause-between-images value in the settings and try excluding particularly large files from the queue via the
ewww_image_optimizer_timeoutfilter.
Do I need EWWW if my host already compresses images?
Host-level compression usually works on the fly and doesn't modify the original file; it serves a cached version through its CDN. EWWW optimizes the files themselves in the media library. They work best together: EWWW shrinks the originals, and the host cache delivers them quickly. Disable overlapping features (for example, double WebP conversion) if they conflict.
What has changed in EWWW by 2026?
The plugin is actively developed. In version 8.x native AVIF support appeared. This next-generation format according to AVIF developer tests delivers up to 50% file size savings compared to WebP at the same quality. However, AVIF conversion is currently a premium feature through the Easy IO CDN subscription.
Lazy Load with auto-scaling is now built into the free version and correctly reserves space for images, eliminating Cumulative Layout Shift (which PageSpeed also penalizes).
If you need a simple, out-of-the-box solution for image optimization, EWWW Image Optimizer remains one of the best free options. Configure it once following the steps in this guide and forget about red warnings in PageSpeed.

A professional team of writers and editors specializing in creating quality content.