














🚀 Scrollify: step-by-step setup of smooth section scrolling in Elementor
When a visitor lands on a page built in Elementor and sees jerky scrolling with jumps between sections, trust in the site drops faster than the scroll reaches the footer. Especially if the page is heavy: background video, parallax effects, a dozen sections with animation. The browser's standard scroll can't smoothly lock onto block boundaries, it just slides past them.
You can spend hours selecting caching plugins, minification and workarounds. Or you can add one lightweight script that turns rough transitions into smooth section flipping, like on expensive landing pages.
We're talking about Scrollify, a jQuery plugin by Luke Haas that's been on GitHub for years, has 1800+ stars and still works where "modern" solutions stumble over conflicts with Elementor. No subscriptions, no tons of dependencies, one .js file and a dozen configuration lines.
💡 Quick overview:
- Installing Scrollify: download the script from GitHub and connect it in
functions.php - Setting up sections in Elementor: CSS class, minimum height and margins
- Basic configuration: breakdown of scrollSpeed, easing, setHeights and touchScroll options
- Vertical navigation: integration with the Scroll Navigation widget from JetElements
- Fine customization: replacing standard circles with SVG icons via CSS
- Common problems: bottom margin, scroll shake, anchor conflict and their solutions
What is Scrollify and what's special about it
Scrollify is a jQuery plugin that forcibly binds scroll to section boundaries. The user spins the wheel, the page doesn't move smoothly, it snaps to the next block. The behavior resembles swiping between screens in a mobile app, only on desktop and via mouse wheel.
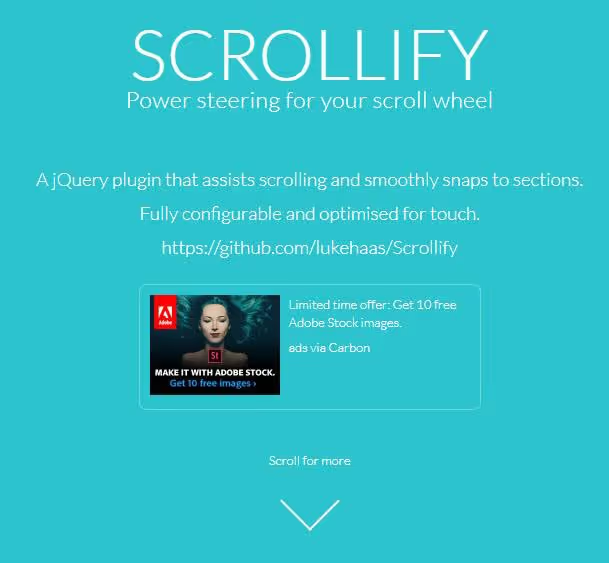
The main advantage is predictability. You know exactly which block a visitor will see after scrolling. No "overshoots" and half-scrolled sections. The plugin is optimized for touch devices and can work with dynamic content, you can load sections via AJAX, Scrollify will recalculate positions.
Out of the box available: hash navigation (direct links to sections), interruption between sections for non-standard blocks (footer, header), callback functions before/after/afterRender/afterResize.
Installation and basic configuration
jQuery 1.7 or newer is required. In 2026 this sounds archaic, but in practice most WordPress themes and plugins still pull jQuery into the footer, there won't be a conflict.
Download jquery.scrollify.js from the GitHub repository lukehaas/Scrollify and connect it in the site footer via functions.php:
1 add_action('wp_enqueue_scripts', function () { 2 wp_enqueue_script( 3 'scrollify', 4 get_template_directory_uri() . '/js/jquery.scrollify.js', 5 ['jquery'], 6 '1.1.1', 7 true 8 ); 9 });
The simplest launch option is to point Scrollify at elements with a specific CSS class:
1 jQuery(document).ready(function ($) { 2 $.scrollify({ 3 section: '.example-classname', 4 }); 5 });
The complete list of configuration options looks like this:
1 $.scrollify({ 2 section: '.example-classname', 3 sectionName: 'section-name', 4 interstitialSection: '', 5 easing: 'easeOutExpo', 6 scrollSpeed: 1100, 7 offset: 0, 8 scrollbars: true, 9 standardScrollElements: '', 10 setHeights: true, 11 overflowScroll: true, 12 updateHash: true, 13 touchScroll: true, 14 before: function () {}, 15 after: function () {}, 16 afterResize: function () {}, 17 afterRender: function () {}, 18 });
Key parameters worth adjusting immediately: scrollSpeed (animation speed in milliseconds, default 1100, for long landing pages better to reduce to 600-800), setHeights (auto-adjust section height to viewport), updateHash (adds #section-name to URL when scrolling).
Integrating Scrollify with Elementor: three steps
For Scrollify to pick up sections built in Elementor, you need to mark them up correctly. Randomly placed blocks without classes will simply not be seen by the plugin.
Step 1: assign a CSS class to each section
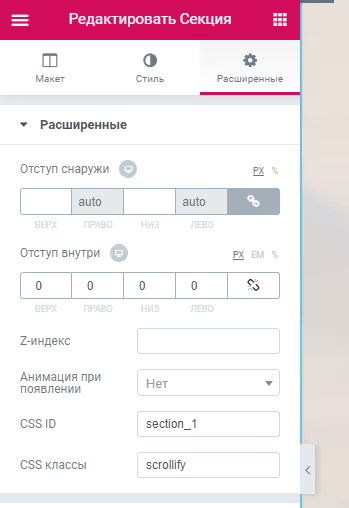
Open section editing in Elementor, go to the "Advanced" tab and in the "CSS class" field enter a value, for example, .scrollify (without the dot, Elementor adds it itself). The class should be the same for all sections participating in frame-by-frame scrolling.
Step 2: set minimum height
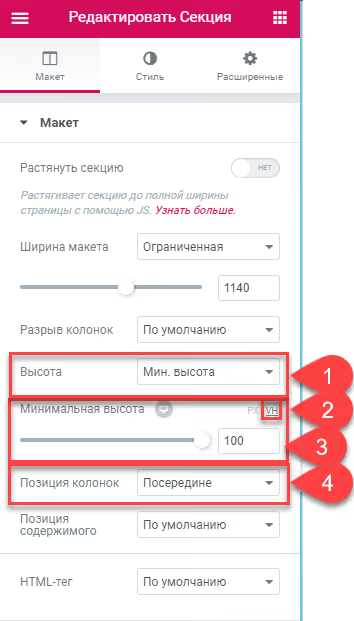
Through trial and error it was found: to avoid jerking when scrolling, sections need a minimum height of 100vh and margins zeroed out. On the "Layout" tab set:
- Minimum height:
100 VH - Padding:
0on all sides
Step 3: write configuration for your site
Below is a production config used on real projects. Screen width is checked so that on mobile devices (less than 1000px) scrolling remains normal, sectional scrolling on a phone is more of a hindrance than a help:
1 jQuery(document).ready(function ($) { 2 if ($(window).width() > 1000) { 3 $.scrollify({ 4 section: '.scrollify, .footer', 5 interstitialSection: '', 6 easing: 'easeOutExpo', 7 scrollSpeed: 1000, 8 offset: 0, 9 scrollbars: true, 10 standardScrollElements: '.footer', 11 setHeights: true, 12 overflowScroll: true, 13 updateHash: false, 14 touchScroll: true, 15 }); 16 } 17 });
Note: both .scrollify and .footer are passed to section. The footer should not participate in frame-by-frame scrolling as a full section (it's usually less than 100vh), but Scrollify should know about it, that's what standardScrollElements is for.
Vertical navigation via JetElements Scroll Navigation
Frame-by-frame scrolling without navigation is like a book without a table of contents. So a visitor can jump to the desired section with one click, let's add a vertical menu.

Here JetElements from Crocoblock enters the scene, one of the most powerful sets of additional widgets for Elementor. It includes the Scroll Navigation widget, which draws a vertical panel with dot indicators and links them to sections.
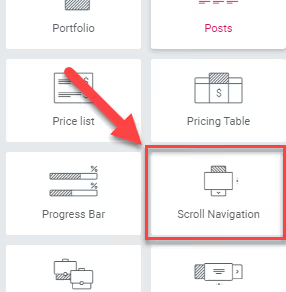
After installing JetElements find the widget in the panel and drag it onto the page. Next, two reciprocal actions.
First, link the navigation to sections. In the widget settings for each item specify the ID of the corresponding section:
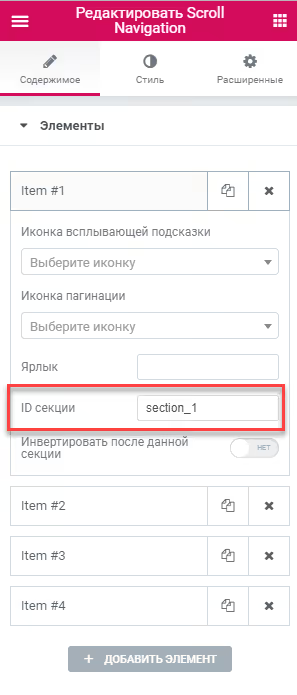
Then open each section in Elementor and write the same ID in the "CSS ID" field on the "Advanced" tab:
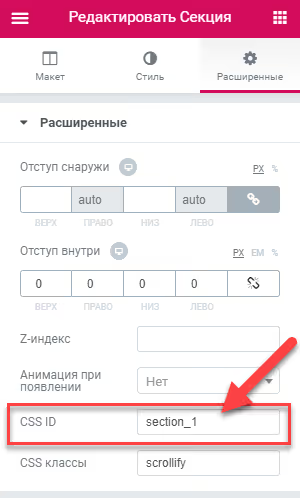
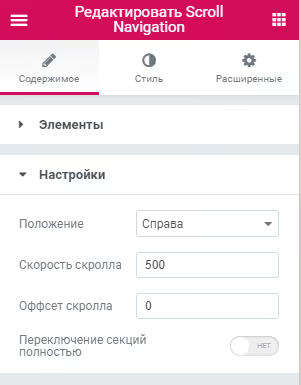
The main setting that's better not to touch is the "Switch sections completely" toggle. If the block content is physically taller than the user's screen (for example, on a laptop with a small display), part of the content will be cut off and not shown.
The remaining parameters are intuitively clear. Here's a set proven in practice:
Customizing navigation markers: changing circles to icons
Standard circles in Scroll Navigation are functional but boring. Replacing them with SVG icons is a matter of one CSS block.
Below is a ready snippet. For each section its own data-anchor and its own icon. Icons (SVG) should be pre-uploaded to the WordPress media library and substitute the URL:
1 /* General styles for all vertical menu items */ 2 div.jet-scroll-navigation__dot { 3 width: 40px; 4 height: 40px; 5 background-repeat: no-repeat; 6 background-position: top; 7 background-size: 40px; 8 background-color: #f0f8ff00 !important; 9 border-radius: 0% !important; 10 } 11 12 /* #1 */ 13 [data-anchor="section_1"] div.jet-scroll-navigation__dot { 14 background-image: url(/wp-content/uploads/2019/01/home.svg); 15 } 16 /* #2 */ 17 [data-anchor="section_2"] div.jet-scroll-navigation__dot { 18 background-image: url(/wp-content/uploads/2019/01/layers.svg); 19 } 20 /* #3 */ 21 [data-anchor="section_3"] div.jet-scroll-navigation__dot { 22 background-image: url(/wp-content/uploads/2019/01/suitcase.svg); 23 } 24 /* #4 */ 25 [data-anchor="section_4"] div.jet-scroll-navigation__dot { 26 background-image: url(/wp-content/uploads/2019/01/success.svg); 27 } 28 /* #5 */ 29 [data-anchor="section_5"] div.jet-scroll-navigation__dot { 30 background-image: url(/wp-content/uploads/2019/01/users.svg); 31 } 32 /* #6 */ 33 [data-anchor="section_6"] div.jet-scroll-navigation__dot { 34 background-image: url(/wp-content/uploads/2019/01/smartphone.svg); 35 }
To find your section's data-anchor, open developer tools in the browser (F12), find the navigation element and look at the attribute value.
Animation effects: easing library
Standard easeOutExpo is just one of dozens of smoothing functions available through jQuery Easing. See the complete catalog with visualization of each curve at easings.net.
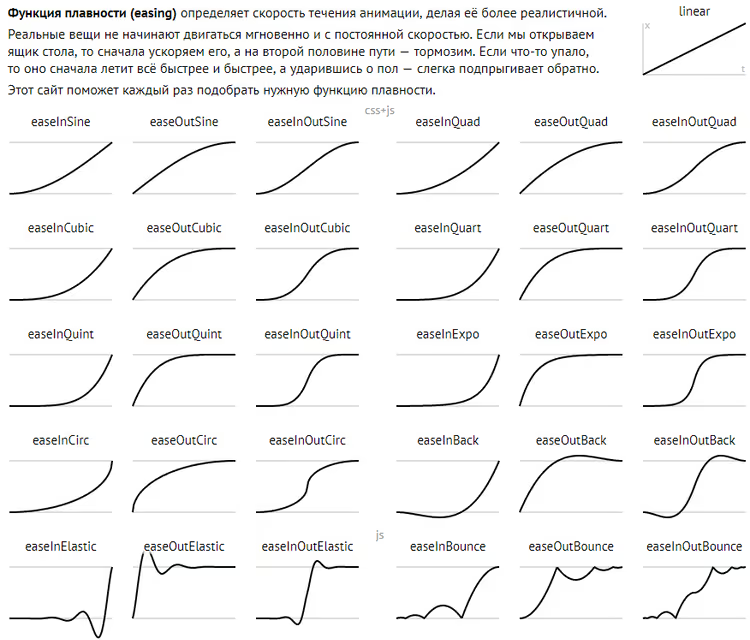
To connect download jquery.easing.1.3.js and connect it in the footer similar to Scrollify, necessarily before calling $.scrollify(). After that in the easing parameter you can use any function from the catalog, from easeInOutCubic and easeOutBounce to easeInOutBack and dozens of others.
Common problems and their solutions
Over several years of using Scrollify on WordPress sites a list of recurring pitfalls has accumulated. Here they are with ready answers.
Problem 1. After connecting Scrollify the first section displays with a bottom margin of about 20 pixels, even though padding is not set anywhere. Cause. Horizontal scroll, hidden via overflow-x: hidden, is technically present in the DOM. Scrollify honestly accounts for its height in calculations. Solution. Add CSS rule padding-bottom: 20px; to the section.
Problem 2. Scroll works but the page shakes heavily when scrolling. Cause. Conflict with another jQuery plugin or script that also manipulates scroll. Solution. Methodically disable plugins one by one, checking scroll behavior after each disable. Don't forget to clear browser and site cache.
Problem 3. Developer console gives error: Scrollify warning: ID matches hash value, this will cause the page to anchor. Cause. Some plugin inserts an anchor in the page URL, due to which Scrollify cannot correctly determine the current position. For example, on the combination of Zita theme and Popups plugin the situation reproduced stably. Solution. "Neutralize" the anchor in jQuery script via return false:
1 jQuery(document).ready(function ($) { 2 $('.AddToAny_View').click(function () { 3 SPU.show(1064); 4 return false; 5 }); 6 });
Problem 4. Scrollify should work only on the home page and only for desktop. Solution. Wrap the call in a check for body class and window width:
1 if ($(window).width() > 1200 && $('body').hasClass('home')) { 2 $.scrollify({ 3 // your config 4 }); 5 }
Scrollify in 2026: alternatives and verdict
Scrollify is not the only solution for sectional scrolling. In 2026 a WordPress developer has at least three alternatives:
CSS property scroll-snap-type, native browser implementation without JavaScript. Works fast, but animation customization is limited (no easing, can't set speed). For simple landing pages, an excellent option.
Lenis, a modern smooth scroll engine from Darkroom studio. Doesn't bind to sections rigidly, but creates an effect of inertial smoothness. Integrates with Elementor via custom code.
Smooth Scroll widget from Unlimited Elements for Elementor, a no-code solution with visual settings for speed and frame rate.
But if you need exactly frame-by-frame, predictable scrolling with navigation and full control over every aspect, Scrollify remains a working and proven tool. 1800 stars on GitHub, open issues get closed, the script lives in production on thousands of sites.
Watch a short video on setting up smooth scroll in Elementor, the entire process from widget installation to final result is clearly shown:
⁉️🤔 Frequently asked questions
Is jQuery required for Scrollify in 2026?
Yes, Scrollify is tightly dependent on jQuery. If your site has completely gotten rid of jQuery (for example, you use Bricks or a custom theme on pure JS), better look at
Lenisor nativescroll-snap-type. But for a typical WordPress site jQuery is almost certainly already loaded by the theme or one of the plugins, there will be no additional load.
What's better for Elementor: Scrollify or built-in motion effects?
Elementor's built-in Motion Effects are responsible for animating elements inside a section (fade, slide), not for scroll behavior between sections. These are different tasks. Scrollify controls exactly transitions between blocks, they can and should be combined.
Does Scrollify work with Elementor Flexbox Container?
Yes, it works. Activate Flexbox Container in Elementor settings, assign CSS class to sections via the container's "Advanced" tab, the mechanics are the same as with classic sections.
Why did Scrollify stop working after updating Elementor?
Most likely, the section's CSS class or ID got reset. Elementor with major updates sometimes resets custom attributes. Check that the "CSS class" field in each section still contains
.scrollify, and IDs match those written in Scroll Navigation.
Can Scrollify be used on a site without WordPress?
Yes, Scrollify is not tied to WordPress or Elementor. Connect jQuery and
jquery.scrollify.js, mark up HTML sections with the needed class and call$.scrollify(), everything will work on any site, from pure HTML to React (with caveats about jQuery dependency).
Scrollify or alternative: what to use for a specific task
The choice comes down to three scenarios. If you have a classic landing page on Elementor with 5-8 sections and vertical navigation, Scrollify + JetElements Scroll Navigation give a ready result in an hour. If you're starting a new project without jQuery and want minimal dependencies, scroll-snap-type on CSS will solve the task with a couple of lines. If you need smoothness without rigid binding to sections, use Lenis.
The main thing that practice has shown: Scrollify doesn't let you down where "trendy" solutions fall due to conflicts with the heavy ecosystem of WordPress plugins. Sometimes stability is more important than novelty.

A professional team of writers and editors specializing in creating quality content.