














🖼 How to compress images in WordPress: complete 2026 guide
You uploaded a couple of product photos, and the site started crawling. The page takes 6 seconds to load, Google PageSpeed Insights is screaming red warnings, and visitors leave before the page even finishes loading.
According to HTTP Archive, images account for about half of the average page's weight. You can't remove them since a site without images looks bare. But you can compress them so that the quality difference is invisible to the eye while the file size drops dramatically.
Below is a complete guide: from automatic plugins to manual tools. Every method has been tested on a live site.
💡 Quick overview:
- Check your current image weight using GTmetrix or PageSpeed Insights.
- Install an automatic compression plugin like Smush or Imagify to get started.
- Set up conversion to WebP or AVIF for additional gains.
- Top off the results with caching and a CDN for maximum speed.
Why compress images at all
A JPEG file from a camera weighs 3-8 MB. Even after WordPress resizes it to 1200px, it rarely drops below 300-500 KB. Ten such images on a page, and you end up with 3-5 MB of graphics. On a mobile network, that means 8-12 seconds of loading time.
Google has counted speed as a ranking factor since 2018, and with the introduction of Core Web Vitals in 2021, the LCP (Largest Contentful Paint) metric became a direct signal. A hero image in the first viewport that takes longer than 2.5 seconds to load drags your rankings down.
Compression solves the problem radically: the same 10 images after optimization weigh 300-600 KB total. Users see the page instantly, and the search engine doesn't penalize you.
Method 1: Automatic compression plugins
Plugins are the most convenient route. They install in a minute and work without human intervention: every upload to the media library automatically runs through the optimizer. Most can also process old files in bulk.
Smush
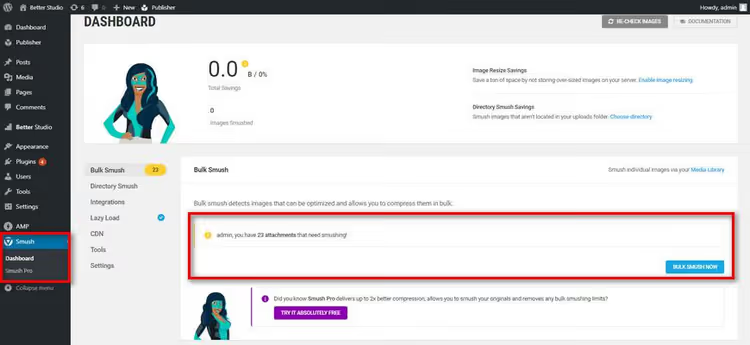
Smush holds the position of the most popular compression plugin: 1 million active installations and a 4.8 rating on WordPress.org. It has three modes: Lossless (no quality loss), Lossy (smart compression with minimal difference), and Super Lossy (maximum compression).
The key feature is that lazy load is built right into the plugin. Images load only when the user scrolls to them, reducing the initial page weight without additional tools.
- Pros: automatic compression on upload, bulk optimization of up to 50 images per click, compatibility with Multisite and Gutenberg.
- Cons: the free version is limited to 5 MB per file, so for DSLR photos you'll need to resize manually or get Pro.
- Price: Free / Pro from $6 per month.
- Download: 🔗 Smush on WordPress.org
Imagify
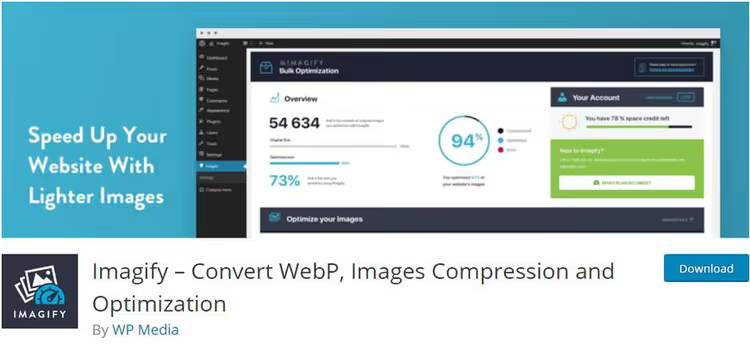
Imagify is made by the same team behind WP Rocket, one of the best caching plugins. The philosophy is the same: everything works out of the box without fiddling with settings.
Three compression modes (Normal, Aggressive, and Ultra) cover any scenario. For a blog, Aggressive is enough: the difference from the original is invisible, and the developers claim savings of up to 70%. Built-in backup lets you revert images to their original state and try a different mode.
- Pros: honest compression without artifacts, backup of originals, intuitive interface.
- Cons: free limit of 250 images per month (20 MB), larger sites need a paid plan.
- Price: Free / from $4.99 per month for unlimited.
- Download: 🔗 Imagify on WordPress.org
Optimole

Optimole works differently: compression happens in the cloud, and images are served via CDN. Your server isn't loaded at all since the entire process is on the Optimole side.
The smart feature is adaptive delivery. The plugin detects the visitor's screen resolution and serves an appropriately sized image. Mobile users don't download a 2000px desktop original.
- Pros: cloud processing without server load, adaptive sizing, built-in CDN, watermarks in Pro.
- Cons: free limit of 5,000 visits per month, growing traffic requires a paid plan.
- Price: Free / from $22.52 per month.
- Download: 🔗 Optimole on WordPress.org
WP-Optimize
WP-Optimize is an all-in-one solution: image compression, database cleanup, and caching in a single plugin. Instead of three separate tools, you install one.
It supports PNG, JPG, GIF, BMP, and TIF. Bulk compression, automatic optimization of new uploads, and restoration of originals are all included. The free version is enough for most personal sites and blogs.
- Pros: three functions in one plugin, broad format support, automatic background processing.
- Cons: premium features (Multisite, lazy loading) only in Pro, interface is cluttered with tabs.
- Price: Free / Pro from $49 per year.
- Download: 🔗 WP-Optimize on WordPress.org
TinyPNG (WordPress plugin)

TinyPNG brought its famous online compressor to a WordPress plugin. The algorithm selectively reduces the number of colors in PNG and optimizes JPEG. The output looks identical while weighing half as much.
It supports Multisite, WooCommerce, animated PNG, and has no file size limit, a rare advantage in a free version.
- Pros: unlimited file size, WooCommerce integration, animated PNG support.
- Cons: requires registration on the TinyPNG website and an API key, free limit of 500 images per month.
- Price: Free (up to 500 compressions) / paid plans on the website.
- Download: 🔗 TinyPNG on WordPress.org
Robin Image Optimizer

Robin Image Optimizer stands out for having no artificial limits. No restrictions on the number of compressions, file size, or monthly volume: everything is free with no catch.
Three compression modes plus background optimization via WordPress Cron. The plugin is regularly updated. As of June 2026, the active version is 2.0.5 with 100,000+ active installations.
- Pros: completely free without limits, conversion to WebP and AVIF, background processing via Cron.
- Cons: fewer additional features than competitors, no built-in CDN.
- Price: Free.
- Download: 🔗 Robin on WordPress.org
Plugin comparison table
Plugin | Lossless compression | WebP/AVIF | Free limit | Lazy Load | Pro price |
|---|---|---|---|---|---|
Smush | Yes | Yes | 5 MB per file | Yes | from $6/mo |
Imagify | Yes | Yes | 250 img/mo | No | from $4.99/mo |
Optimole | Yes | Yes | 5,000 visits/mo | Yes | from $22.52/mo |
WP-Optimize | Yes | Yes | Unlimited | Pro | from $49/yr |
TinyPNG | Yes | No | 500 img/mo | No | paid plans |
Robin | Yes | Yes | Unlimited | Yes | Free |
Method 2: Online tools without a plugin
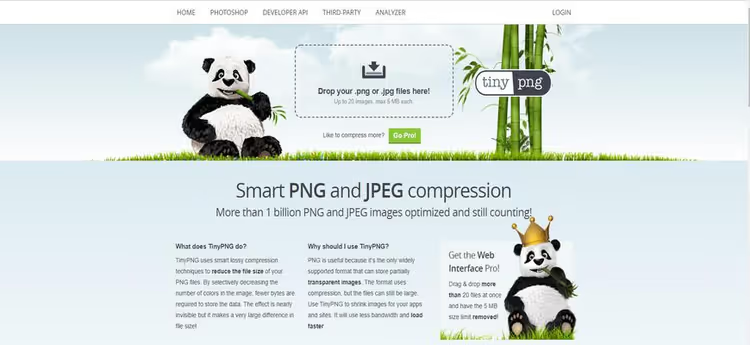
If you don't want to install a plugin, compress images before uploading. TinyPNG.com accepts PNG and JPEG up to 5 MB, up to 20 files at a time, and up to 100 per month for free. Drag and drop, get the compressed result, and upload to your media library already optimized.
Alternatives: Squoosh from Google (works right in the browser and shows before/after side by side), ShortPixel (online version with batch processing), Compressor.io (supports JPEG, PNG, SVG, GIF, and WebP).
The manual method works well for one-off tasks: prepare 5-10 images for an article and upload them. But for regular content, a plugin saves hours since you don't have to remember to compress before every upload.
Method 3: Converting to WebP and AVIF

Modern formats are not a separate tool but rather a finishing touch. The image is already compressed by a plugin but still in JPEG. According to Google, converting to WebP cuts the size by another quarter without visible changes.
All the plugins in the table above can automatically generate WebP copies on upload. If you use the manual method, convert via Squoosh or CloudConvert before uploading to the media library.
An important note: WebP is supported by all modern browsers (Chrome, Firefox, Safari, Edge). AVIF provides even stronger compression, but support is narrower, so for a mass-market site WebP is more reliable as the primary format with a JPEG fallback.
What else speeds up WordPress besides compression
Image compression gives the most noticeable boost, but it doesn't solve everything. Other speed levers include:
Page caching
Every visit to a WordPress site starts the PHP processor, triggers dozens of database queries, and assembles the page from scratch. Caching saves a ready-made HTML version and serves it instantly.
If your hosting doesn't provide built-in caching out of the box, install W3 Total Cache (free, flexible) or WP Rocket (premium, configured in 5 minutes).
CDN (content delivery network)
Your server is in the Netherlands while the visitor is in Brazil. Every kilometer adds latency. A CDN copies static assets (images, CSS, JS) to dozens of servers worldwide and serves them from the one closest to the user.
Jetpack offers a free CDN for images in its basic module. For full coverage (all static assets), look at Cloudflare: the free plan covers the needs of an average site.
Hosting

Budget shared hosting keeps hundreds of sites on a single server. When a neighboring project gets a traffic spike, your site slows down along with it. A VPS or managed WordPress hosting isolates resources: your site gets a guaranteed share of CPU and memory.
Switching from shared hosting to a VPS often delivers speed gains comparable to image compression, without a single change to the site's code.
Optimized theme

A theme with a page builder drags along megabytes of CSS and JavaScript. A lightweight theme without a visual builder shaves 200-400 ms off load time simply by switching templates. Check your theme's speed via GTmetrix on a fresh WordPress install: the result is often surprising.
GZIP compression
The server compresses HTML, CSS, and JS before sending them to the browser, like ZIP for web pages. GZIP doesn't affect images (they're already compressed), but it significantly reduces text resources.
Check if GZIP is enabled: open DevTools → Network → find any CSS file → check the response header content-encoding: gzip. If it's missing, add the following to .htaccess:
1 <IfModule mod_deflate.c> 2 AddOutputFilterByType DEFLATE text/html text/css text/javascript 3 AddOutputFilterByType DEFLATE application/javascript 4 AddOutputFilterByType DEFLATE application/xml 5 AddOutputFilterByType DEFLATE image/svg+xml 6 </IfModule>
The file is in the site root and accessible via FTP or your hosting's file manager. Make a copy before editing since a broken .htaccess takes down the site.
How to check if optimization is needed
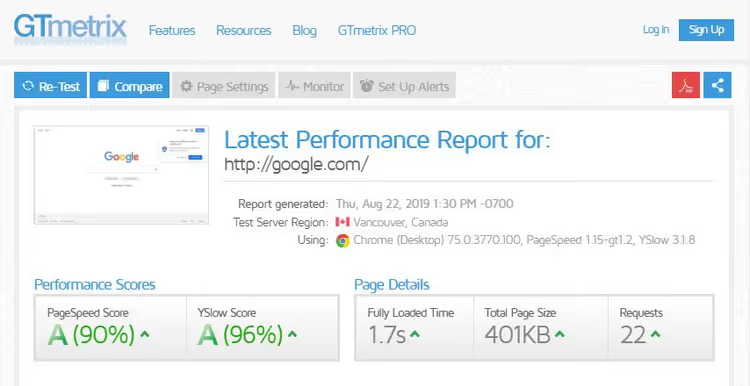
GTmetrix is a free benchmark that breaks down speed into components. Enter your URL, choose a server nearby (USA, Canada, UK, India, Australia, and Brazil are available), and within a minute you get a report.
Key metrics: LCP (how long the main content takes to load), TBT (how long the processor is busy with tasks), total page weight, and separately, image weight. If the "Images" tab is glowing red, you're in the right place: the methods described above will solve the problem.
Alternatives: Google PageSpeed Insights (the same data the search engine sees), WebPageTest (detailed waterfall with scenarios), Pingdom (simple and fast).
⁉️🤔 Frequently asked questions
Should I compress before or after uploading?
Automatic compression after upload is better: the plugin catches every upload so you never forget. But if you have 8-10 MB photos from a camera, resize them to 2000px on the long side first. WordPress will create reasonable thumbnails, and the plugin will compress them further. The optimal workflow is: resize on your computer to a reasonable resolution, upload to the media library, automatic plugin compression with WebP conversion. Double savings without extra effort.
Does quality suffer after heavy compression?
With lossy compression, the difference is only visible in pixel-by-pixel comparison. The human eye doesn't distinguish moderate data loss in JPEG. If the image isn't a photographer's portfolio, feel free to set Aggressive mode in Imagify or Lossy in Smush. For online store product cards, quality loss is critical since buyers need to see fabric texture or case details. In that case, use Lossless (compression without quality loss): it provides modest savings but preserves every detail.
What about images that are already uploaded?
All the plugins in the table above support bulk optimization: one click, and the media library runs through the compressor. Before starting, back up your site since bulk operations are irreversible without built-in backup (available in Imagify and WP-Optimize). If you have more than a thousand images, run optimization at night or in batches: some hosts terminate long processes due to timeouts. Good practice is to run 10-20 images first, check the results, then launch the full media library.
Which plugin should I start with?
If your site is small and you want free, Robin or Smush. Need an all-in-one solution (compression plus caching)? WP-Optimize. Cloud delivery and adaptive sizing are important? Optimole. You value simplicity and quality without hassle? Imagify. On a test site, we ran the same media library through three plugins: Imagify gave the best balance of size and visual quality, Smush was the fastest in processing time, and Optimole completely offloaded the server. The specific choice depends on your priorities.
What to do right now: step-by-step plan
A sequence of actions that will take 30 minutes and deliver noticeable results today:
- Open GTmetrix, enter your site URL, and record the current page weight and speed score as your baseline.
- Install Smush or Imagify, both are free and launch in two clicks. Enable automatic compression.
- Run bulk optimization on the existing media library: all images accumulated over the years will be compressed in one pass.
- After a couple of days, repeat the test in GTmetrix. Page weight should drop noticeably, and the score should rise into the green zone.
- Still seeing red? Add caching (W3 Total Cache) and a CDN (Cloudflare). These three steps together pull almost any site into shape.
If your site is on shared hosting and still lags after all optimizations, changing your plan or provider will help more than any plugin.

A professional team of writers and editors specializing in creating quality content.