













🚀 How to disable plugins for specific pages in WordPress
Why plugins slow down your site and how selective loading helps
Every active plugin means additional PHP code, database queries, and often its own CSS and JavaScript files. Even if a plugin does nothing on a particular page, WordPress still initializes its core with every request. The result is bloated server response time and extra kilobytes in the user's browser.
Nearly half of visitors leave a page if it takes longer than three seconds to load. At the same time, disabling necessary plugins entirely is not a solution: one handles SEO, another handles caching, and a third handles contact forms. All of them are needed, just not everywhere at once.
The solution is selective loading: a plugin is active only on pages where it is actually required. And you do not need to touch any code for this. The free Plugin Organizer gives you full control over which plugins load on which URLs, post types, and even for which user roles.
💡 Quick overview:
- Make a full site backup before starting, Plugin Organizer changes the plugin loading order, and a mistake can bring down your site
- Install Plugin Organizer from the WordPress.org repository and verify that the MU plugin was created
- Configure global plugins (disabled by default for all visitors), plugins by post type, and loading order
- For alternative scenarios, Asset CleanUp (asset management) and Plugin Load Filter (plugin × content type matrix)
Plugin Organizer features
Plugin Organizer is a free plugin with open source code that works through a must-use filter at the WordPress core level. It intercepts the list of active plugins before they load and modifies it according to your rules. This is not just disabling scripts on the frontend: the plugin is physically not initialized, and its PHP code is not executed.
What you get:
- Enabling and disabling plugins for specific URLs (including child pages)
- Filtering by user roles, for example, an affiliate plugin only for the "partner" role
- Binding plugins to post types (pages, posts, custom types)
- Changing plugin loading order, critical for dependent extensions
- Grouping plugins for loading together
Important point: Plugin Organizer does not replace completely removing unnecessary plugins. If a plugin is not used anywhere, delete it. This tool is for situations when a plugin is needed, but not everywhere.
Step-by-step Plugin Organizer setup
Plugin Organizer takes 15-20 minutes to configure. The interface is in English, but the logic is intuitive. We will go through all seven steps.
Step 1: Make a site backup
Plugin Organizer works at a low level, it changes the very list of loaded plugins. One incorrect setting can make your site unavailable. Before starting, make a full backup: files + database. Most hosts offer backup in their control panel, alternatively, plugins like UpdraftPlus.
Step 2: Install Plugin Organizer
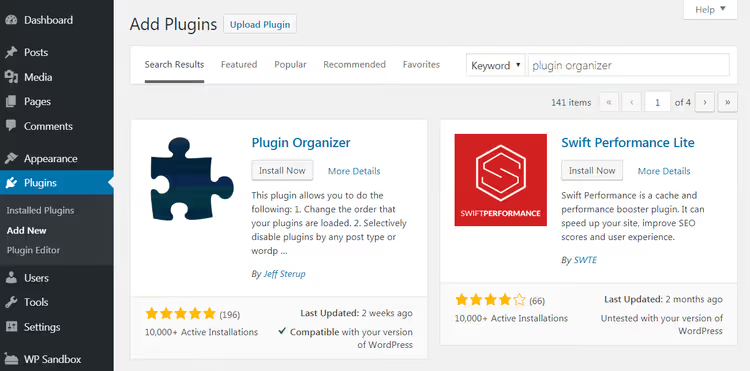
Installation is standard: go to "Plugins → Add New", enter "Plugin Organizer" in the search field, and click "Install Now". After installation, click "Activate".

Step 3: Configure plugin settings
Immediately after activation, go to Plugin Organizer → Settings. A page with general parameters will open, and it is important not to just click through "Save" but to understand each item.
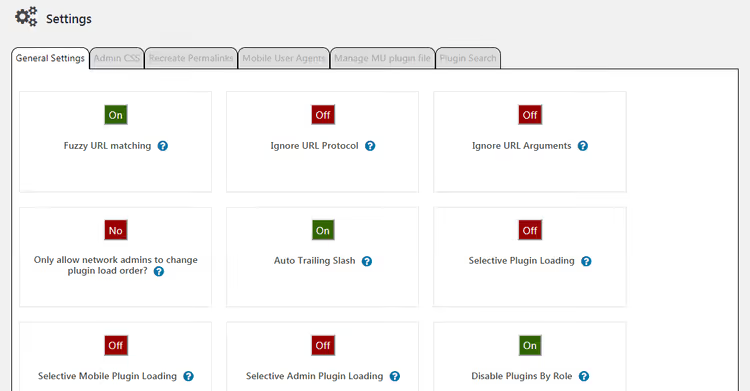
Let us examine the key options:
Fuzzy URL Matching enables loading plugins on child pages. If a rule is set for
/blog/, then with this option it will also apply to/blog/category/post/. I recommend enabling it.Ignore URL Protocol tells the plugin to ignore the difference between HTTP and HTTPS. Leave it off: modern sites only work over HTTPS, so there is no difference.
Ignore URL Arguments ignores URL parameters after the question mark. Keep it off unless you use UTM tags or filter parameters that affect plugin logic.
Only allow network admins to change plugin load order is for WordPress multisite networks. Enable it on multisite, on a regular site, disable it.
Custom Post Type Support is where you add the slugs of your custom post types, for example
portfolioortestimonials, so Plugin Organizer works on them too.Auto Trailing Slash removes the trailing slash in plugin URLs, aligning them with your permalink format. Usually worth enabling.
Selective Plugin Loading is the key option: it allows loading individual plugins only on selected pages, even if they are globally disabled. Enable it without fail.
Selective Mobile Plugin Loading is the same for mobile devices. Useful if you have plugins that are not needed on mobile (for example, desktop popups).
Selective Admin Plugin Loading allows loading plugins only in the admin area. For backup and debugging plugins, it is ideal.
Disable Plugins By Role disables plugins for selected user roles. Specify the roles in the Role Support field below.
When you have configured everything, click "Save Changes".
Step 4: Verify the must-use plugin was created
Plugin Organizer works through an MU plugin, a file that WordPress loads before regular plugins. It intercepts the list of active plugins and modifies it according to your rules.
Go to "Plugins → Installed Plugins" and check for the "Must-Use" tab:
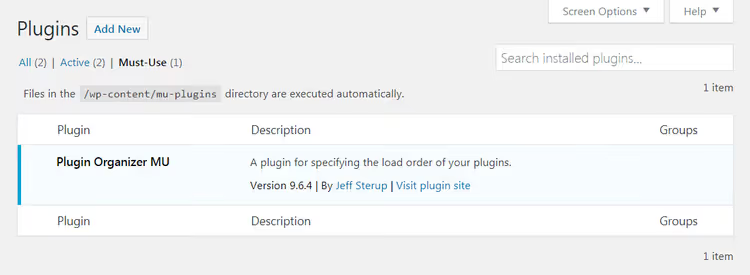
If the tab exists and "Plugin Organizer MU" is listed there, great, proceed to step 5. If not, you need to add the file manually. Connect to your site via FTP, find the file PluginOrganizerMU.class.php in /wp-content/plugins/plugin_organizer/lib/ and copy it to /wp-content/mu-plugins/. If the mu-plugins folder does not exist, create it.
Step 5: Configure global plugins
Global plugins are those disabled for all site visitors but kept active in the admin area. Typical candidates: backup plugins, debugging plugins, import/export plugins. Visitors do not need them, they only create load.
Go to Plugin Organizer → Global Plugins:
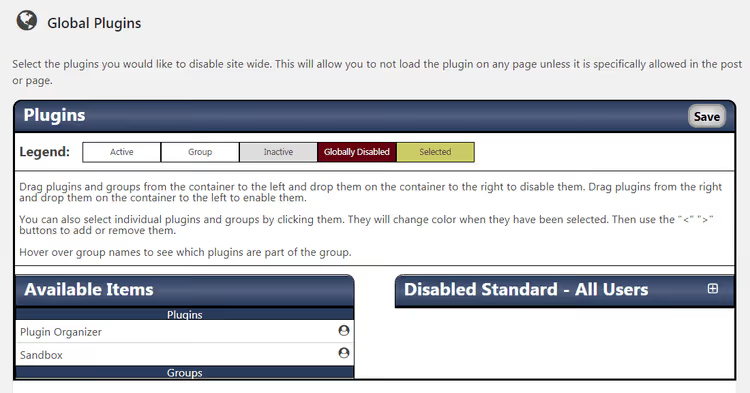
The interface is drag-and-drop. Drag plugins that visitors do not need to the "Disabled: All Users" column and save changes. For example, UpdraftPlus, Query Monitor, WP Migrate, all of them only work in the admin area or via cron, on the frontend they just add load.
Step 6: Disable plugins for post types
If you want to disable plugins not by URL but by content type, for example, an ecommerce plugin only on product pages, use Plugin Organizer → Post Type Plugins:
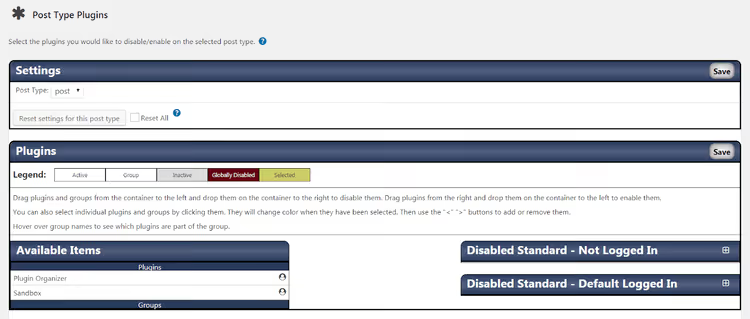
Select the post type from the dropdown list (pages, posts, custom types) and drag unnecessary plugins to the right. Granularity is available: for logged-in users, for guests, or for everyone.
Step 7: Configure plugin loading order
The final step is order and grouping. WordPress by default loads plugins in alphabetical order, but this is rarely optimal. If you have WooCommerce and its extensions, the main plugin must load first, otherwise extensions will not find the required classes and functions.
Go to Plugin Organizer → Group and Order Plugins:
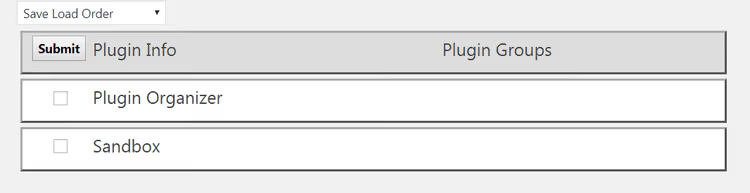
Drag plugins into the desired order. For grouping, select "Create New Group" from the dropdown, enter a group name, check the plugins included in it, and click "Submit". For example, you can group WooCommerce + all its extensions so they always load as a single block.
Alternative solutions
Plugin Organizer is a powerful tool, but not the only one. If the drag-and-drop interface is inconvenient for you or you need to focus specifically on assets (CSS/JS), consider alternatives.
There is an excellent video on the topic of selective plugin loading:
Asset CleanUp: Page Speed Booster
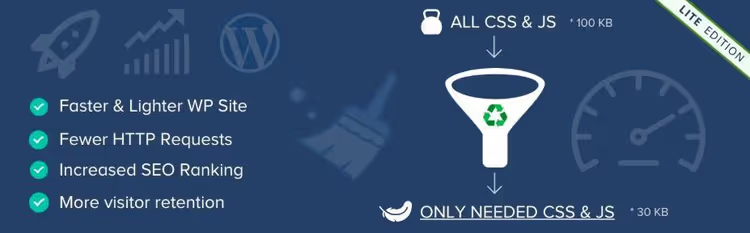
Asset CleanUp solves the problem from a different angle: it does not disable plugins entirely but prevents their CSS and JavaScript files from loading where they are not needed. It scans the page and shows all loaded assets, and you uncheck the unnecessary ones.
The advantage is fine control over scripts and styles: you can disable a specific CSS file of a specific plugin on one page. The disadvantage is that the plugin's PHP code still executes, so server load does not decrease as dramatically. The free version covers basic needs, the Pro version adds disabling entire plugins and conditional loading by screen size.
🔗 Asset CleanUp on WordPress.org
Plugin Load Filter
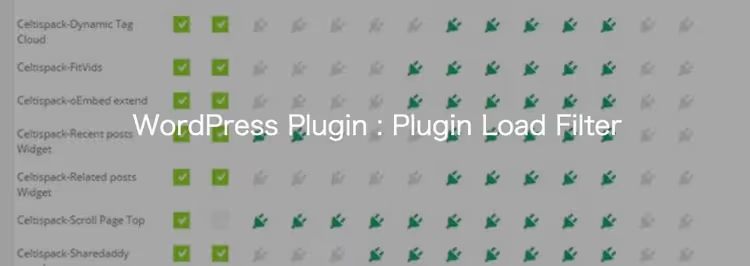
Plugin Load Filter is a free minimalist tool with a matrix interface. You see a table: all plugins on the left, all content types at the top. You use checkboxes to indicate which plugin is active where.
It supports standard and custom post types, Jetpack modules, and has a filter for desktop/mobile. It works through a must-use filter, like Plugin Organizer, but the interface is flat, with no dragging or grouping. It is updated regularly: version 4.4.1 from April 2026, full compatibility with WordPress 7.0 and PHP 8.1+. The downside is that the community is small and support is limited.
🔗 Plugin Load Filter on WordPress.org
⁉️🤔 Frequently asked questions
Is it safe to use Plugin Organizer on a production site?
Yes, provided you make a full backup before configuration. Plugin Organizer works at the must-use plugin level and can make your site unavailable if settings are misconfigured, for example, if you accidentally disable a plugin responsible for routing. After backup, experiment freely: recovery will take a couple of minutes.
Can I disable a plugin on one specific page rather than on the entire post type?
Yes, this is Plugin Organizer's main feature. When editing any page or post, a "Plugin Organizer" metabox appears at the bottom where you can specify an individual set of plugins for that specific URL. A rule for a specific page takes priority over global settings and post type settings.
Will selective plugin loading help pass Core Web Vitals?
Indirectly, yes. Fewer plugins → less PHP code and database queries → lower TTFB (Time to First Byte). Fewer CSS/JS files → faster rendering → better LCP and FID. But selective loading does not replace caching and image optimization, it is part of a comprehensive speed optimization strategy.
What should I do if the site stops opening after configuration?
Enable WordPress recovery mode: add
/wp-login.php?plugin_organizer_reset=1to the URL, this will reset all Plugin Organizer rules. If that does not help, connect via FTP and rename the/wp-content/mu-plugins/folder (for example, adding_disabled). WordPress will stop loading MU plugins, and the site will come back to life. Then troubleshoot settings one by one.
Does it make sense to use Plugin Organizer together with a caching plugin?
Yes, this is the best combination. A caching plugin serves ready HTML, and Plugin Organizer reduces the PHP workload before the page gets into the cache. Together they produce a multiplicative effect: fewer plugins load → the page generates faster → the cache is invalidated less often.
How does disabling a plugin through Plugin Organizer differ from deactivating it in the "Plugins" section?
Deactivation in the "Plugins" section turns off a plugin globally, it works nowhere. Plugin Organizer keeps the plugin active but prevents it from loading on selected pages. On other pages, the plugin works as usual. Additionally, the plugin continues to receive updates and can work in the admin area or via cron.
Why manage plugin loading if you can just buy good hosting
Good hosting is the foundation. But even on a dedicated server, two dozen plugins loading on every page will slow down HTML generation. Selective loading does not replace hosting, it eliminates the problem at its root: a plugin that is not needed on a page should not load on it. Plugin Organizer gives you this control for free and without editing code.
If you are not yet managing plugin loading, start with an audit. Go to your list of active plugins and ask about each one: "Is it needed on the homepage? On the contact page? In the cart?" Those not needed everywhere are candidates for selective loading. Half an hour of configuration will save seconds of loading time for every visitor.

A professional team of writers and editors specializing in creating quality content.