













🚀 How to install Git on Windows: three methods from quick to manual
A project without version control is a folder called "project_final_2_really_final". Sound familiar? Git solves this problem once and for all: every change is tracked, any state can be rolled back, and teamwork stops being a quest involving zip archive exchanges.
Installing Git on Windows used to be a compromise: either a sluggish emulator or a stripped-down port. Now there are three working methods, and all of them give you a full-featured Git with a Bash terminal. The same one you get on Linux.
Below is a step-by-step guide from download to first commit. With the current version 2.54.0 and no fluff.
💡 Quick overview:
- Installation via winget, one command in the terminal, works for Windows 10/11
- Official Git for Windows installer, the classic approach with a step-by-step wizard
- Chocolatey, for those already using this package manager
- After installation: basic setup of name, email, and version check
Method 1: winget, one command
If you have Windows 10 (build 1709 or later) or Windows 11, winget is already on your system. This is Microsoft's native package manager, similar to apt for Windows. No websites, no "Next → Next → Finish".
Open PowerShell or Command Prompt as administrator and run:
1 winget install --id Git.Git -e --source winget
What happens here: --id Git.Git specifies the exact package identifier in the winget repository, the -e flag requires an exact name match (so you don't install something similar), and --source winget explicitly sets the source. In 30-60 seconds Git is ready to use.
Verify the installation:
1 git --version
The output should show git version 2.54.0 or newer. If winget is not found, install App Installer from Microsoft Store or update your system to a current build.
A winget bonus: it will also update Git with a single winget upgrade command.
Method 2: official Git for Windows installer
The classic approach. Works for any Windows version (including 7 and 8.1) and gives you full control over components and settings. Download the installer from the official website, the site will automatically detect your architecture (64-bit or 32-bit) and offer the appropriate file.
Download and launch
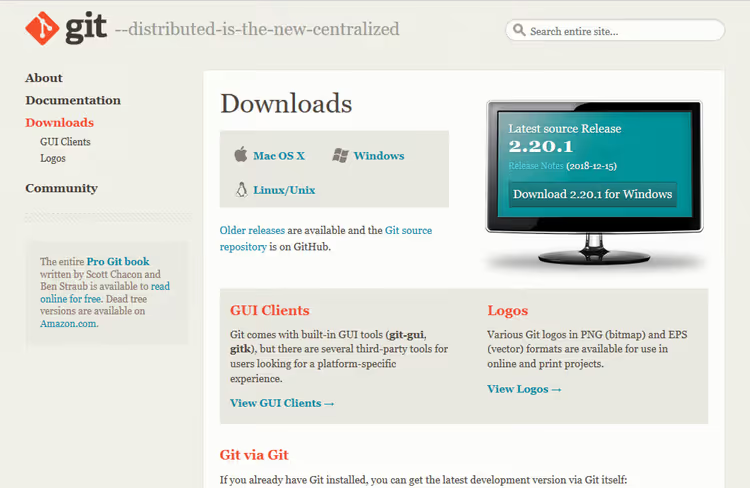
Go to git-scm.com/downloads/win. The download will start automatically. Double-click the downloaded .exe file:
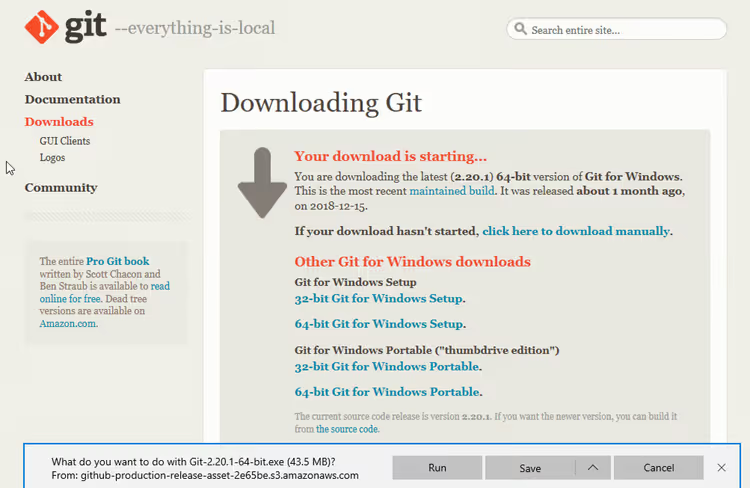
Click Run in the security warning dialog:
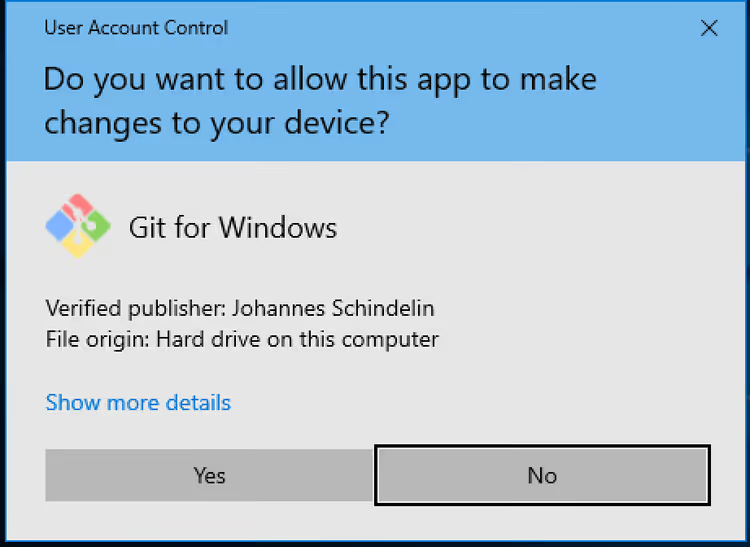
User Account Control (UAC) will request permission, click Yes:
License and installation path
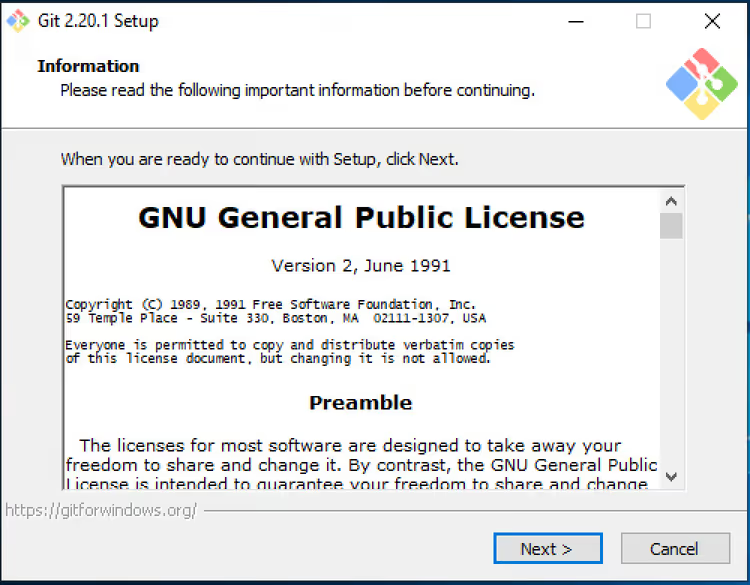
The setup wizard will greet you with the GNU GPL license agreement. Click Next:
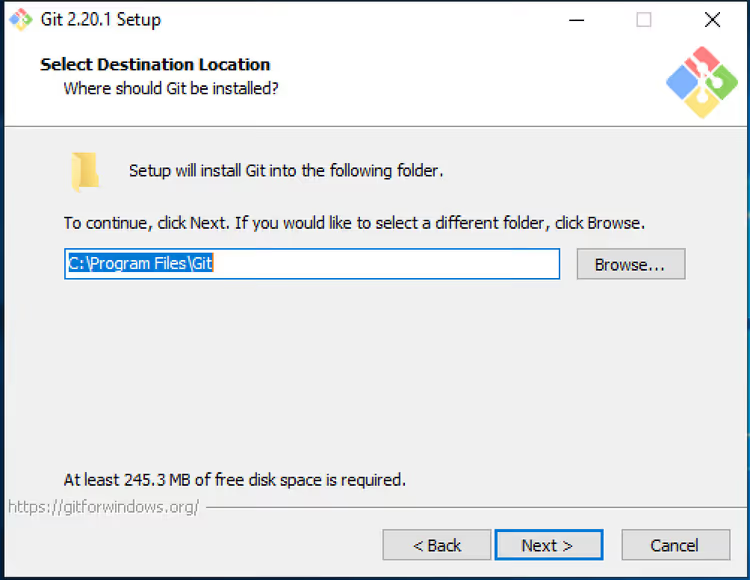
Choose the installation folder. There is no reason to change the default path C:\Program Files\Git. If you need a different location, click Browse:
Selecting components
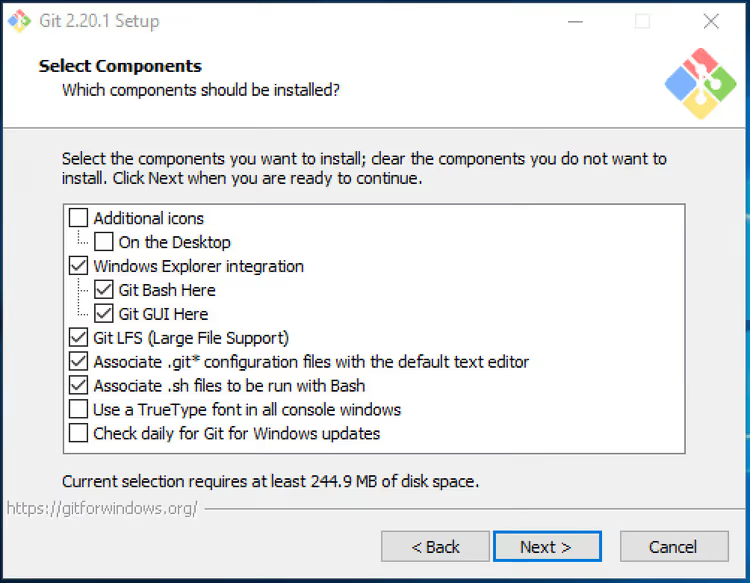
On this screen, decide what to install. We recommend leaving everything at default, the set includes Git Bash, Git GUI, and Windows Explorer integration. You can additionally check Add a Git Bash Profile to Windows Terminal (if you use the new terminal):
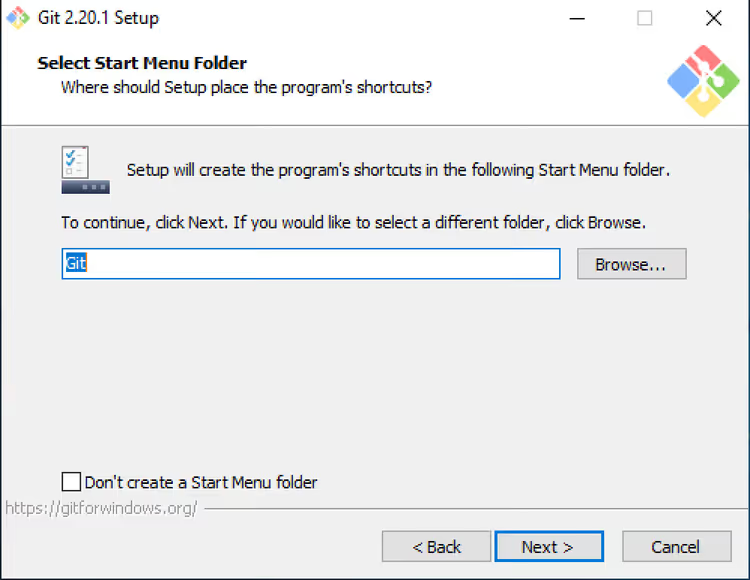
Leave the Start Menu folder unchanged and click Next:
Default text editor
Git will ask you to choose an editor for commits and rebase. The default option is Vim. If you are not familiar with Vim, choose Nano (easier for beginners) or Visual Studio Code (if already installed):
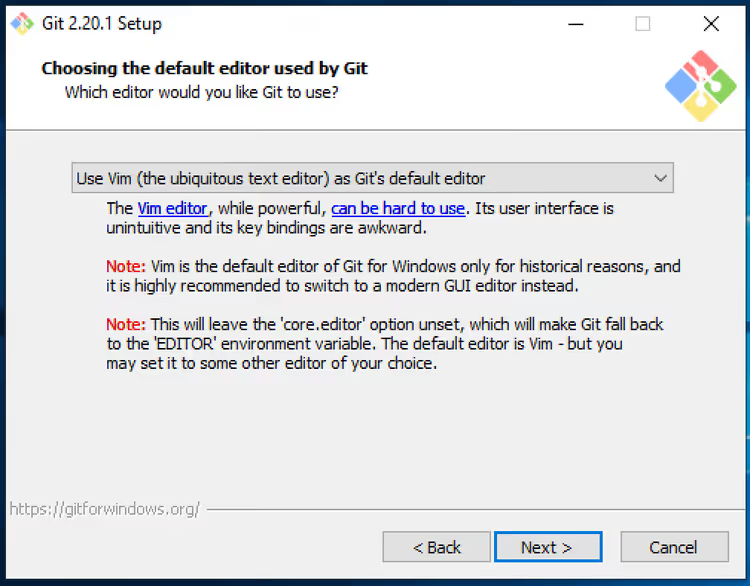
In practice, Nano is a good compromise: it works directly in the terminal, and keyboard hints (^X to exit, ^O to save) are visible at the bottom of the screen.
Configuring PATH
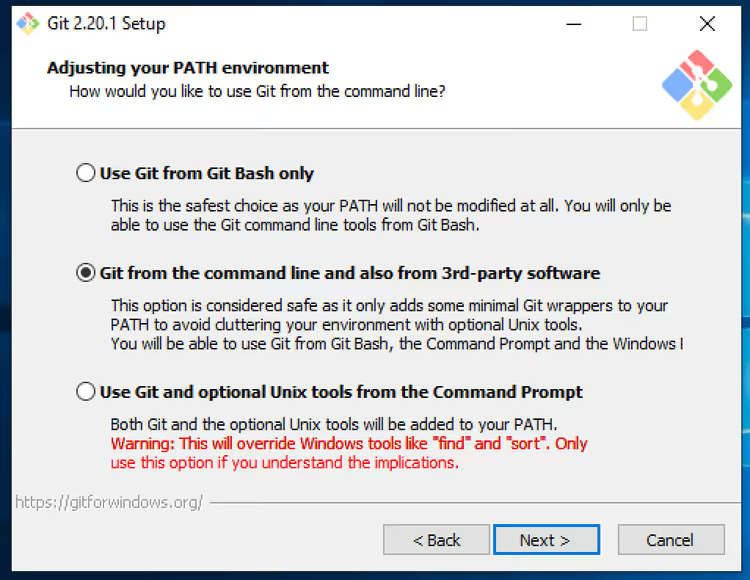
A critical step. Select Git from the command line and also from 3rd-party software (the second option). This adds Git to the system PATH variable, and the git command will work from any terminal, PowerShell, CMD, and third-party editors:
HTTPS transport and line endings
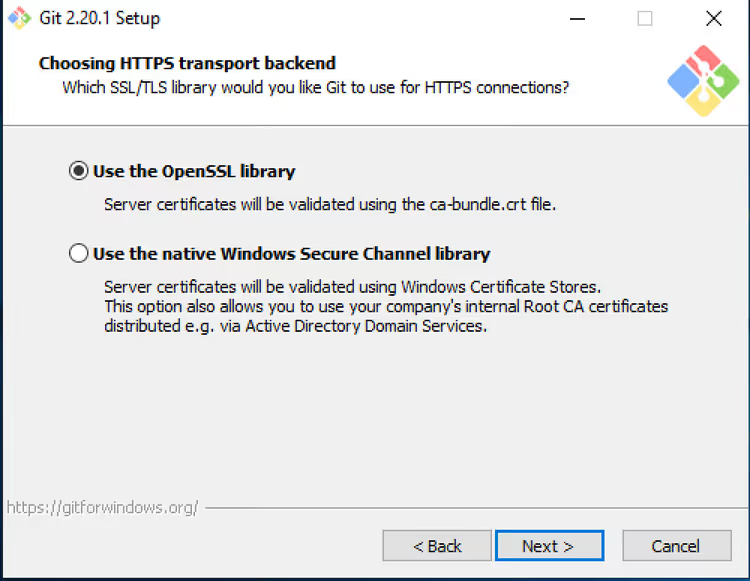
For HTTPS connections, leave Use the OpenSSL library, this is the standard and causes no issues:
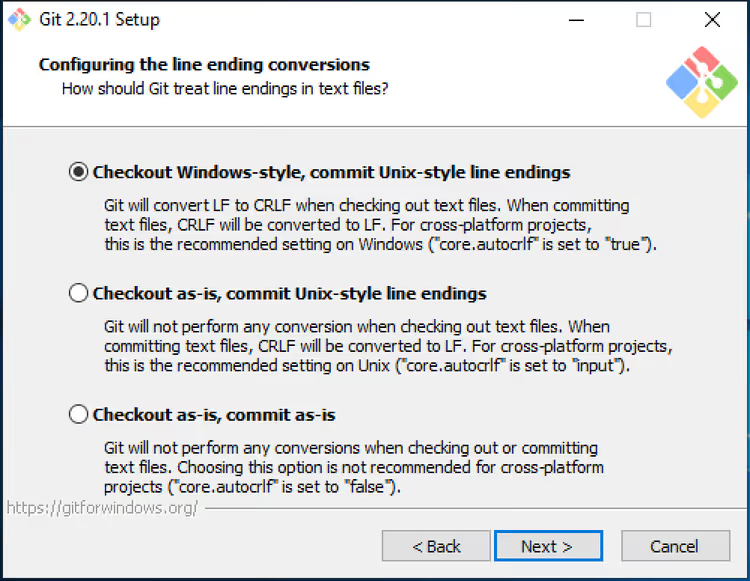
On the line endings screen, select Checkout Windows-style, commit Unix-style line endings (the first option, default). This is the correct choice for Windows: files in your working directory will have CRLF (Windows), while files committed to the repository will have LF (Linux/Unix). We do not recommend changing this, you will get formatting conflicts when collaborating with Linux developers:
Terminal and additional options
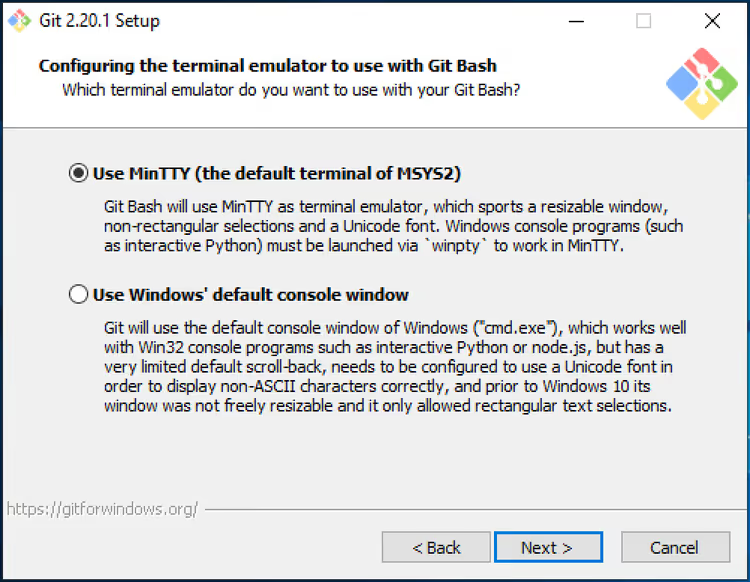
For the terminal emulator, choose Use MinTTY. This is the standard Git Bash terminal with proper support for colors, resizing, and clipboard. The standard Windows console (first option) works worse with Unix commands:
Additional options: enable Enable file system caching and Enable symbolic links (if permissions allow). Leave the rest at default:
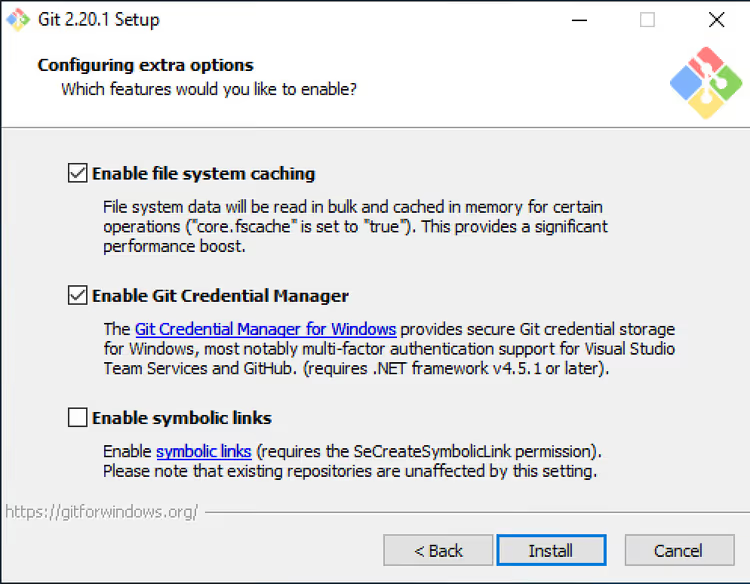
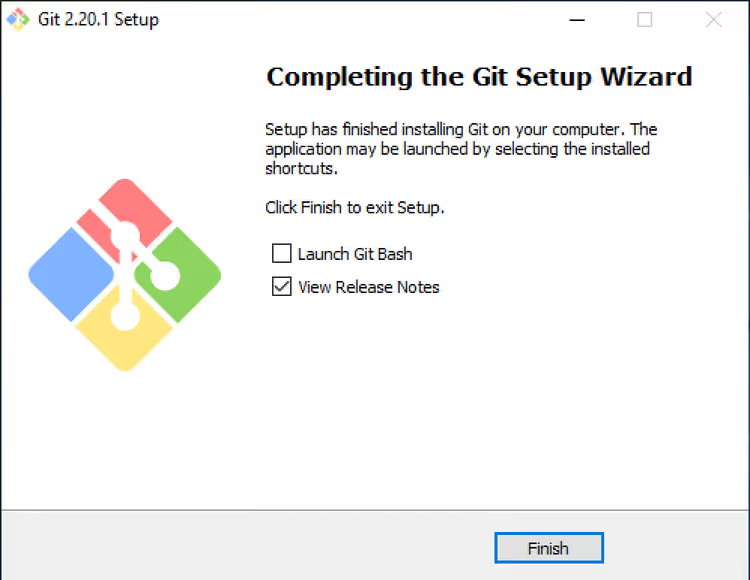
Click Install. After about a minute, the wizard will offer to launch Git Bash, leave the checkbox and click Finish:
First launch and verification
A MinTTY window will open with a command prompt. This is Git Bash, a full Unix terminal inside Windows. Type:
1 git --version
You will see the installed version number. It works.
Git also adds a graphical interface called Git GUI. Launch it with the git gui command in Git Bash:
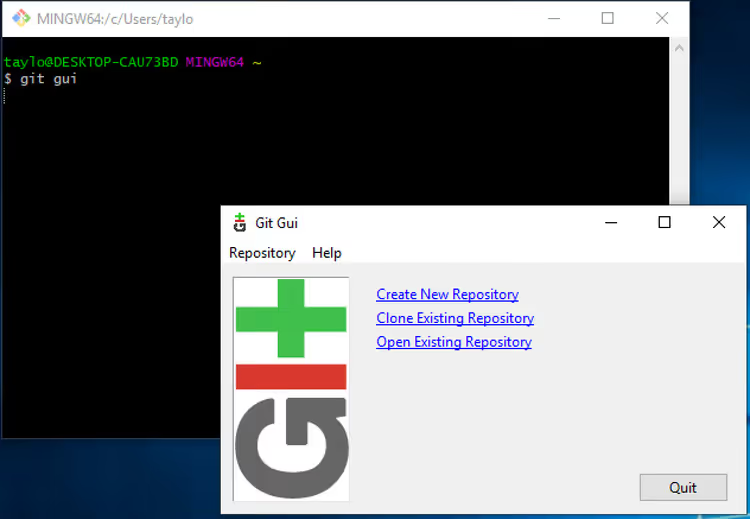
In the window that opens, there are three actions: Create New Repository (create a new one), Clone Existing Repository (clone an existing one), and Open Existing Repository (open a local one). To test, create a new one, enter a folder name or click Browse:
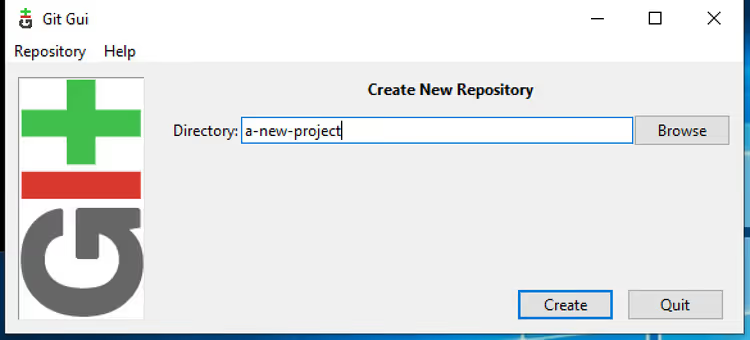
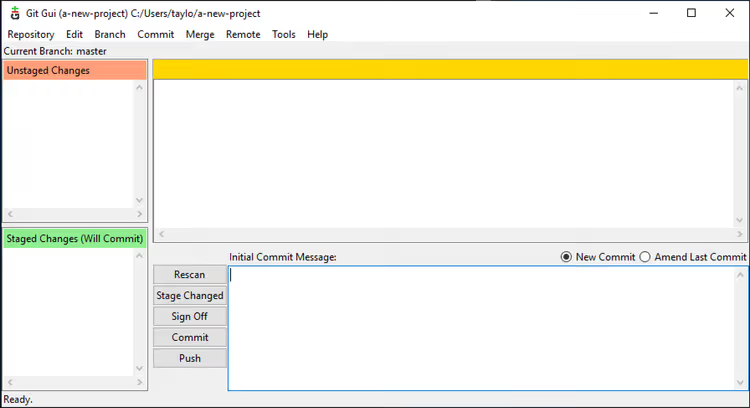
Done, an empty repository is created. A hidden .git directory with all of Git's internal machinery has appeared in the folder:
Method 3: Chocolatey
If you already use Chocolatey to install software on Windows, Git can be installed with one command. Open a terminal as administrator:
1 choco install git.install
Chocolatey will download the latest version from the official website and run the same setup wizard in silent mode (with default settings). If you need full control over options, use method 2 instead.
The git.install package in the Chocolatey repository is updated in sync with Git for Windows releases. To update: choco upgrade git.install.
Basic setup after installation
Regardless of the installation method, immediately set your name and email. These will sign every commit you make:
1 git config --global user.name "Your Name" 2 git config --global user.email "your@email.com"
The --global flag means the setting applies to all repositories on this computer. If you need a different name for a specific project, repeat without --global inside the project folder.
Verify that the settings were applied:
1 git config --list
In the output, find the lines user.name and user.email. From this point on, Git is ready to use.
Video: installing Git on Windows step by step
If you prefer watching over reading, here is a 10-minute tutorial on installing and configuring Git on Windows demonstrating all three methods:
⁉️🤔 Frequently asked questions
Do I have to install Git Bash if I use VS Code?
VS Code uses the system Git for its version control features. The editor itself does not ship Git, it finds your installation through the PATH variable. So you do need to install Git (and Git Bash that comes with it). However, you are not required to launch Git Bash after that, VS Code will pick up Git automatically and show it in the status bar.
Git GUI or GitKraken/SourceTree, which should I choose?
Git GUI is a minimalist built-in tool. For a beginner, it is enough for the first steps: create a repository, make a commit, view history. But if you work with branches, merge conflicts, and rebase daily, GitKraken or SourceTree offer significantly more clarity. Start with Git GUI, it is free and already available after installation.
Can I install Git without administrator rights?
Yes. Download the portable version (
PortableGit-2.54.0-64-bit.7z.exe) from the download page and extract it to any folder where you have write access. Then add the path to thebinfolder inside the extracted archive to your user PATH variable (via System Settings → Environment Variables). No administrator rights required.
How do I update Git to the latest version?
If you installed via winget:
winget upgrade --id Git.Git -e. Via Chocolatey:choco upgrade git.install. If you used the official installer, simply download and run the new.exeover your existing installation. The wizard will update the files automatically, your settings will be preserved. You can check the version at any time:git --version.
Git for Windows and Git on Linux, is there any difference?
In commands, no difference at all.
git init, thengit add, thengit commitandgit pushwork identically on all platforms. The only difference concerns line ending handling (CRLF versus LF), and the Windows installer handles this automatically (see the line endings step above). For collaboration with a Linux server or colleagues on Mac, no additional configuration is needed.
What to choose: winget, installer, or Chocolatey?
If you have Windows 10/11, use winget. It is the fastest: one command, automatic updates, no need to visit websites. If you have Windows 7/8.1 or need full control over every parameter (specific editor, custom path, enabling symlinks), use the official installer. If you already manage a fleet of machines through Chocolatey, choco install git.install will fit into your pipeline without changes.
After installation, spend two minutes on git config --global user.name and user.email, and Git is ready for your first commit. And if you want to get straight to work, here are the basic Git commands you need every day.
Which method did you choose and why? Let us know in the comments, especially if you found a fourth one.

A professional team of writers and editors specializing in creating quality content.