













 AIIllustrative image: AI-generated
🔄 How to safely change a WordPress theme
At first glance, it's a harmless operation. A couple of clicks in the admin panel, and the site dons a new design. What could go wrong?
A lot. Over time, a WordPress site accumulates plugins, edits in functions.php, custom post types, and a manually built widget structure. All of this rests on the theme like a Jenga tower. Pull out the theme, and the entire construction risks collapsing: pages lose their layout, shortcodes stop working, SEO settings reset, and a prominently placed video turns into a bare URL.
But there is a way to change themes with zero risk. No panic, no late-night restoration from backup, and no call to the developer. It requires discipline but is manageable even for a phpMyAdmin beginner. Below is the complete sequence: from choosing a theme to activating it on the live site.
💡 Quick overview:
- Make a full site backup, files and database, before any theme operations
- Clone the site to staging or a local server and test the new theme THERE, not in production
- After activation, check everything: menus, widgets, custom post types, featured images, browser console
- Enable WP_DEBUG mode during testing, hidden PHP errors will surface immediately
- Theme SEO settings don't migrate automatically, transfer them to a plugin beforehand
Step 1. Choose a new WordPress theme
The first milestone is finding a theme that not only looks good visually but is also compatible with your current stack. If you're not a developer, don't chase a "blank canvas," take a theme that looks close to your desired result out of the box. Fewer customizations mean fewer chances to break something.
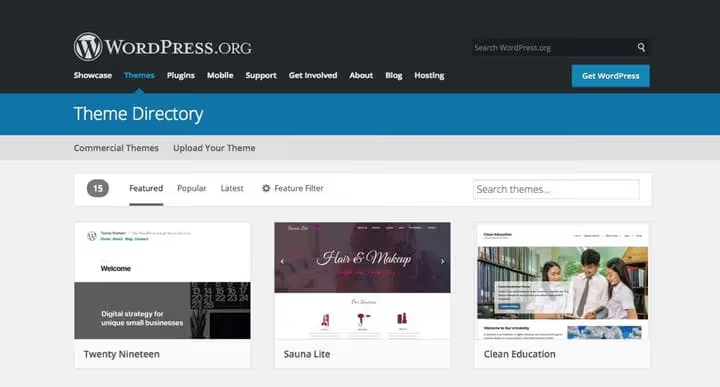
Places to search: ThemeForest, the largest premium theme marketplace with niche and rating filtering; WordPress.org Themes, the official repository of free open-source themes. The free catalog currently has over 12 thousand themes, the selection is huge, but check the last update date and number of active installations.
Critical compatibility checklist before choosing:
- Does the theme support your key plugins? If you have a WooCommerce store, the theme must have an explicit WooCommerce-ready label. For builders like Elementor or Beaver Builder, the same logic applies.
- Does the theme use custom post types for portfolio, testimonials, sliders? When changing to a theme without support for these CPTs, content will "disappear" from the admin, it will remain in the database but stop displaying.
- Does the theme have built-in SEO fields? If you filled them in, they'll vanish when changing themes. Better to transfer SEO data to a plugin (Rank Math, Yoast SEO) beforehand.
For developers it's easier: you don't look for the "perfect" theme, you take a minimal framework (GeneratePress, Kadence, Blockstarter) and add what you need. But backup and testing are mandatory for you too.
Step 2. Create a site backup
Backup is not "recommended," it's a hard requirement. Without it, any failure during theme change turns from an annoying inconvenience into a catastrophe. Two reliable paths: automatic (plugin) and manual (files + database).
Method 1: backup plugin
The safest path for a non-developer is a plugin that backs up to the cloud automatically.
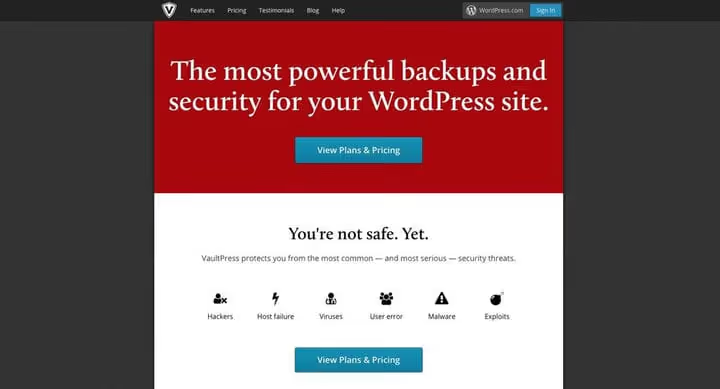
The flagship option is Jetpack VaultPress Backup (formerly VaultPress, now part of the Jetpack ecosystem). Works in real time: every change creates a new snapshot in the Automattic cloud. One-click restoration, 30-day archive, 10 GB storage. Cost starts at €4.95/month (first year, then €8.95/month with annual payment). Behind these numbers is infrastructure supporting 32 million WordPress.com sites.
Among alternatives with premium features is WPvivid (detailed breakdown in our WPvivid review). WPvivid can not only back up but also migrate a site between domains, convenient for relocations.
Budget option is the free UpdraftPlus. Uploads copies to Google Drive, Dropbox, S3, and a dozen more cloud storages. Restoration is one-click. We covered it in detail in our UpdraftPlus review.
The main advantage of the plugin approach is you don't need to remember about backup. Set it up once and forget.
Method 2: manual backup
Manual backup looks scarier than it is. Essentially, four simple stages.
1. Log into your hosting control panel. cPanel, Plesk, or custom panel, each host has their own, but the logic is the same. Look for login through the host's site.
2. Find FTP access. In the control panel, find the "FTP Accounts" or "FTP Access" section. If there's no password, create a new user and write down the credentials.
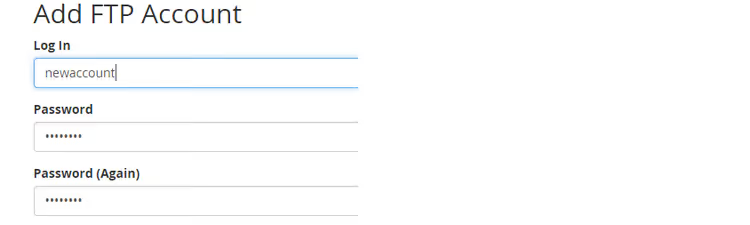
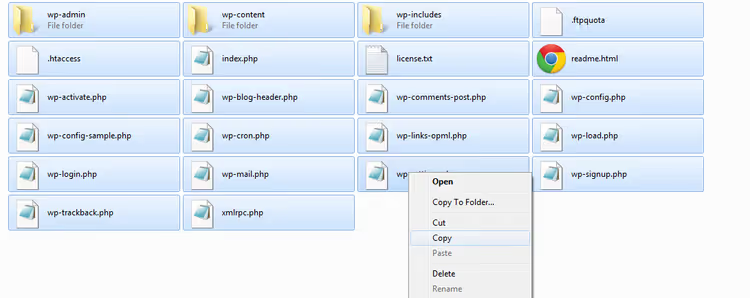
3. Copy site files. The simplest way without an FTP client. Open Windows Explorer (or Finder on macOS), enter in the address bar ftp://yoursite.com and log in with credentials from the previous step. Copy the entire site folder to your computer and compress it to ZIP.

After logging in, you'll see your site's file structure, exactly as on the server. Select all (Ctrl+A) and copy to a local folder on your computer.
4. Open phpMyAdmin. In the hosting panel, find the phpMyAdmin icon, usually in the "Databases" section.

5. Select the correct database. If you have multiple sites on the host, there will be multiple databases. You can find the right one via wp-config.php: find the line define('DB_NAME', '...'), the value in quotes is your database name. Or open databases one by one and find the one where the wp_posts table has your content.

6. Export the database. Click "Custom" (or "Export"), select the needed database, leave the SQL format, and click "Go". The file will download to your computer. Import works the same way, useful if you need to restore.

Done. You have a ZIP with files and an SQL database file, a complete backup independent of any plugin.
Step 3. Clone the site for testing
Changing the theme directly in production is like testing a parachute mid-air. A clone is needed to see: did the layout break, did custom fields disappear, did the page builder fail. Two cloning options: staging via host and local server.
Cloning to a staging site
Many WordPress hosts provide staging "out of the box": WP Engine, "Copy site from LIVE to STAGING" button in admin; SiteGround, Staging Tool in panel; Kinsta, Cloudways, and others similarly. The process takes from a couple of minutes to half an hour depending on site size.

The staging clone lives online, you can access it from a phone, check responsive layout, share the link with a colleague. The only downside is it's only available if your hosting included staging in the plan.
Cloning to a local server
A local server is free, works without internet, and gives full control. Install XAMPP, MAMP, WAMP, or Local by Flywheel, any of these applications sets up Apache/MySQL/PHP on your computer in a couple of clicks.
Method 1: migration plugin
The simplest path is to use a plugin that will pack the site into one file.
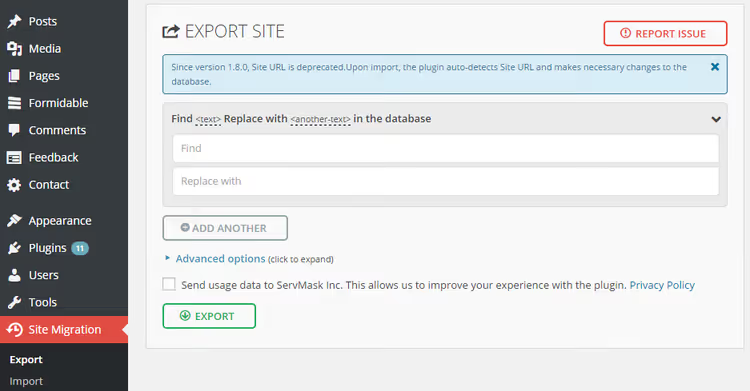
We recommend All-in-One WP Migration, free and works "out of the box". Install on the source site, click "Export", and download the resulting file. Alternative is Duplicator, also free with an active community.
Then on fresh local WordPress, install the same plugin and click "Import". Specify the downloaded file, the plugin will deploy an exact copy.
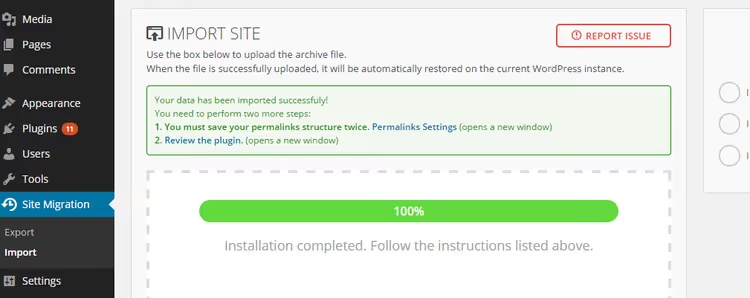
Wait for completion, import can take several minutes on large sites.
Method 2: manual cloning
If you made a manual backup in Step 2, half the work is already done.
1. Prepare the server. Install XAMPP/MAMP and local WordPress via the standard installer.
2. Copy files. Unpack the ZIP backup into the local server folder: for XAMPP it's htdocs/folder_name/, for MAMP it's htdocs/folder_name/.
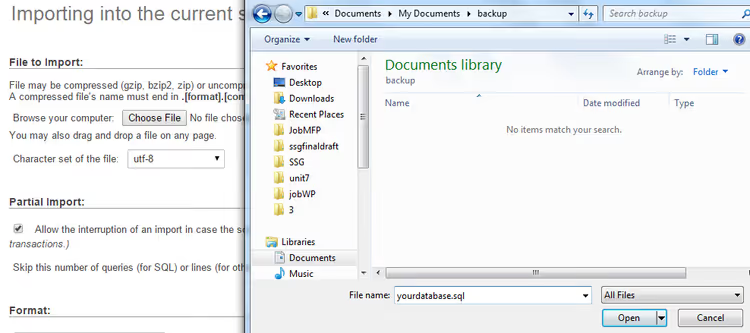
3. Import database via phpMyAdmin. In local phpMyAdmin (usually localhost/phpmyadmin) click "Import", select the SQL file from backup, and click "Go".
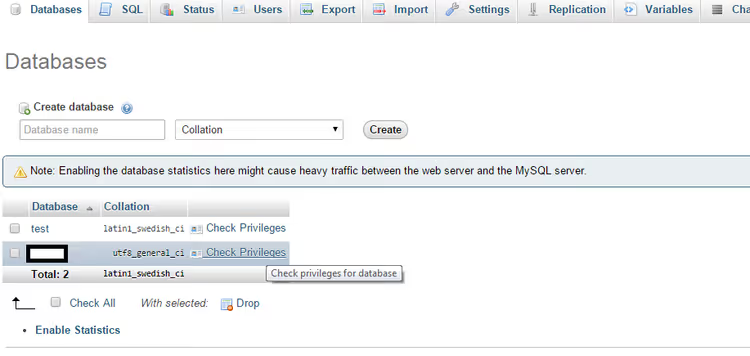
4. Restore database credentials. Open wp-config.php from the copied files, find DB_USER and DB_PASSWORD. Create a user with these same values in local phpMyAdmin ("Privileges" tab → "Add user").
5. Fix URLs. In the local database, open the wp_options table, find rows siteurl and home, and replace their values with http://localhost/folder_name. Without this, the site will try to open using the old domain.

Done, an exact clone of your site is running locally.
Step 4. Test the new theme on the clone
Now install and activate the new theme on the clone. Below is a control checklist. Each item will save you hours of edits in production.
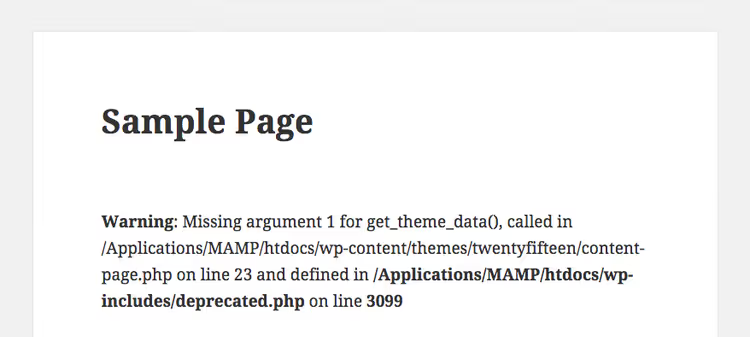
Enable WP_DEBUG. Open wp-config.php and set:
1 define('WP_DEBUG', true);
This will display all PHP errors and warnings directly on screen. Not every notice is fatal, but each is worth fixing, especially those referencing theme functions.
Custom post types (CPT). The old theme might have registered its own CPTs: portfolio, testimonials, sliders, team. When changing to a theme without support for these CPTs, content stops displaying, although it doesn't go anywhere in the database. Solution is the Post Types Unlimited plugin: it re-registers CPTs in the new theme. If you don't remember exact names, find register_post_type in old theme files, CPT names are specified in the first argument.
Widgets. Check all widget areas: sidebar, footer, homepage. Make sure: (a) all needed widgets are displayed; (b) their order and layout didn't break; (c) there are no empty zones where there was content before. Missing functionality? Add plugins, don't hardcode into the theme.
Menus. Check all registered menu areas in the new theme: primary, mobile, footer menu. It may turn out the new theme only supports one menu, and you have three configured, an unpleasant surprise better caught on the clone.
Post formats. If the old theme used formats (video, gallery, audio) and displayed them via custom fields, the new theme might not understand this. Solved via child theme with add_post_meta().
Plugins. Go through critical plugins: contact forms, caching, SEO, WooCommerce. Verify that each performs its function: form submits, cache clears, meta tags output.
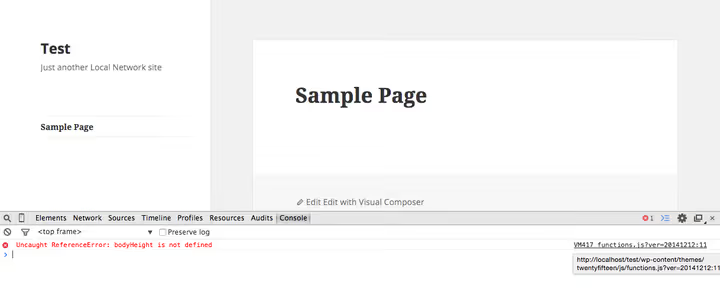
Browser console. Open DevTools (F12 → Console) and go through main pages. JavaScript errors, red lines, are signs of theme script conflicts with plugins. Pay special attention if there are sliders, popups, animations.
Featured images. The new theme almost certainly uses different thumbnail sizes. After activation, install the Regenerate Thumbnails plugin and recreate all images for new sizes, otherwise pages will have either stretched or incorrectly cropped pictures.
SEO. If you filled in built-in theme SEO fields like meta title, description, Open Graph, they'll disappear when changing themes. Transfer them to an SEO plugin (Rank Math or Yoast SEO) on the live site before switching. And make sure the new template outputs canonical links and meta tags.
Mobile layout. On the staging site, open pages from phone and tablet. For local server, use built-in Device Mode in Chrome DevTools (F12, phone/tablet icon at top left). Check: homepage, one post, one page, and WooCommerce product card (if applicable).
When all items are checked, you can proceed to activation in production.
Step 5. Install and activate the theme on the live site
Final stage. But before activation, one more safety measure.
Install a maintenance mode plugin: WP Maintenance Mode or Coming Soon by SeedProd. Activate it for a minute or two, visitors will see a placeholder instead of broken layout while you do final checks.
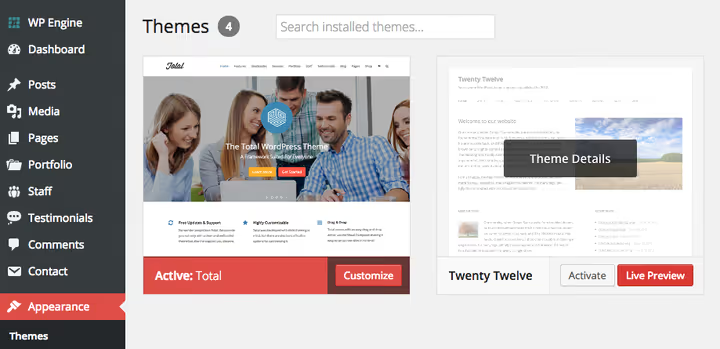
Then, "Appearance" → "Themes", hover over the new theme, and click "Live Preview". WordPress will show the site in the new theme without actual activation. Quickly go through main pages, if everything is OK, click "Activate".
Immediately after activation, do a control check: homepage, one post, one category, contacts. Disable maintenance mode. Make sure the site opens for anonymous users (open in incognito mode).
If something went wrong, don't panic. You have a full backup (Step 2), and restoration will take exactly as long as it takes to click "Restore" in the plugin or import the database back. This is exactly why all the previous steps were done.
Visual summary of the process in this video. All steps are demonstrated on a live WordPress site, from backup to final activation.
⁉️🤔 Frequently asked questions
Can I change the theme without a backup at all?
Technically, yes, you can click "Activate" without a backup. But if something goes wrong (and without testing you don't know this), there will be nowhere to roll back. Ten minutes for backup versus potential hours of restoration, the choice is obvious.
How do I know if the new theme is compatible with my plugins?
Open the theme page in the catalog or marketplace and find the "Compatible plugins" or "Features" block. For a WooCommerce store, look for explicit "WooCommerce-ready" labeling. If in doubt, ask the theme developer. Most importantly, check on the clone: install the theme and go through all critical plugins. Script conflicts are usually visible in the browser console immediately.
What to do with content that "disappeared" after changing the theme?
Most likely it didn't disappear, but is tied to a custom post type that the old theme registered. The new theme doesn't know about it and doesn't display it. Install the Post Types Unlimited plugin, register the CPT with the same name (find it in
register_post_type()of the old theme), and the content will return to the admin.
Is staging required if I'm changing the theme on an empty site?
On an empty site, no. If you don't have content, users, and orders yet, change directly via Live Preview. But if the site has at least 10 posts and a couple of plugins, a clone will save your nerves. Better to spend half an hour on staging than an hour fixing broken layout in front of visitors.
Do I need to regenerate thumbnails after changing the theme?
Almost always, yes. Each theme sets its own sizes for featured images, blog thumbnails, and product cards. The Regenerate Thumbnails plugin does this automatically: run it, wait, done. Without it, old images will either be incorrectly cropped or stretched to wrong proportions.
What to do after changing the theme: short final checklist
You activated the new theme. The site works. But the work isn't finished, here are three tasks for the next 24 hours:
- Search monitoring. Go to Google Search Console, check for a sharp drop in indexing. Changing HTML structure sometimes confuses search engines, make sure pages continue to be indexed.
- Load speed. New theme means new CSS and JS. Run the site through PageSpeed Insights. Drop of more than 10 points? Look at theme bundle size and number of HTTP requests.
- Forms and transactions. Make a test order (if a store) and test form submission. These are two places where theme change breaks functionality most often: button wrappers, AJAX hooks, field styling.
Don't delete the backup immediately. Keep it for at least a week, it's your parachute in case a problem shows up during the next plugin update or nightly cron job. Better to delete the backup in a month for being unnecessary than to search for it a day after a crash.

A professional team of writers and editors specializing in creating quality content.