














🔐 How to set up a membership site with WordPress and MemberPress
You launched a site on WordPress, filled it with content, and now you're wondering: can you actually make money from this? Not selling ads for pennies per click, but building a stable income from gated content, courses, or subscriptions.
You can. MemberPress is a plugin that turns WordPress into a full-fledged membership platform in a single evening. No developer needed, no separate subscription-based course builders, and no zoo of five plugins.
In an hour and a half, you'll go from installation to a ready-to-use site with paid access: installation, activation, subscription plans, content restriction rules, and registration and login menus. Every step comes with screenshots from an actual WordPress 2026 admin panel.
💡 Quick overview:
- Purchase and download MemberPress from the official site
- Install the plugin via "Plugins → Add New → Upload Plugin"
- Activate with your license key and complete basic setup (pages, payments, email)
- Create a membership plan with pricing and terms; the registration form is generated automatically
- Set up access rules: which content to show to whom
- Add registration and login links to your site menu
What MemberPress can do in 2026
Before diving into settings, here's a quick rundown of what this plugin is and why it's become the standard for membership sites on WordPress.
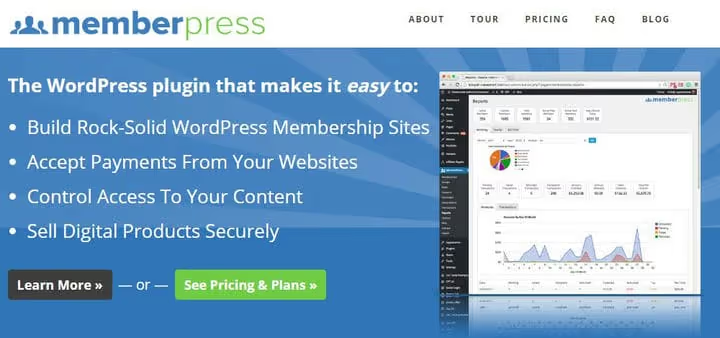
MemberPress is a premium plugin that works with any WordPress theme. The core concept: you hide part of your content behind a paywall and sell subscriptions to access it. Visitors pay and see the gated pages, courses, and files. If they don't pay, they don't see them.
Key features available on all plans:
- Flexible paywall. Protect pages, posts, categories, tags, files, and individual content blocks with URL-level precision.
- Subscriptions and billing. Recurring and one-time payments, trial periods, coupons, and automatic subscription expiration reminders.
- Ready-made pages. ReadyLaunch generates pricing, registration, login, and account pages without any coding.
- Courses and LMS. Built-in drag-and-drop course builder with lessons, sections, quizzes, and certificates.
- CoachKit. A coaching platform inside MemberPress: clients, progress tracking, and assignments.
- Communities. ClubCircles (forums and Circles groups) and ClubDirectory (member directory with profiles).
- AI Course Generator. Generate course structure and lessons from a text description, saving hours of work.
- Order Bumps. One-click upsells on the checkout page.
- Payment gateways. Stripe (all plans), PayPal and Square (Growth+), Authorize.net (Scale).
Plans as of June 2026 (see memberpress.com/pricing): Launch at $199.50/year (+4.9% transaction fee), Growth at $349.50/year (no fee, adds courses, communities, and CoachKit), Scale at $499.50/year (REST API, Zapier, gating, corporate accounts). Launch is enough to get started; for $200 a year you get a full paywall and Stripe.
A 12-minute interface walkthrough: installation, plans, rules, and ReadyLaunch. If you'd rather not read the entire article, watch the video; it covers the key setup points.
Step 1. Installing and activating MemberPress
Purchase the plugin from the MemberPress website. After payment, download the plugin ZIP archive from your account dashboard.
Open your WordPress admin panel: Plugins → Add New → Upload Plugin.
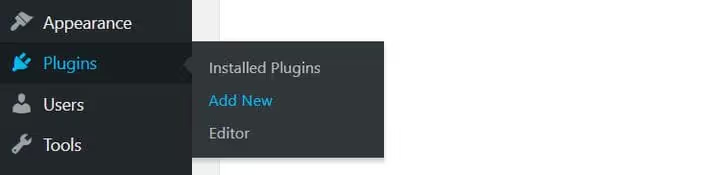
Select the MemberPress ZIP file, click "Install Now," then "Activate." A new item will appear in the admin sidebar: MemberPress.
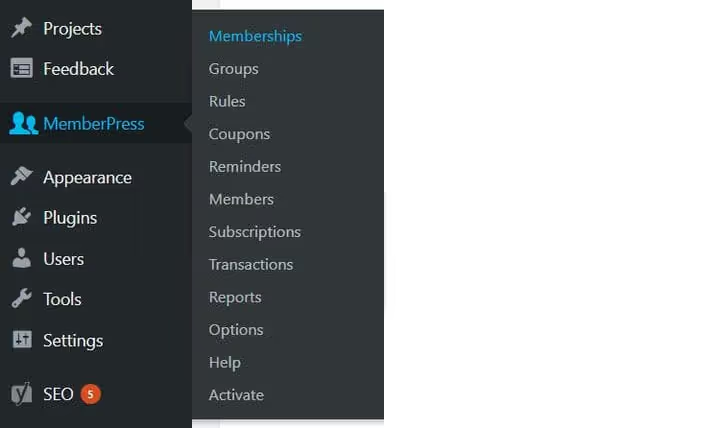
Go to MemberPress → Activate. Paste your license key (found in your account dashboard on the MemberPress site under "License Keys") and click "Activate License Key."
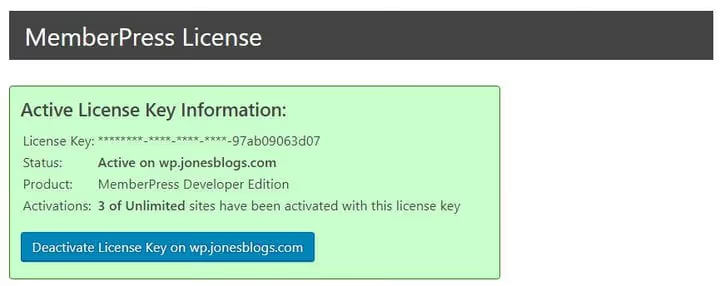
The plugin is now activated. Next step: configuring it for your project.
Step 2. Basic plugin configuration
Go to MemberPress → Settings (in the WordPress sidebar). You'll see a page with tabs; let's go through the main ones.

Pages
This is where you set up required pages: the thank-you page after registration, the login page, and the member account page.
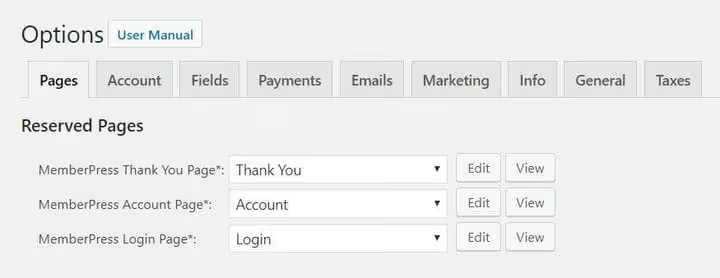
The easiest approach is to click "Auto Create New Page." MemberPress will generate all three pages automatically. If you already have your own pages, select them from the dropdown.
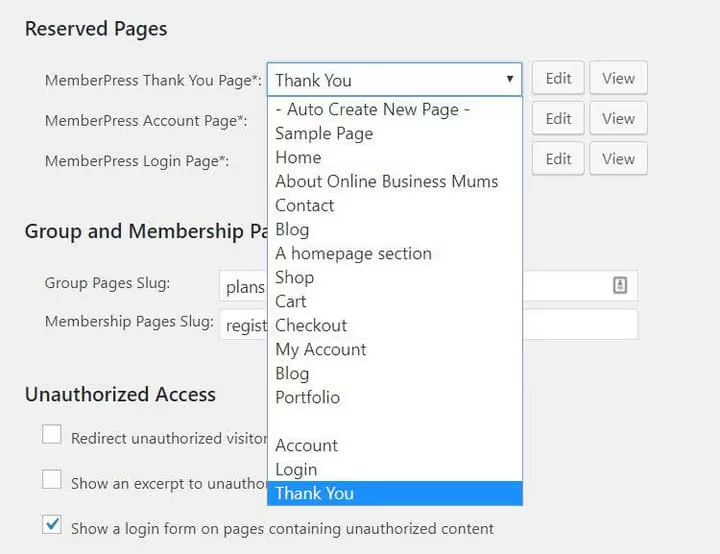
After making changes, click "Update Options" at the bottom of the page.
Account
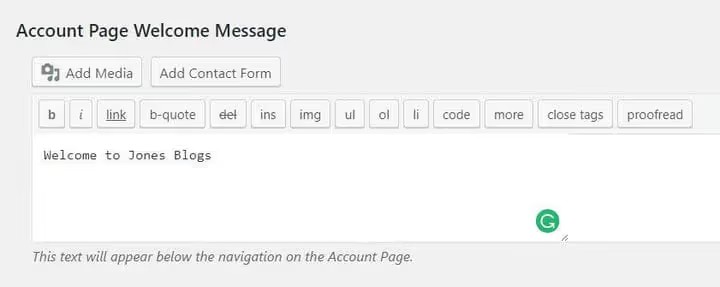
Configure member account settings: what data to collect and what welcome message to display at the top of the account page. You'll also find the toggle "Force WordPress to use the MemberPress login page" (enable it so the standard wp-login.php stays hidden).
Fields
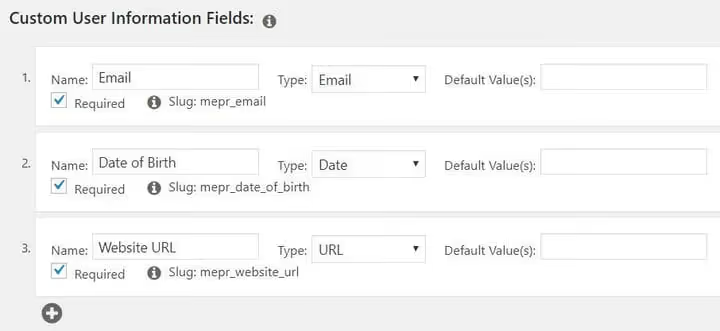
Create custom fields for the registration form: name, address, phone, date of birth, and anything else your business needs. These fields will appear on the registration page and in the member account.
Payments
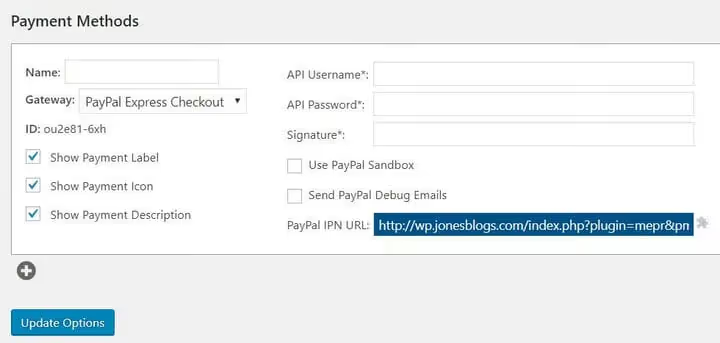
Click the "+" icon and add Stripe (available on all plans). On Growth and Scale, PayPal, Square, and Authorize.net are also available. Each gateway requires API keys; instructions for obtaining them are in the MemberPress documentation.
Email notifications
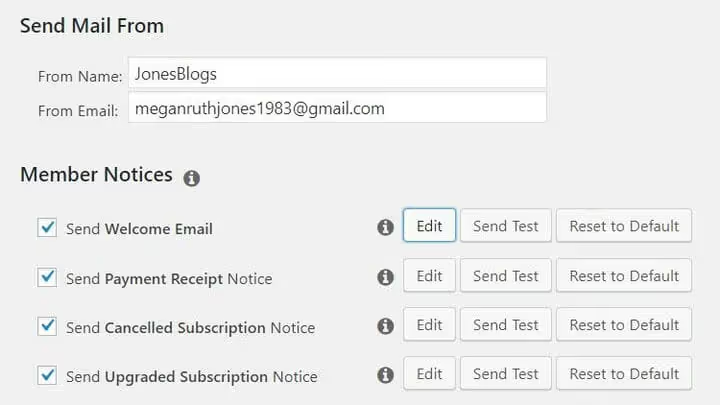
MemberPress sends members dozens of email types: registration confirmation, subscription expiration reminders, password reset, and payment receipts. Select the types you need and configure the content via the "Edit" button (text, subject, sender). I recommend sending yourself a test email using the "Send Test" button in each email type editor.
Step 3. Creating membership plans
This is the most important section. Go to MemberPress → Memberships and click "Add New" at the top of the page.

Give the plan a name (for example, "Premium") and description. In the right column, find "Membership Terms":
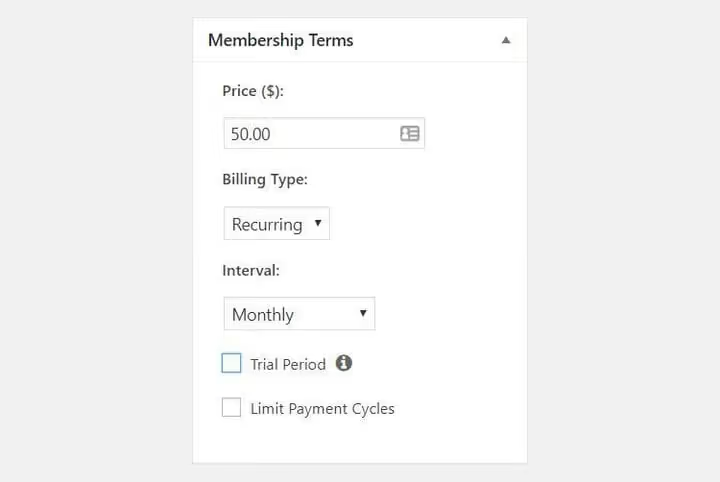
- Price. Amount in dollars. You can set 0 for a free trial plan.
- Billing type. One-time payment, monthly, yearly, weekly, or any combination.
- Trial period. Free N days before the first charge.
- Limit payment cycles. For example, 12 payments and then stop.
Below that, find "Membership Options":
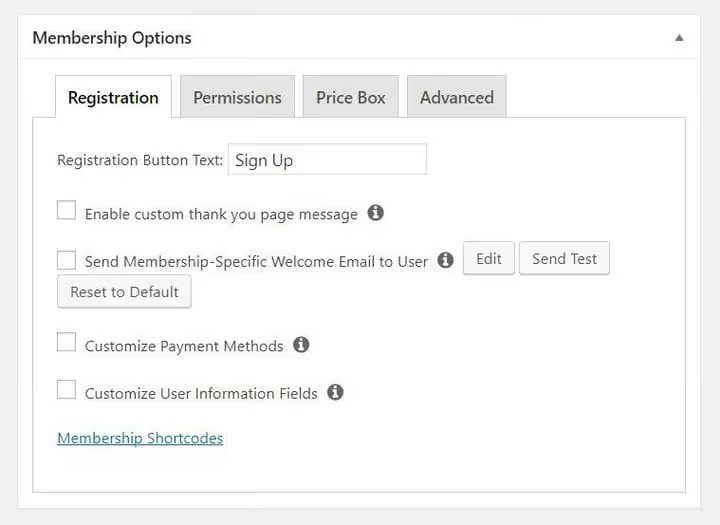
- Registration button text (default is "Sign Up"; replace with "Subscribe" or something of your own).
- Custom thank-you message after registration.
- Page template selection from your WordPress theme.
- Shortcode for embedding the registration form on any page or post.
Publish the plan. Here's the ready registration form:
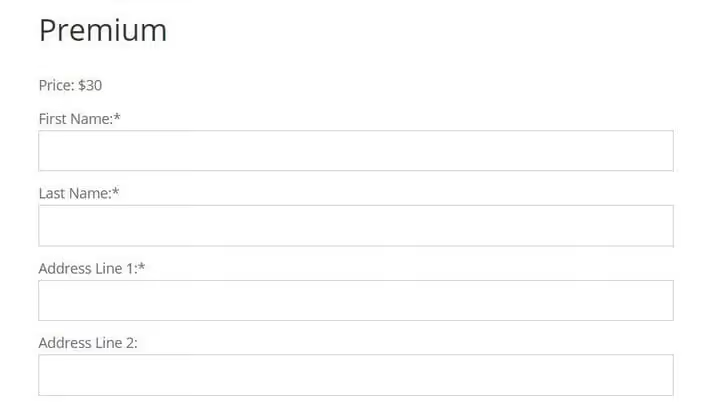
Repeat for each tier. A typical setup: a basic plan with limited access, an advanced plan with full content, and a VIP plan with coaching or individual support. The difference between them lies in the access rules you'll create in the next step.
Step 4. Content access rules
Plans are created; now you need to decide who sees what. Go to MemberPress → Rules and click "Add New."
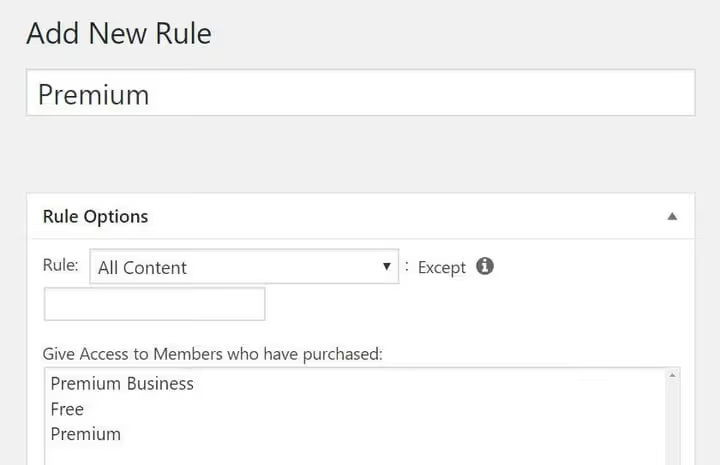
In the "Rule Options" section, choose what content to protect:
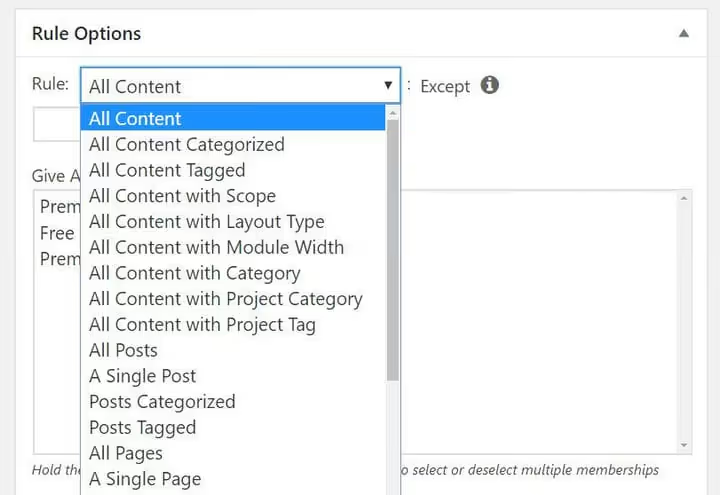
- All content closes everything except what's explicitly allowed.
- Specific posts/pages for pinpoint protection via slug search.
- Categories and tags, for example, all posts in the "Premium Lessons" category visible only to subscribers.
- Child pages protect a section along with all nested pages.
- Files allow MemberPress to protect digital downloads (PDF, ZIP).
Then specify WHICH membership plans can access this content. One piece of content for one plan, another for a different plan. This is how you build a hierarchy: the basic plan sees basic lessons, VIP sees all lessons plus coaching.
Click "Save Rule." Create rules for each membership plan. A visitor without the required subscription who tries to open a protected page will see a login form or an offer to sign up for a plan.
Step 5. Registration and login menu on the site
The final touch is enabling visitors to register and log in without having to remember the login page URL.
Go to Appearance → Menus (or Customizer → Menus in the site interface). In the list of available items, you'll see a "Memberships" block; check the plans you created and click "Add to Menu."
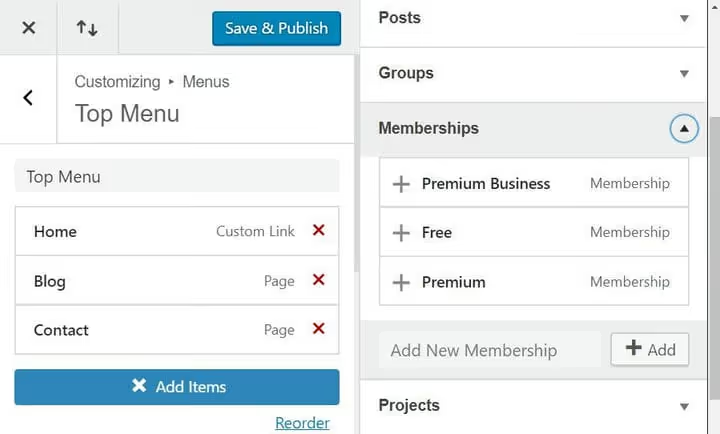
Change the "Navigation Label" to something human-readable (for example, "Pricing" or "Subscribe"). Save the menu.
Login link
MemberPress provides its own login page. To add a "Log In" link to your menu, use the built-in WordPress mechanism:
In the same menu editor, expand the "Custom Links" block. In the URL field, enter /login/ (or whatever slug you set for the login page in MemberPress Settings). Link text should be "Log In." Click "Add to Menu" and save.
MemberPress also automatically shows a logout link to authenticated members via the account page.
The old BAW Login-Logout Menu plugin (often recommended in 2021 guides) was closed in June 2025 and is incompatible with PHP 8+. Do not use it; the built-in MemberPress functionality is sufficient.
⁉️🤔 Frequently asked questions
Do I need a developer to set up MemberPress?
No. Installation and basic setup can be done with your mouse in one evening. Ready-made pages via ReadyLaunch, drag-and-drop course builder, and automatic registration forms. MemberPress works with any theme "out of the box": installation takes 5 minutes, and your first membership plan with a payment form takes 20 minutes. A developer is only needed for deep customization of membership pages to match a unique design. The only tricky part is connecting a payment gateway: you'll need Stripe or PayPal API keys from your payment system dashboard, but step-by-step instructions with screenshots are in the MemberPress documentation.
What payment systems does MemberPress support?
Stripe on all plans. PayPal and Square starting with Growth ($349.50/year). Authorize.net only on Scale ($499.50/year). This covers 99% of scenarios: Stripe for cards and Apple Pay/Google Pay, PayPal for those who prefer paying via PayPal. For accepting payments on the basic Launch plan, Stripe is enough. All gateways are configured in the "Payments" section: paste your API keys, and your site accepts payments. MemberPress also supports offline payments (manual confirmation of bank transfers or cash).
Can I sell courses through MemberPress?
Yes, it's a built-in feature. The LMS builder with drag-and-drop: create a course, add sections and lessons, attach quizzes and assignments, and issue certificates. The course is protected by MemberPress rules and available only to those who purchased the required plan. The course builder is included in all plans. On Growth and Scale, advanced features are available: unlimited quizzes and assignments, certificates, and Gradebook. Scale and Growth also include the AI Course Generator: describe a topic in text, and AI generates the structure and draft lessons. A single course can be part of a membership plan or sold separately.
How does MemberPress differ from Kajabi and Patreon?
Your site remains yours. Kajabi and Patreon are platforms: you pay them commission or an expensive subscription, and your content lives on their servers. MemberPress is a plugin on your WordPress: you own the audience, the data, and don't depend on someone else's platform. Patreon takes 5% to 12% commission on revenue (see patreon.com/pricing) plus payment processing fees. Kajabi starts at $69/month. MemberPress on Launch is $199.50/year ($16.63/month) with a 4.9% fee only on transactions (see MemberPress pricing). But the main difference isn't about price: on your own WordPress installation, you control the design, SEO, and member list. Platforms won't hand over your email list when you leave.
What should I do if the BAW Login-Logout Menu plugin stopped working?
Stop using it. The plugin was closed in June 2025, hasn't been updated in 9 years, and is incompatible with PHP 8+. Delete it and set up login through the built-in MemberPress page: MemberPress → Settings → Account → "Force WordPress to use the MemberPress login page". Add a link to the login page in your menu via "Custom Links," just a simple
/login/.
Is MemberPress worth it in 2026?
In short: yes, if you're already on WordPress and want to monetize your content.
MemberPress has no serious drawbacks for its price. The only objective downside is the 4.9% commission on the Launch plan, but it goes away when you upgrade to Growth, and for getting started, $200 a year with a working paywall and Stripe is a fair price. For comparison: a review of membership plugins for WordPress often requires separate add-ons for courses or communities, while here everything is in one core.
If you're launching a membership site from scratch, get Launch and follow the five steps in this article. By the end of the evening, you'll have a working payment system and gated content. If you already have an audience and plan to offer courses or coaching, look at Growth: it pays for itself with no commission and built-in CoachKit.
Compared the plans? Decided on your membership tiers? Head over to memberpress.com and grab the plugin. Setup takes an evening, and your membership site will start generating revenue from your very first subscriber.

A professional team of writers and editors specializing in creating quality content.