














🎨 Customizing WordPress theme design with Yellow Pencil: complete 2026 guide
The theme is installed, the content is in place, and the site looks... like nothing. The built-in WordPress customizer covers basic scenarios: background color, logo, sidebar widgets. But the moment you want to shift a heading 10 pixels to the left, change the font on a specific button, or add a gradient backdrop to a single block, the standard controls fall short. And nobody wants to dive into style.css after every minor tweak.
Yellow Pencil solves this problem head-on. It is a visual CSS editor: you click on an element on the page and immediately change fonts, colors, spacing, borders, animation, without writing a single line of code. The plugin generates clean CSS on the fly and leaves your theme files untouched.
By the end of this guide you will be adjusting designs faster than a front-end developer can open the code inspector, and without any risk of breaking something.
💡 Quick overview:
- Install Yellow Pencil from the WordPress.org directory (free) or download the Pro version from the official website
- Activate the plugin and open the visual editor using the "Let's Start" button on the welcome screen
- Choose a customization type: global (site-wide), single page, or post template
- Click on elements on the page and adjust their appearance through the right panel: fonts, color, borders, background, animation
- Save your changes and check responsiveness using the built-in tablet and phone emulator
What is Yellow Pencil and why you need it
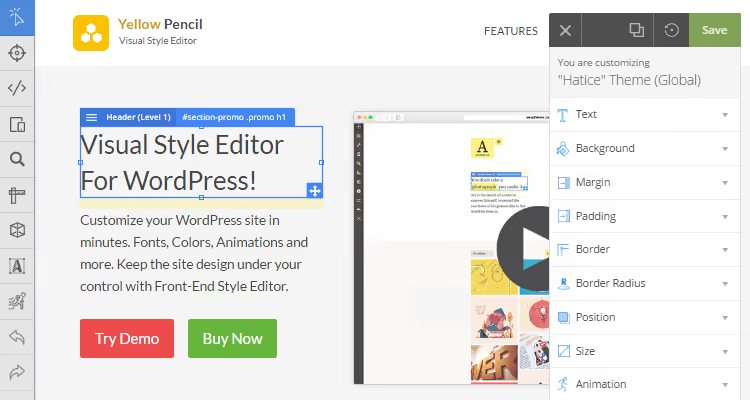
Yellow Pencil is a visual CSS editing plugin for WordPress. An important distinction right away: this is not a page builder like Elementor or Gutenberg. The plugin does not add new blocks; it styles existing ones. Those you created with any builder or those that come with your theme.
At its core is an element inspector: click on a heading, button, or image, and you instantly get access to 60+ CSS properties in the right panel. Move a slider, and the page changes in real time. No more "edit code → refresh browser → doesn't fit → repeat" cycles.
The plugin works with any WordPress theme and does not modify its files. All edits are stored in a separate stylesheet and loaded dynamically. The theme remains untouched, changes can be rolled back, exported as ready-to-use CSS, or removed along with the plugin.
Who needs this? Primarily those who do not write CSS by hand but want to refine the design visually. However, experienced developers will also appreciate the speed: instead of editing source files and reloading, a mouse click delivers instant results. Freelancers and agencies use Yellow Pencil for quick client site customization without risking damage to someone else's theme.
Key features of Yellow Pencil
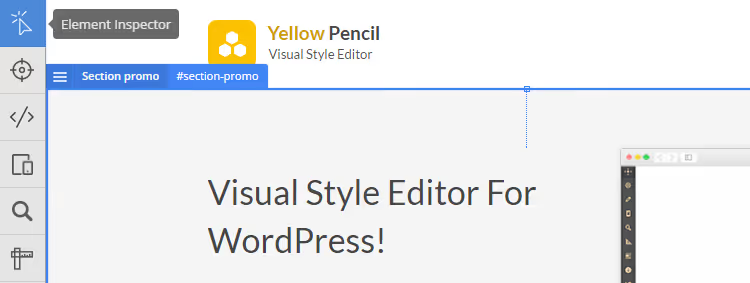
There are many features, but they all revolve around one idea: take any element on the page and change its appearance through a visual interface. Below are the key features of the Pro version (v7.6.7, current as of 2026):
- Element inspector: clicking on any block, text, or image opens a panel with all available CSS properties
- **Visual **drag and drop: change element positions with your mouse, without editing code
- Resizing: drag the edges of the blue frame around an element, and the size changes visually
- 900+ Google Fonts: connect them with one click from the plugin's built-in library
- 300+ background patterns: plus gradients, solid colors, and custom images
- 50+ animations: ready-made CSS animations with a visual manager and custom keyframe generator
- CSS code editor: for those who want to write styles manually, with autocomplete and error checking
- Responsive mode: separate style editing for desktop, tablet, and phone
The plugin generates CSS dynamically and loads it as a separate stylesheet. Site performance is not affected; exactly one stylesheet is added, nothing more.
Installing Yellow Pencil
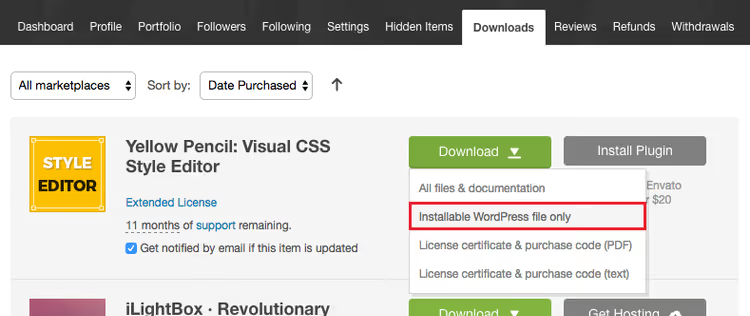
Installation is no different from any other WordPress plugin. First get the file: the free version is available in the WordPress.org directory, while Pro is purchased from the developer's official website (single-site license, lifetime updates). Some premium themes include Yellow Pencil Pro in the bundle.
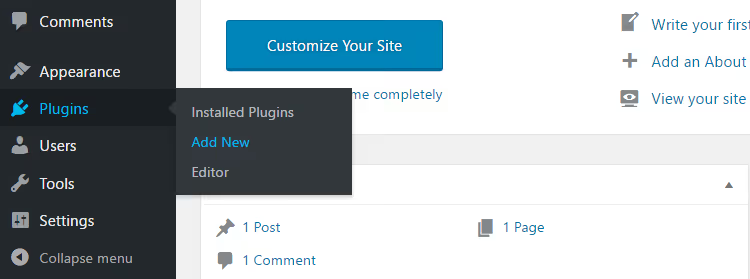
Open the WordPress dashboard and go to "Plugins" → "Add New."
Click "Upload Plugin" → "Choose File."
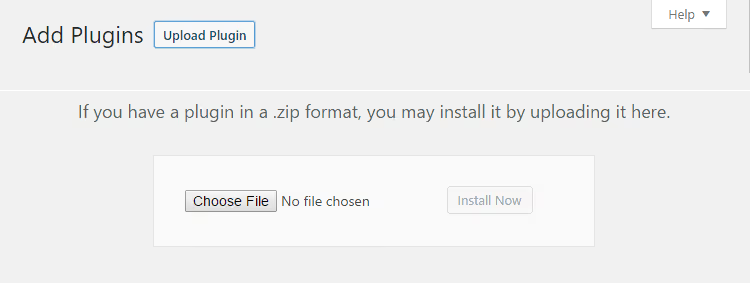
Select the downloaded ZIP archive waspthemes-yellow-pencil.zip and click "Install Now."
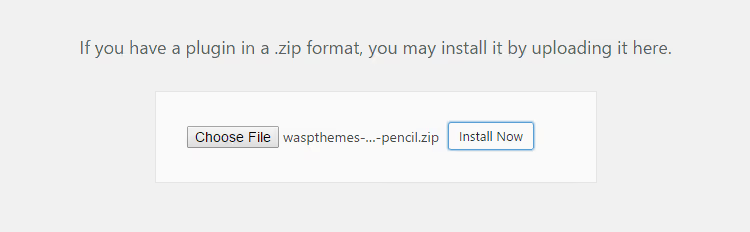
After installation click "Activate." For the Pro version, enter your license key (it will arrive by email after purchase). Activation unlocks updates and all Pro features.
The Yellow Pencil welcome page will appear on your screen. The "Resources" section contains documentation, guides, and support links.
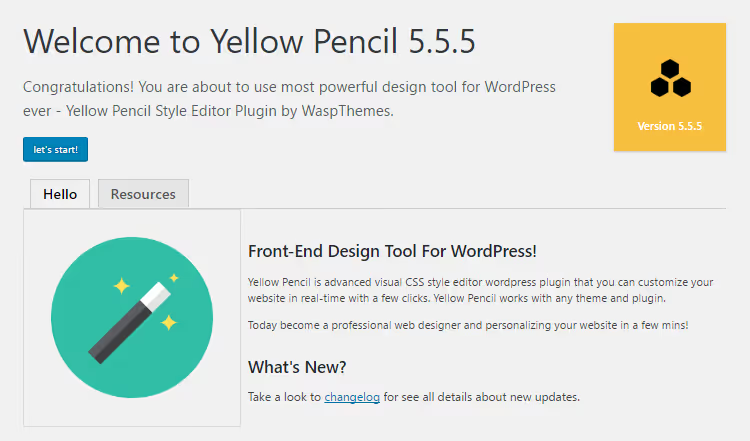
Click "Let's Start," and you will immediately enter the visual editor on the current site page.
Interface: three editor zones
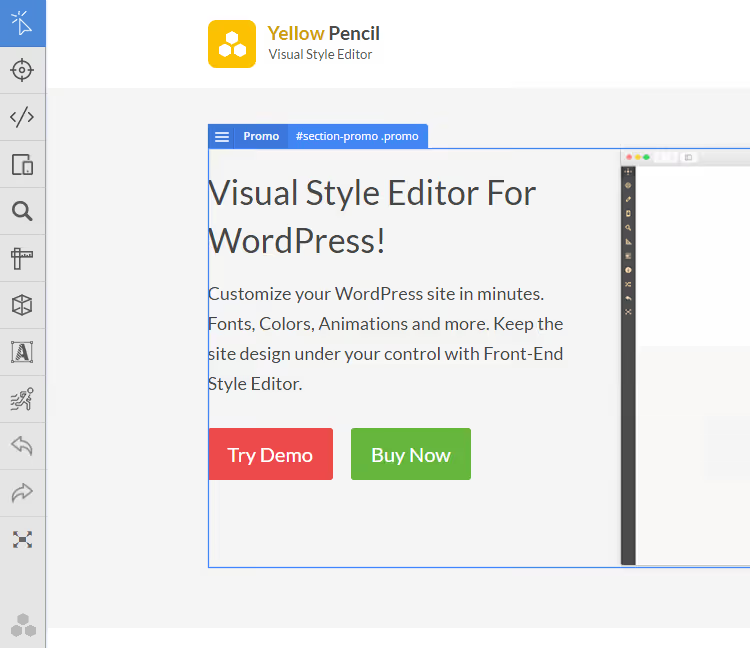
The Yellow Pencil interface is divided into three zones. On the left is a narrow toolbar with icons: element inspector, undo and redo actions, fullscreen mode, responsiveness tool, and measuring ruler. The panel is minimalist and does not distract from the page you are editing.
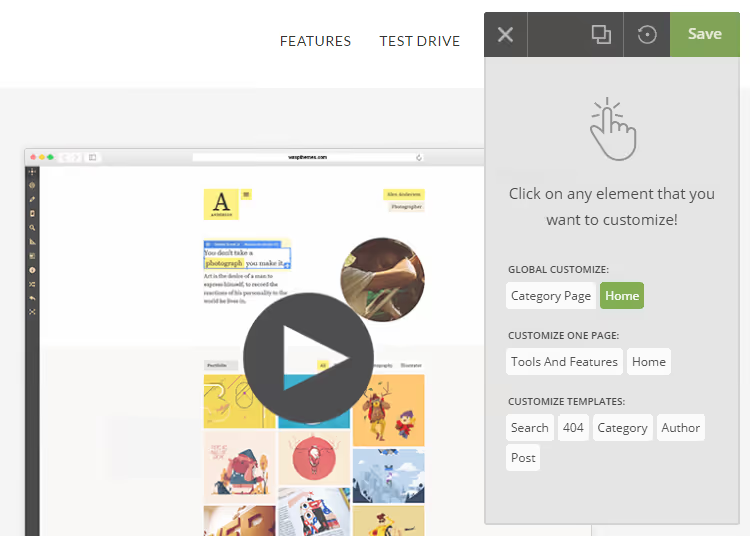
On the right is the editor panel. When no element is selected, it shows three available customization types.
When you click on an element on the page, the panel switches to style properties: fonts, colors, spacing, borders.
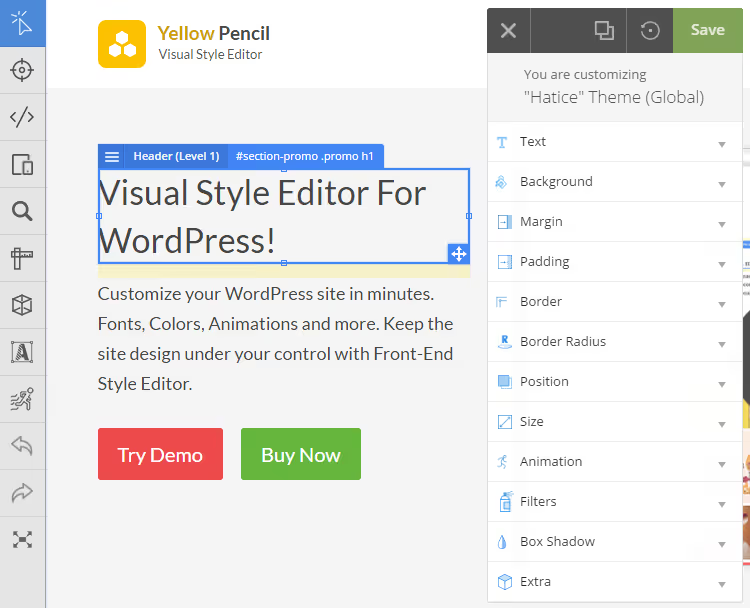
A blue frame with resize handles appears around the selected element. The element can be moved by dragging and resized by pulling the frame edges.
The center zone is occupied by the page itself: you see it as visitors will, and you edit it in real time.
Main tools
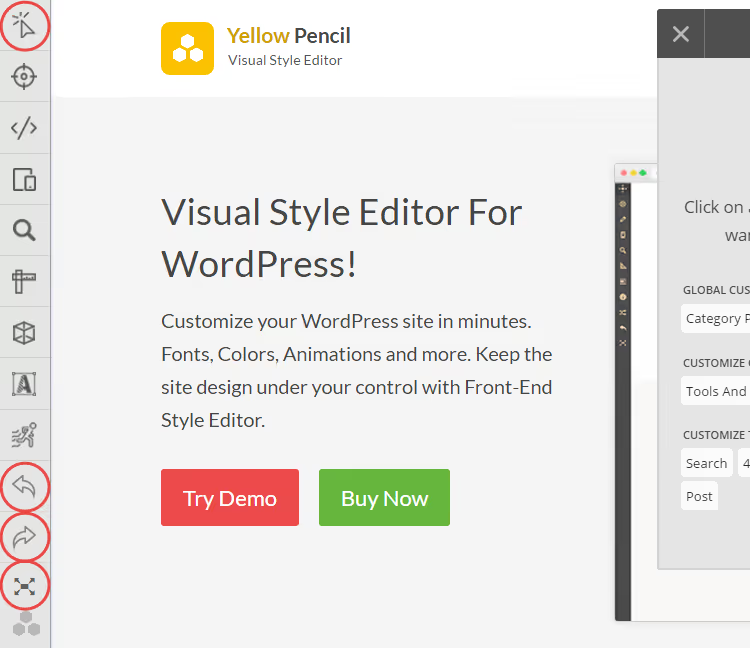
The left panel has three tools you will use constantly:
- Element inspector: selects any visual element on the page for customization. Click on a heading, button, or block, and all its CSS properties appear in the right panel.
- Undo and redo: experimenting with colors and fonts? Hit "undo" if you went too far. The edit history is preserved until you exit the editor.
- Fullscreen mode: hides the WordPress admin, leaving only the page and editor panels. Useful for precise positioning.
On the right panel, at the very top, are three crucial buttons:
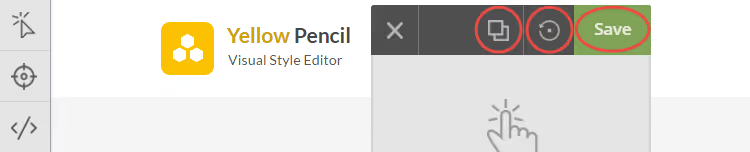
- Preview: shows the page without the editor interface. This lets you see the result through a visitor's eyes.
- Reset changes: rolls back all unsaved edits. Useful when you have gone overboard and lost track.
- Save: applies the changes. After saving, edits are visible to all site visitors.
Three customization modes: when to use each
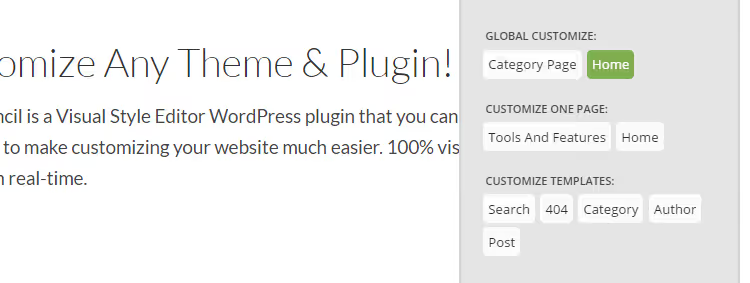
Before you start editing, Yellow Pencil asks you to choose the scope of your changes. The editor panel (with nothing selected) shows three options:
- Global customization: changes apply to all pages on the site. Change the color of all H2 headings, and they change everywhere (homepage, blog, contact page).
- Single page customization: edits apply only to the page you are editing. Ideal for landing pages and unique sections.
- Template customization: changes apply to all posts of the same type. Want all product pages to look the same? This mode is for you.
The current mode is displayed at the top of the editor panel. Always check you are editing the correct type before saving: confusing global and page customization is easy, and the consequences appear immediately across the entire site.
What you can do with Yellow Pencil: practical walkthrough
Below is a breakdown of key capabilities with real examples. Each operation is performed by clicking on an element and selecting the appropriate section in the right panel.
Typography
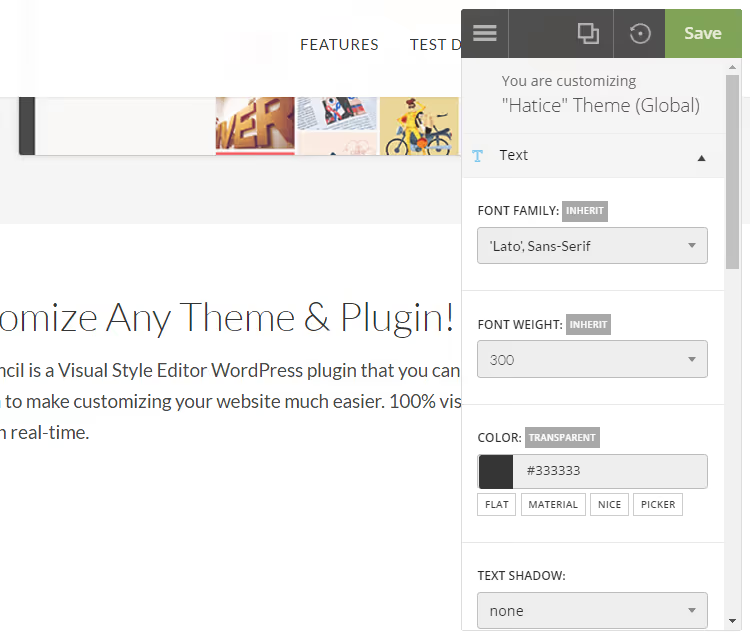
Text is the first thing people tackle after installing the plugin. Click on any text block and select "Text" in the editor panel. All basic properties are available: font change (900+ options from Google Fonts in Pro), size, line height, letter spacing, and word spacing. Text color is chosen from built-in palettes (material and flat) or set with an eyedropper.
The main advantage is live preview. You move the font size slider and immediately see how the layout shifts. This is far faster than the "edit CSS → refresh page → doesn't fit → repeat" cycle.
Borders
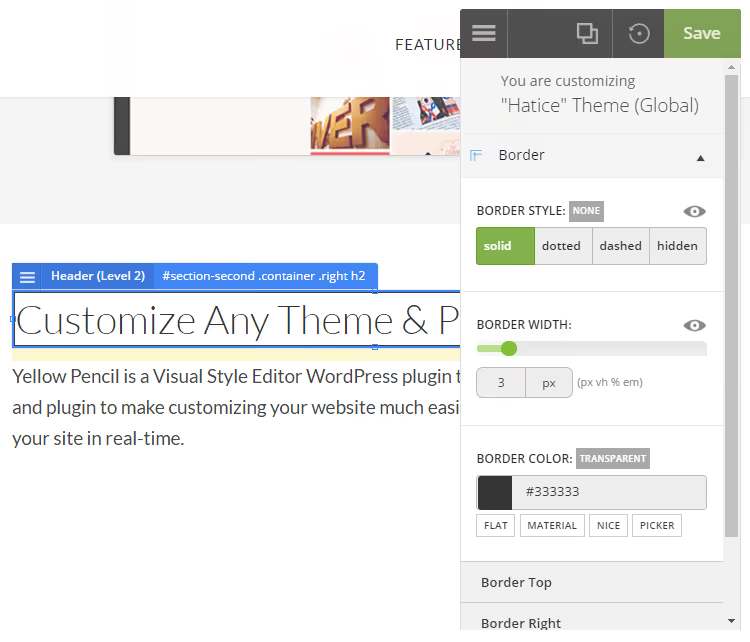
A border around a block is a simple way to highlight a card, quote, or subscription form. Select the element and go to the "Border" tab in the editor panel. Four styles are available: solid, dashed, dotted, and hidden.
A feature most competitors lack: each of the four border sides can be configured separately. Top border is red dashed, left is blue solid, right is green, bottom is absent. Width, color, and style for each side are set independently, giving you design freedom without a single line of code.
Background
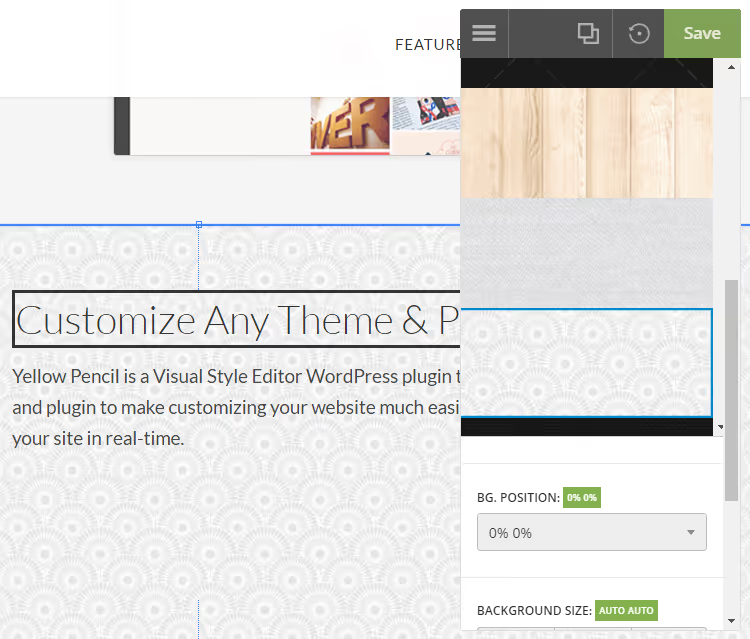
Element background is configured in the "Background" tab. Three options are available: solid color (eyedropper or palette), one of 300+ built-in patterns, and a CSS gradient (linear or radial). You can upload a custom image and configure its positioning, repeat behavior, and scroll behavior.
Background patterns are a nice detail that saves time. Instead of searching for textures on stock sites, you pick a pattern from the library, change its color and opacity, and get a neat block background in a couple of clicks.
Animation
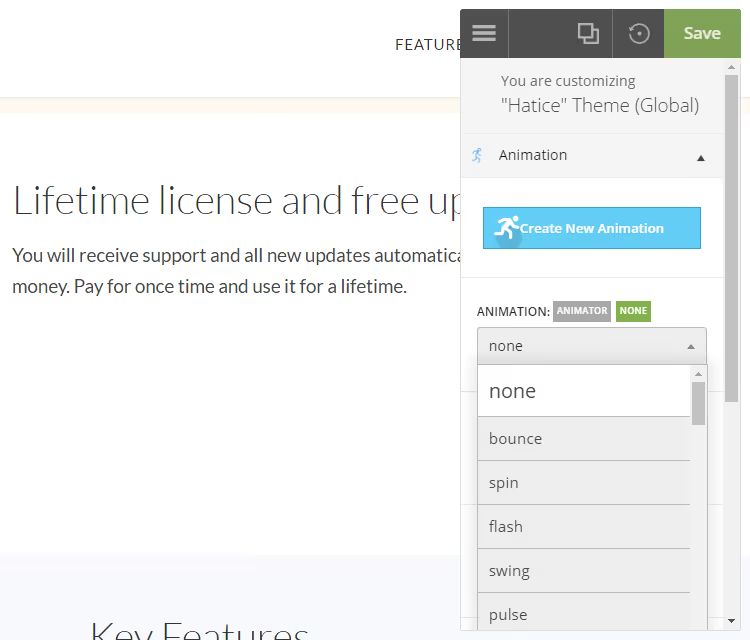
The "Animation" tab gives access to 50+ ready-made CSS animations: fade in, fade out, bounce, rotate, pulse, and others. You select an effect in the visual manager, set duration and delay, and immediately see the element come to life.
For custom scenarios there is an animation generator (Pro): you define keyframes in the visual editor, and the plugin generates CSS @keyframes. Multiple animations can run simultaneously for complex element behavior.
Size and position
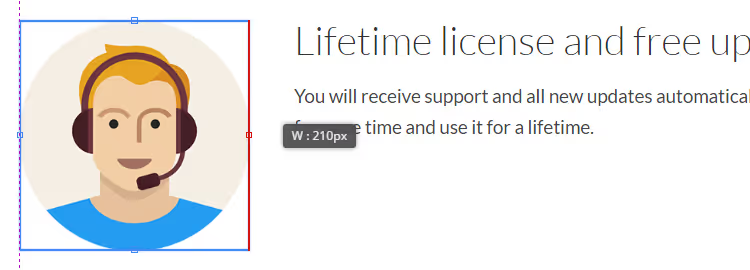
Changing element size is literally dragging the edges. Clicking on an element shows a blue frame with handles at corners and sides. Pull a handle, and the size changes.
Changing position is even simpler: grab the element with your mouse and drag it where needed.
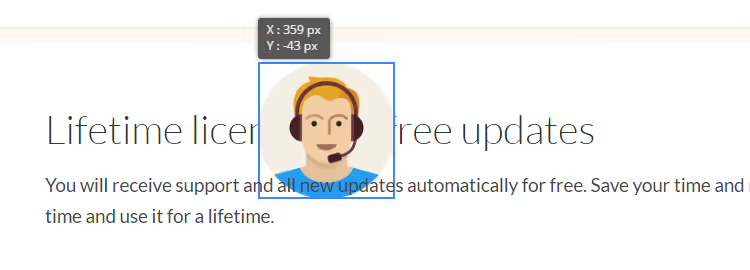
One caveat: dragging can break responsiveness. After moving elements, always check how the page looks on tablet and phone. The left panel has a responsiveness emulator that switches the preview area between desktop, tablet, and smartphone. If something has shifted, separate styles can be set for each resolution.
Free vs Pro: what to choose
The capabilities of the free and Pro versions differ significantly. The free version provides a basic set of CSS properties: fonts (without Google Fonts), text color, spacing, borders, shadows, positioning. This is enough for minimal theme customization (move a heading, change a button color, add a border).
Pro unlocks everything else: 900+ Google fonts, background color and images, animations with a visual manager, gradients, background patterns, width and height control, a CSS editor with autocomplete, WordPress login page customization, and the animation generator.
For a one-off client project, the Pro license pays for itself instantly, saving you hours of manual coding. For a personal blog, the free version is often sufficient.
Price
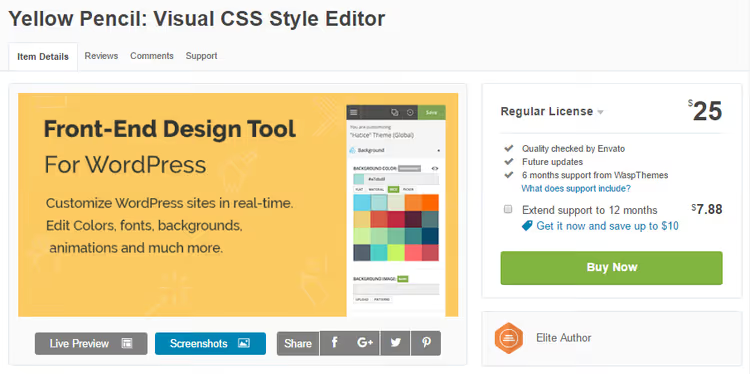
Yellow Pencil Pro is distributed under a paid license from the developer's official website. The price includes lifetime plugin updates and a support period. The license is valid for one site; separate keys must be purchased for multiple projects.
The free version is available on the WordPress.org plugin page. Installation is standard, directly from the admin via "Plugins" → "Add New" → search "Yellow Pencil."
A detailed video overview of the interface and key techniques for working with the plugin (in English, visual and to the point).
⁉️🤔 Frequently asked questions
Will Yellow Pencil break my theme?
No. The plugin does not modify theme files or touch other plugins. All changes are stored separately and loaded dynamically. If something goes wrong, roll back edits using the "Reset changes" button or delete the plugin, and the theme returns to its original state.
Do I need to know CSS to work with Yellow Pencil?
No, that is the whole point of the plugin. You click on an element and change its properties visually: color, font, spacing, borders, animation. CSS is generated automatically. If you know CSS, there is a built-in code editor with autocomplete and highlighting, and you can write styles manually on top of visual edits.
Does the plugin work with Gutenberg and Elementor?
Yes, Yellow Pencil is compatible with all popular page builders: Gutenberg, Elementor, Divi, Beaver Builder, WPBakery. The plugin styles the ready-made blocks you create in the builder and does not conflict with their markup.
Can I customize the WordPress login page?
Yes, in the Pro version. Go to "Appearance" → "YellowPencil Editor," select "WordPress login page" as the target, and click "Customize." You edit the logo, background, buttons, and form fields just like a regular page.
What happens after I delete the plugin?
All applied styles will disappear, and the site will return to the default theme design. Before deleting, you can export the CSS via the built-in "Export stylesheet" function and connect it manually as a child theme, so the styles are preserved even without the plugin.
Are there alternatives?
Direct analogs with a visual CSS editor include Microthemer (similar element inspector) and CSS Hero (a bit simpler, fewer properties). Both are paid. Among free options, only the built-in WordPress customizer exists, but it provides access to just a small fraction of the CSS properties Yellow Pencil offers.
Is Yellow Pencil worth getting for theme customization
If you do not write CSS by hand and do not want to spend hours editing theme files, Yellow Pencil is one of the best tools on the market. It does not replace a page builder, but it addresses exactly the pain every site owner faces: "I want to tweak things just a bit, change a color and font, but without code."
For freelancers and small agencies, this means time saved on routine client site edits. For blog owners, it is a way to tidy up the visuals without calling a front-end developer. For developers, it provides quick style prototyping before transferring to a child theme.
The main rule when working with Yellow Pencil: check responsiveness after every batch of edits. The built-in tablet and phone emulator shows an honest picture, and separate styles for each resolution allow you to fix anything that has shifted. With this habit, the plugin pays for itself on the very first day of use.

A professional team of writers and editors specializing in creating quality content.