













 AIIllustrative image: AI-generated
🚀 How to create a one-page website in WordPress in less than an hour
A single-page website is when all the content lives on one page, and the menu doesn't lead to other URLs: on click, the page smoothly scrolls to the needed block. No reloads, no lost visitors. Sounds like what you need for a landing page, portfolio, or business card, right?
But when it comes down to it, a beginner hits two walls. The first, "I don't know how to code." The second, "I probably need expensive plugins." Both walls crumble within an hour.
You will create a full-fledged single-page website on WordPress with smooth scrolling, anchor sections, and entirely with free tools. Not a single line of code.
If you prefer to watch rather than read, here's a visual walkthrough from installation to publication:
💡 Quick overview:
- Install XAMPP, a local server for testing WordPress on your computer
- Deploy WordPress on a local machine through phpMyAdmin and editing wp-config.php
- Choose a theme compatible with single-page structure (we'll use SiteOrigin North)
- Install two free plugins from SiteOrigin: Page Builder and Widgets Bundle
- Assemble a page from ready-made layouts, assign anchor IDs, and link them to menu items
Why a single-page website at all
A single-page site wins over a classic multi-page website in specific scenarios. You control the order in which a visitor consumes information: first the value, then the price, not the other way around. No hunting for links in the menu.
When this works
A photographer's portfolio, service landing page, product promo page, company business card with five sections, all this fits into one scroll screen. Six blocks of two to three paragraphs on one page look solid. The same six blocks on six different pages look like a dummy site.
Mobile and speed
A single-page site loads once. After that, only scrolling. A visitor can lose internet in the middle of reading and still scroll to the end: the page is already in memory. On a mobile screen, this feels like an app, not a website. Google confirmed long ago: mobile-first indexing has been the standard since 2018.
When not to
A hundred blog articles, a complex online store, multi-level structure, a single-page site won't handle it. Scrolling becomes endless, and SEO suffers: search engines love separate URLs for each cluster of meanings.
Step 1: Installing XAMPP on Windows
XAMPP is a free cross-platform package: Apache (web server), MariaDB (database), PHP, and Perl. Simply put, it turns your computer into local hosting where WordPress works without internet and without payment. Ideal for testing and learning builds.

Installation procedure on Windows:
- Go to the Apache Friends website and download the latest version of XAMPP for your system.
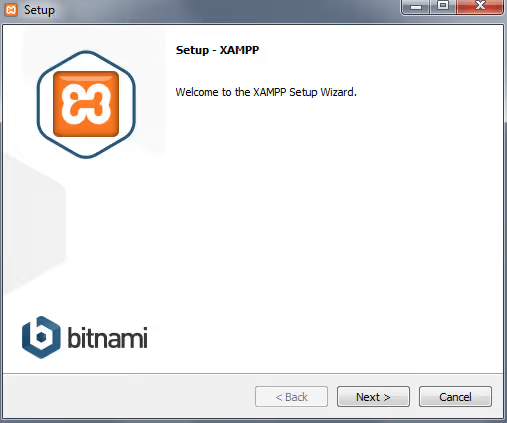
- Run the installer. On the welcome screen, click Next.
- At the component selection stage, leave checkmarks on MySQL and phpMyAdmin, this is enough for WordPress. The rest can be unchecked: you can add them later through the control panel if needed.
- Choose an installation folder (default is
C:\xampp, you can leave it). - On the Bitnami screen, uncheck "Learn more about Bitnami for XAMPP", we'll install WordPress manually. Click Next.
- Wait for the files to unpack. Leave the "Launch control panel" checkbox and click Finish.
If the control panel opened without red errors and Apache and MySQL are highlighted in green, the server is working. Open a browser and go to http://localhost/. If you see the XAMPP welcome page, everything is configured correctly.
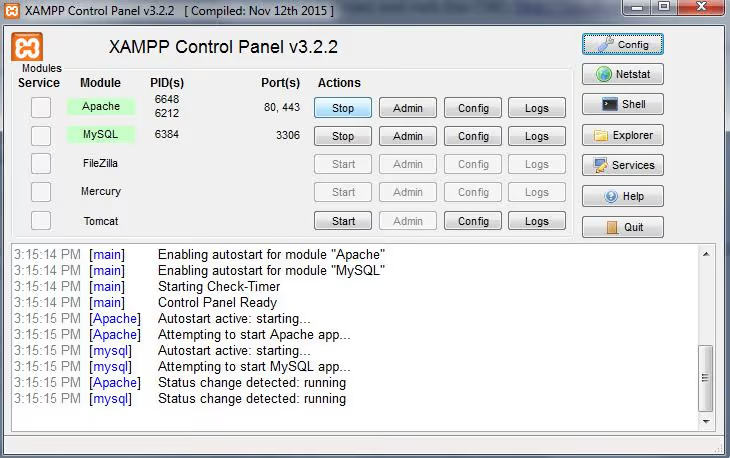
If Apache doesn't start, check if port 80 is occupied by another program. Skype and IIS are common culprits. In Apache settings (Config → Apache → httpd.conf), you can change the port from 80 to 8080.
Step 2: Creating a database and installing WordPress
WordPress stores everything, pages, settings, users, in a MySQL database. Let's create it through phpMyAdmin.
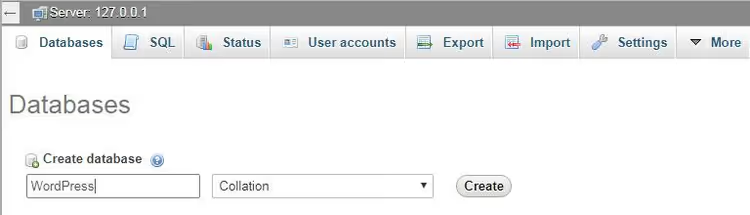
- In the XAMPP control panel, click the Admin button in the MySQL row. phpMyAdmin will open.
- Go to the Databases tab in the upper left menu.
- Enter a database name, for example
wordpress, and click Create.
The database is ready. Now, WordPress itself:
- Download the latest version of WordPress and extract the archive to the folder
C:\xampp\htdocs\wordpress(you can name the folder differently, this will be part of the local URL). - In the folder, find
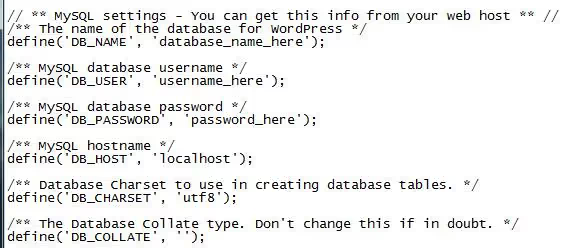
wp-config-sample.php, rename it towp-config.php. - Open the file in any text editor and find the MySQL settings block:
1 define('DB_NAME', 'wordpress'); 2 define('DB_USER', 'root'); 3 define('DB_PASSWORD', ''); 4 define('DB_HOST', 'localhost');
- Save the file and close the editor.
- In the browser, open
http://localhost/wordpress/. Choose a language, create a username and password, click Install WordPress.
Done. You're logged into the WordPress admin on your local machine. First milestone achieved.
Step 3: Choosing a theme
Almost any theme will work for a single-page website, but we'll use SiteOrigin North, it's free, responsive, and tailored for working with the page builder SiteOrigin, which will come into play in the next step. The theme supports a sticky menu, so visitors won't have to scroll back up to navigate to another section.
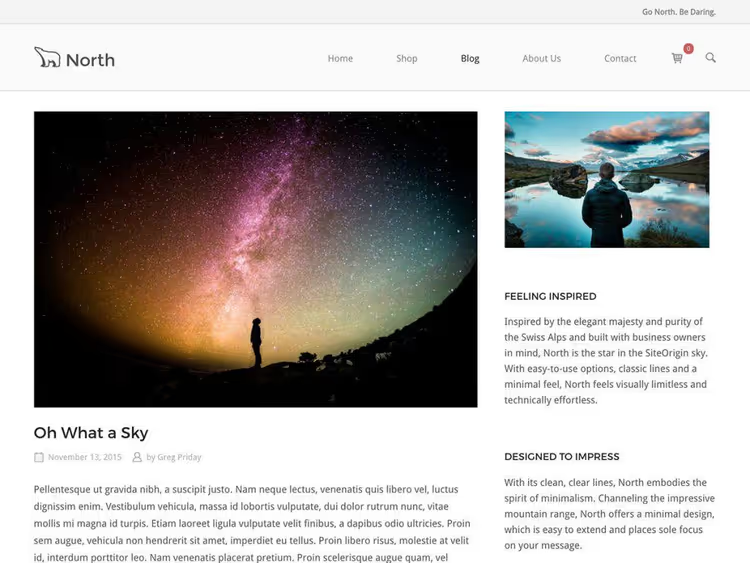
Installation: Appearance → Themes → Add New → enter SiteOrigin North → Install → Activate. The theme is developed by the SiteOrigin team, the same people who make the Page Builder plugin. There won't be conflicts.
Step 4: SiteOrigin plugins, Page Builder and Widgets Bundle
The core of our build, two free plugins from the WordPress repository:
- SiteOrigin Page Builder (
siteorigin-panels), a drag-and-drop builder with a grid, layouts, and built-in single-page scrolling functionality (since version 2.3). Live previews, clean HTML output, 500,000+ active installations. - SiteOrigin Widgets Bundle (
so-widgets-bundle), a set of widgets: buttons, images, sliders, maps, prices, and another two dozen elements. Everything that fills layouts.

Installation: Plugins → Add New → search for SiteOrigin Page Builder and SiteOrigin Widgets Bundle one by one → Install → Activate both. It's precisely the combination of these two plugins that will give you both the builder and content for layouts. The anchor scrolling feature is built into Page Builder, no additional plugins for single-page functionality are needed.
Step 5: Building a page in SiteOrigin Page Builder
Create a new page (Pages → Add New). Above the standard editor, tabs will appear, switch to Page Builder.
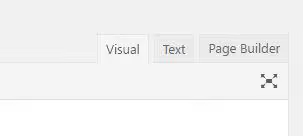
SiteOrigin Page Builder comes with a library of ready-made layouts. Click the Layouts button above the editor.

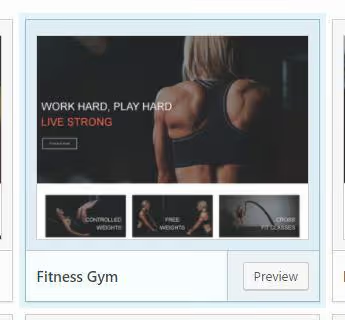
A catalog of presets will open, from Fitness Gym to Agency. Choose a suitable one (we chose Fitness Gym), click Insert. If there was already content on the page, the plugin will ask: insert before, after, or replace. For a blank page, it makes no difference.
Save the page and open it. Switch to **Live **Editor, the link to it will appear in the top WordPress admin bar.
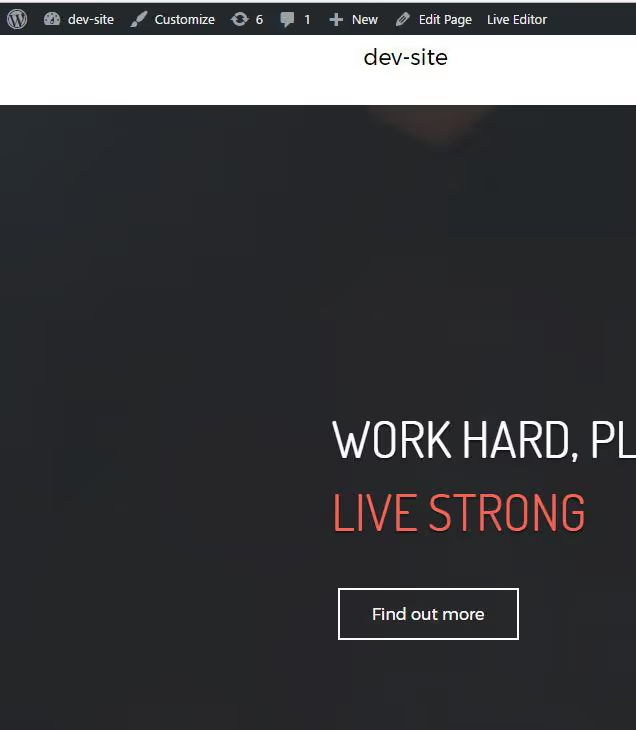
In Live Editor, you hover over any element and immediately see which widget is responsible for it. You can edit text, change images, and drag blocks, all in real time.
Step 6: Anchor IDs and navigation menu
The last step is to link menu items to page sections. Without this, scrolling won't work.
In Live Editor, hover over the first row after the Hero block, click the wrench icon, and select Edit Row. Go to the Attributes tab and in the Row ID field, enter an identifier, for example activities. Click Done.
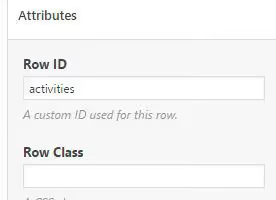
Repeat for each row with a unique ID: services, then pricing, then contact, and so on. Save the page.
Now the menu: Appearance → Menus. Create a new menu. Add items through Custom Links: in the URL field, enter #activities, in the name field, "Activities". Repeat for each ID.
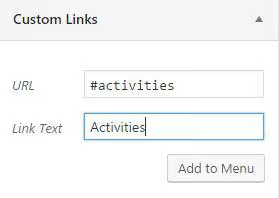
Important nuance: the hash # is mandatory in the menu item URL (this is the HTML anchor format), but in the Row ID inside Page Builder, you do not need to put the hash, the builder understands by itself that it's an identifier.
More details about creating menus in WordPress are covered in our guide on setting up navigation.
Save the menu, assign it to a theme display area, and open the site. Click on a menu item, the page will smoothly scroll to the needed section.
⁉️🤔 Frequently asked questions
Is XAMPP mandatory or can I go straight to hosting?
XAMPP is needed for local testing. If you already have hosting with WordPress, skip steps 1 and 2, go straight to the theme and plugins. The anchor logic works the same way both locally and on a live server.
Can I use another theme instead of SiteOrigin North?
Yes, almost any modern WordPress theme supports single-page structure. The main thing is that the theme doesn't conflict with SiteOrigin Page Builder. The Page Builder developers guarantee compatibility with most themes from the WordPress repository.
Does this setup work on Mac or Linux?
XAMPP is cross-platform, versions exist for Windows, macOS, and Linux. On Mac, you can also use MAMP (free version). WordPress and plugin installation after setting up a local server is identical on all operating systems.
What to do if Apache doesn't start?
The two most common reasons: port 80 is occupied by another program (Skype, IIS, another web server) or antivirus is blocking network activity. Solution: change the Apache port to 8080 in
httpd.confor terminate the interfering process throughnetstat -ano | findstr :80in the command line.
Can I add more sections later?
Yes. At any time, go into Page Builder, add a new row, assign it a Row ID, and create a menu item with the same anchor. The builder doesn't limit the number of sections.
What you got in an hour
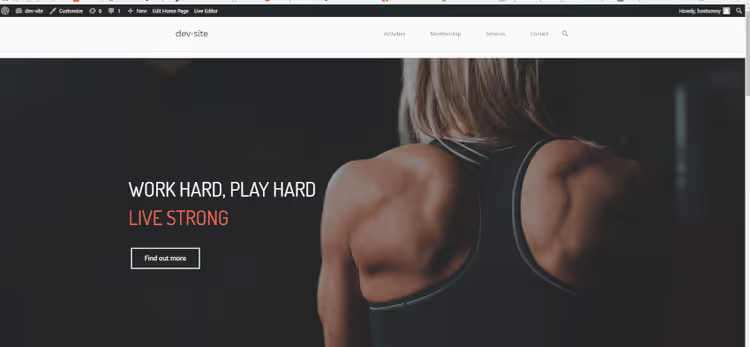
A working single-page website on WordPress. With an anchor menu, smooth scrolling, live editor, and entirely with free tools. The same XAMPP + SiteOrigin setup works for commercial projects too: build a landing page locally, test it, and transfer it to live hosting through any migration plugin.
Make it a rule: first local build, then production. This saves money on hosting during experiments and saves nerves when something goes wrong.
If the material was helpful, try building your first single-page site today. XAMPP and WordPress download in five minutes, and the SiteOrigin builder takes care of all the layout.

A professional team of writers and editors specializing in creating quality content.