













 AIIllustrative image: AI-generated
📝 How to publish posts from Google Docs to WordPress: step-by-step guide
Copy-paste from Google Docs to WordPress, pain. Formatting breaks, images fall off, headings turn into a pumpkin. And if three authors are working on the post, emailing docx files back and forth by email kills what's left of productivity.
The official WordPress.com addon for Google Docs solves this problem in one click: write in Docs, save a draft to WordPress. No copy-paste, no workarounds, no lost formatting.
But this setup has nuances. We'll cover exactly what below: what the addon can do, how to configure it, where it lies and why you should still check the WordPress editor after export.
💡 Quick overview:
- WordPress.com addon for Google Docs, an official Automattic tool, is available in the Google Workspace Marketplace
- For self-hosted sites you need the free Jetpack plugin and a WordPress.com account
- Formatting transfers selectively: headings, lists and links yes, colors and fonts no
- Images automatically upload to the WordPress media library, but alt text requires manual adjustment
- Always save as draft rather than publishing directly, after export you need to proofread in the editor
What is the WordPress.com addon for Google Docs
The WordPress.com for Google Docs addon is an official extension from Automattic, the creators of WordPress. It lives in the Google Workspace Marketplace and as of 2026 is actively maintained.
The name is confusing: despite WordPress.com in the name, the addon works with self-hosted wordpress.org sites too. For this you need the Jetpack plugin, which acts as a bridge between Google Docs and your site. Jetpack itself is free in the basic version, and the free tier is enough for the addon to work.
Why do you need this at all? Three scenarios where this setup wins:
Collaboration. Google Docs, king of collaborative editing. Multiple authors edit the document simultaneously, changes are visible in real time, and change history is stored by the second. After finishing, one click and the draft is in WordPress.
Typing speed. The Docs interface is more responsive than WordPress admin, especially on weak machines or with unstable hosting. You type without lag, publish when ready.
Security. Editors and copywriters don't need WordPress accounts. All work happens in Docs, and one person enters the admin for final proofreading and publishing. Fewer accounts, fewer attack vectors.
Step 1. Connect Jetpack to the site
The first thing you need to do on a self-hosted WordPress site is install Jetpack. Without it the addon won't see your site.
Find the Jetpack plugin in the WordPress repository (Plugins → Add New), install and activate it. Immediately after activation the system will ask you to connect a WordPress.com account, this is mandatory because the addon authorizes the connection through it.
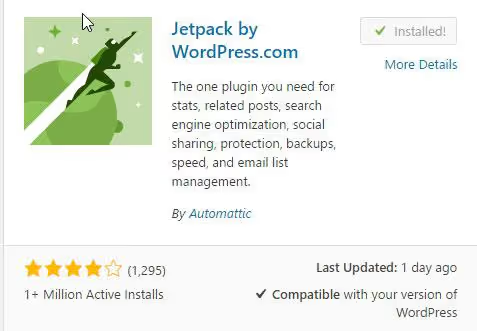
After connecting, go to Jetpack settings and disable everything you don't plan to use. By default the plugin enables dozens of modules: from CDN for images to brute force protection. None of them are needed for the Google Docs addon to work, you can safely turn everything off except the basic WordPress.com connection.
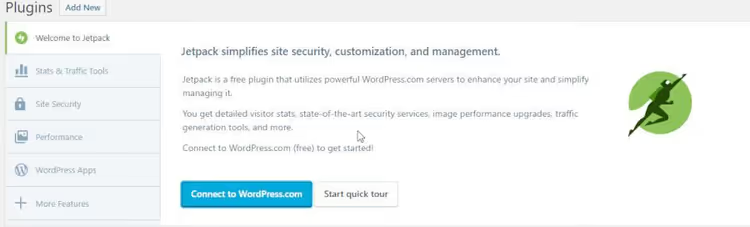
Why this matters: every extra module is a potential conflict with your theme or other plugins. Minimalism is justified here.
Step 2. Install the addon in Google Docs
Open the addon page in Google Workspace Marketplace and click "Install". The addon will be added to your Google account and become available in any Docs document.
Now open the document you want to publish, go to the "Extensions" menu → WordPress.com for Google Docs → "Open". A sidebar will appear on the right.
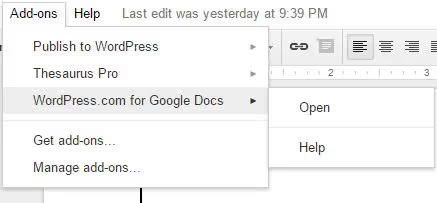
On first launch the addon will request access to your Google account. Click "Authorize", without this step the addon won't see sites linked to your WordPress.com account.
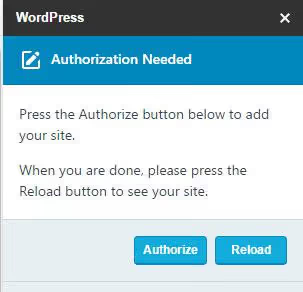
Step 3. Save your first draft to WordPress
After authorization a dropdown list with your sites will appear in the sidebar. Select the one you need and you can save.
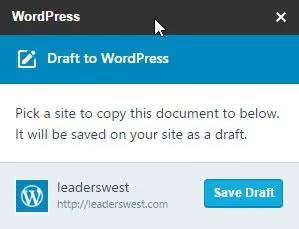
Important point: the addon offers two buttons, "Save as Draft" and "Publish". I strongly recommend using only the draft. Why will become clear in the next section.
How Google Docs converts formatting to HTML
This is the most important section of the post. The addon doesn't do magic, it translates Docs content to HTML and uploads it to WordPress. And it does this selectively.
To check conversion honesty, I created a test document with all typical formatting elements: three levels of headings, bold and italic text, underline, strikethrough, numbered and bulleted lists, links, colored text, custom fonts. Then I saved it as a draft to WordPress and compared the source with the result.
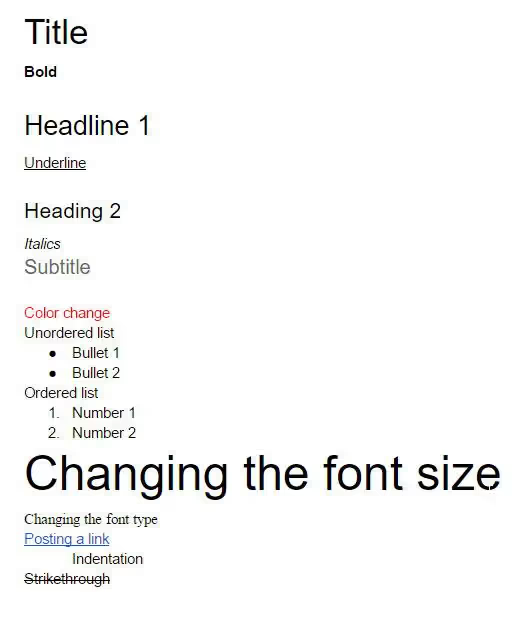
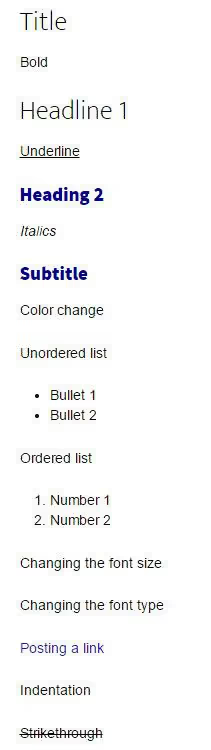
Here's how the same post looks on the site after export:
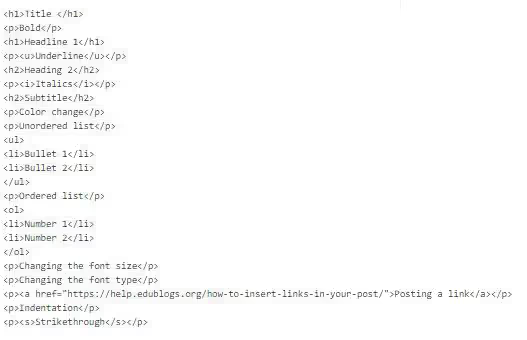
And here's the clean HTML that the addon generated:
Results in a table:
Formatting element | Converts? | Note |
|---|---|---|
H1, H2, H3 headings | ✅ Yes | "Heading" in Docs → H1, "Subheading" → H2 |
Bold, italic, underline, strikethrough | ✅ Yes | No losses |
Numbered and bulleted lists | ✅ Yes | Structure preserved |
Links | ✅ Yes | URL and anchor text transferred |
Text color | ❌ No | Resets to default |
Font type | ❌ No | Replaced with theme font |
Indents | ❌ No | Lost |
Block quotes | ❌ No | Docs doesn't support blockquote |
Conclusion: basic structure transfers perfectly. But visual styling tied to colors and fonts is completely lost. That's exactly why after export you should open the draft in the WordPress editor and look it over. Fifteen minutes of proofreading and the post looks as intended.
What happens to images during export
Images are a separate topic. The addon can upload images from Docs directly to the WordPress media library, but behavior depends on exactly how you added the image to the document.
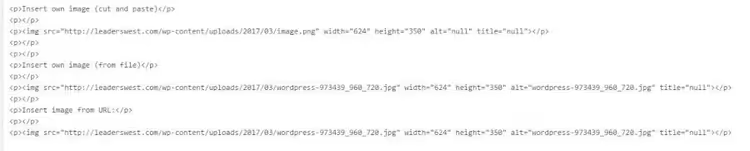
I tested three methods:
Copy-paste (Ctrl+V). The image gets to WordPress but receives the filename
imageand empty alt text. Bad option, the SEO specialist will be unhappy.Insert from file. The image uploads to the WordPress media library with the original filename. Alt text equals the filename, already better but still requires manual editing.
Insert by URL. Contrary to expectations, the addon doesn't leave the image on external hosting. It downloads it and uploads to your media library, same as when inserting from file. Alt text again equals the filename.
What follows from this. After export you need to go through the images anyway and write meaningful alt text. The addon won't do this for you. And yes, image alignment (left, center, text wrapping) doesn't transfer from Docs to WordPress, everything falls into the standard flow.
Video: the process in practice
For those who prefer watching to reading, here's a seven-minute demonstration of the whole process: from installing the addon to publishing a draft.
⁉️🤔 Frequently asked questions
Is installing Jetpack mandatory for the addon to work?
Yes, for self-hosted WordPress sites Jetpack is mandatory. The addon connects to the site and transfers content through it. Exception, sites on wordpress.com: there everything works out of the box without additional plugins. Jetpack is needed for authentication and data transfer, the basic free tier covers this function completely. Paid modules (protection, CDN, backup) are not required for the addon to work, you can safely disable them.
Can you publish a post immediately, bypassing the draft?
Technically yes, the "Publish" button exists. But I strongly advise against it: after export you almost always need to fix image alt texts, check indents and replace lost colors. Better to save a draft, open the WordPress editor and publish the post after a five-minute proofread. Practice shows: even a perfectly formatted document contains at least 3-5 minor flaws after conversion. Draft is insurance against publishing raw material.
What alternatives exist to the official addon?
Direct competitors working on the same principle (Google Docs → WordPress without copy-paste), several. GoPublish, a free plugin with one-click publishing that doesn't require Jetpack. Docswrite, a commercial tool with batch publishing and SEO fields right in Docs. But the official addon remains the most stable and predictable option, it's supported by Automattic itself and is guaranteed not to break when WordPress updates. The choice depends on needs: GoPublish if you don't want to install Jetpack, Docswrite if you publish 10+ posts a week. For most blogs the official addon is more than enough.
What about security, won't the addon get access to all my documents?
The addon requests access only to the document where you opened it. It doesn't scan Google Drive and has no access to other files. Authorization goes through OAuth, you can revoke access anytime in Google account settings. No document leaves Google Docs without your explicit action: clicking the "Save as Draft" or "Publish" button. Background sync is absent.
Why don't colors and fonts transfer, is this a bug or a feature?
This is deliberate behavior. WordPress manages styling through theme CSS, not through inline HTML styles. If the addon transferred colors and fonts from Docs, you'd get a mess of inline styles conflicting with the site theme. So the addon deliberately strips visual styling, leaving only semantic markup. For consistency this is a plus: all posts look like the theme style, regardless of who typed them in which Docs.
Google Docs + WordPress: the right solution for your process
The Google Docs + WordPress combo through the official addon is not a silver bullet but a tool for a specific scenario.
If you're a solo author who writes 2-3 posts a month, the benefit is minimal. The built-in WordPress editor handles this no worse, and an extra plugin (Jetpack) is an extra point of failure.
But if a team works on content, editor, copywriter, proofreader, and they all concurrently edit one document, the addon saves hours. Plus the absence of WordPress accounts for freelancers is a real security plus.
The main rule to remember: always save as draft, don't publish directly. Five minutes of proofreading in the WordPress editor and the post looks exactly as you wanted.

A professional team of writers and editors specializing in creating quality content.