













🔄 How to reinstall WordPress without losing data: a step by step guide
Your WordPress site stopped responding, the admin panel shows a white screen, and standard troubleshooting methods yielded no results. Sound familiar? When deactivating plugins, switching themes, or restoring from backup all fail, there's a nuclear option left: complete reinstallation of the CMS from scratch.
It sounds scary, but in practice this is a controlled procedure. The key is not to panic and not to delete files blindly. Following the correct sequence of steps will keep your content, settings, and media files intact.
Below is a step-by-step algorithm for a clean WordPress reinstallation without data loss. This method works on any hosting platform: cPanel, DirectAdmin, ISPmanager, or with FTP access.
💡 Quick overview:
- Create a full backup using UpdraftPlus and download the archive locally
- Export content using the built-in WordPress tool to XML
- Download the wp-content folder via FTP, which contains all uploads, themes, and plugins
- Delete WordPress core files and create a new database on your hosting
- Install a fresh version of WordPress and connect the new database
- Restore the wp-content folder, import the XML with your content
- Install plugins one by one and test the site
When and why to reinstall WordPress
Reinstalling WordPress is not a preventive measure. It's a last resort when all other recovery methods have been exhausted. Here are typical cases.
Your site is infected with a virus at the core level, and no antivirus plugin can handle it. Malicious code has embedded itself in wp-admin or wp-includes, and cleaning manually takes longer and is riskier than reinstalling.
The database is corrupted, the wp_options or wp_posts tables throw critical errors, and recovery through phpMyAdmin doesn't help. Meanwhile, the content is still readable and can be exported using the standard export.
After manually editing system files, the site stopped loading, and there's no backup of that specific change. It's easier to roll back the entire core at once than to guess which line in wp-config.php or functions.php broke everything.
If the error occurs on a specific page or in the admin panel, try restoring the site from a backup first. If that doesn't help, proceed with the steps below.
Step 1. Full site backup
Before any destructive actions, a backup is mandatory. Skip this step, and your data could be lost forever.
We recommend UpdraftPlus, a free plugin with millions of active installations and stable updates. It exports a complete snapshot: core files, wp-content, and the database.
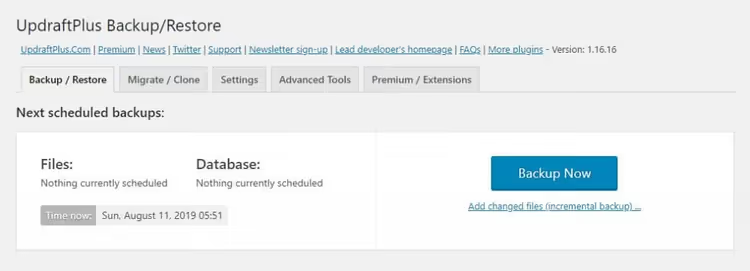
Install the plugin via "Plugins → Add New," type "UpdraftPlus" in the search field, click "Install" and then "Activate." Go to "Settings → UpdraftPlus Backups" and click the blue "Backup Now" button. Wait for completion and download all five archives (plugins, themes, uploads, other files, and database) to your computer.
Additionally, set up remote storage (Google Drive or Dropbox) directly in the plugin interface. If something goes wrong on the hosting, the cloud copy will save you.
Step 2. Exporting content through the WordPress panel
The backup covers everything, but a separate XML export provides a second, independent layer of protection specifically for content: posts, pages, comments, categories, and tags. It will also be needed for the final import into fresh WordPress.
Log into the admin panel. In the sidebar, click "Tools."

In the dropdown submenu, select "Export."
On the page that opens, select "All content." This option captures posts, pages, media files, comments, and custom post types.

Click "Download Export File." The browser will save an XML document to your computer. Don't delete it until the reinstallation is fully complete; you'll need it in step 7.
Step 3. Downloading the wp-content folder
The wp-content folder is the heart of your site. Inside it:
/themes, the active theme and all installed themes;/plugins, all plugins (even deactivated ones);/uploads, every uploaded image, document, and PDF.
Connect to your hosting via FTP (using FileZilla, WinSCP, or the built-in cPanel file manager). In the site's root directory (usually public_html or www), find the wp-content folder.

Download the entire folder to your computer by dragging it to a local directory or right-clicking and selecting "Download." Depending on the size of your media library, the process may take several minutes.
After the download completes, verify that the uploads, themes, and plugins folders inside your local wp-content copy are not empty. Now you can proceed to deletion.
Step 4. Deleting WordPress files and creating a new database
The goal of this step is to erase all WordPress core files while leaving the database and wp-content folder untouched (you've already saved it locally).
Connect to your hosting via FTP or through the cPanel file manager. Select all files and folders in the site root EXCEPT wp-content and database files (they don't exist at this level; the database is stored separately on the MySQL server). Delete the selection.

Now create a new database. Log into your hosting control panel and find the "MySQL Databases" section (in cPanel, it's called exactly that). Click "Create a new database," enter a name (for example, new_wp_db) and confirm.
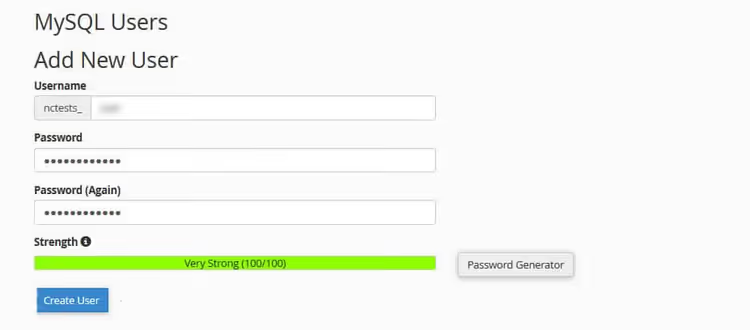
Create a new MySQL user: create a username and strong password, and write them down. Then link the user to the database. In the same cPanel section, find "Add User to Database," select the database and user you just created, check "All Privileges," and confirm.
You'll need the database name, username, and password when installing fresh WordPress, so keep them handy.
Step 5. Clean WordPress installation
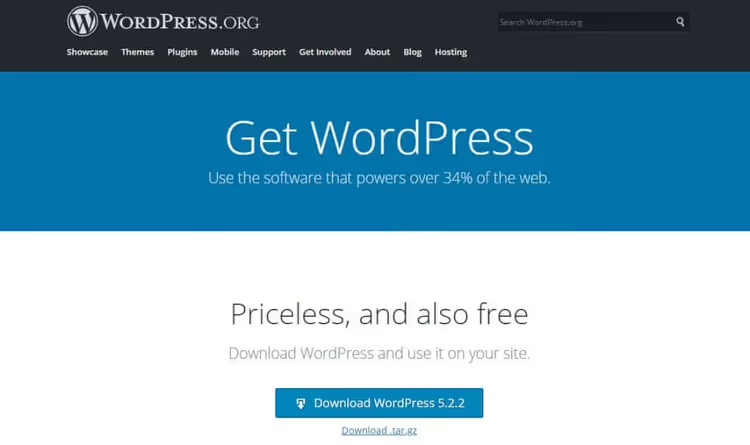
Download the latest version of WordPress from the official website; you'll receive a ZIP archive. Extract it on your computer: inside are system folders wp-admin, wp-includes, wp-content, and files like wp-config-sample.php.
Upload ALL contents of the WordPress folder (not the folder itself, but the files inside) to the site root via FTP. The system will offer to overwrite the wp-content folder. Decline: your original folder with themes and uploads is already there.
Now open the site in a browser; the installation wizard will launch. On the first screen, select your language.
At the database connection step, enter the database name, username, and password created in the previous step. The database host for most providers is localhost. Leave the table prefix as wp_ (unless you have specific security requirements). Click "Submit."
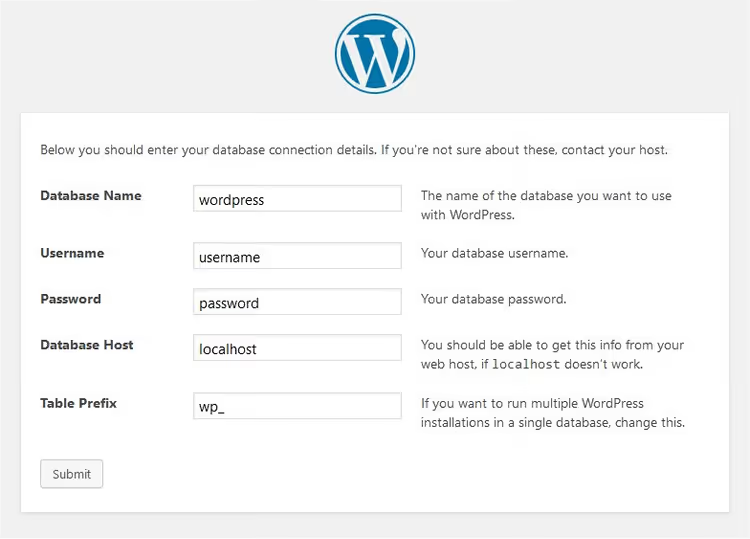
WordPress will verify the connection and show a success message. Click "Run the installation."

Fill in the site information: title, administrator username (NOT admin, create a unique one), password, and email. Click "Install WordPress." After completion, log into the new admin panel.
First, delete the test post "Hello World" through "Posts → All Posts → Trash." Then clear the test comment in the "Comments" section.
Step 6. Restoring uploads, images, and themes
Connect to the site via FTP and navigate to the wp-content folder. Alongside it, open the local wp-content folder you downloaded in step 3 on your computer.
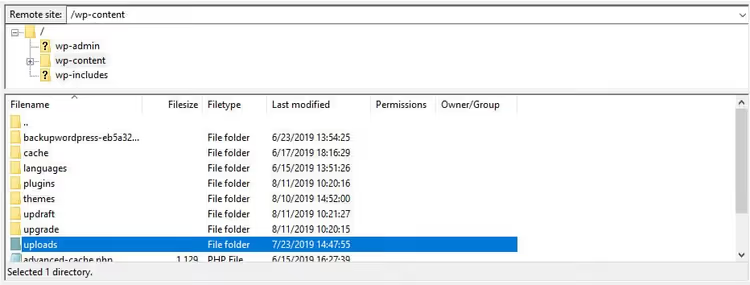
Upload the contents of your local uploads folder to wp-content/uploads on the server. Similarly, transfer your theme folder from the local themes to wp-content/themes. Don't touch the plugins yet; we'll reinstall them in step 8.
After uploading, go to the admin panel, navigate to "Appearance → Themes," and activate your theme. Verify that media files appear in "Media → Library."
Step 7. Importing content from XML
In the WordPress admin panel, go to "Tools → Import."
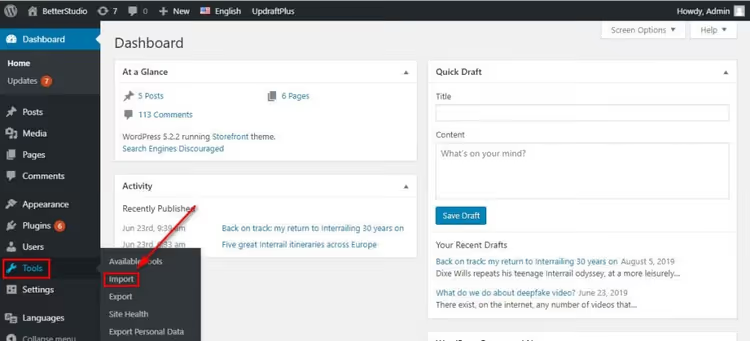
Next to the WordPress option, click "Install Now." This will download WordPress Importer, the official plugin for XML import. After installation, click "Run Importer."
On the page that opens, click "Choose File" and select the XML document exported in step 2. Click "Upload file and import."
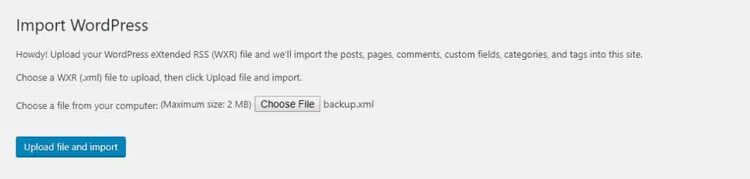
WordPress will prompt you to assign an author for the imported content. Select the administrator account you created. Be sure to check "Download and import file attachments." This will pull images from the uploads folder and link them to posts.
Click "Submit" and wait for completion. When finished, open the site and verify that all posts and pages are in place.
Step 8. Installing plugins one by one
Install plugins manually and one at a time. Mass activation by copying the plugins folder is dangerous: old plugin versions may conflict with the new WordPress version, and you won't know which one caused the error.
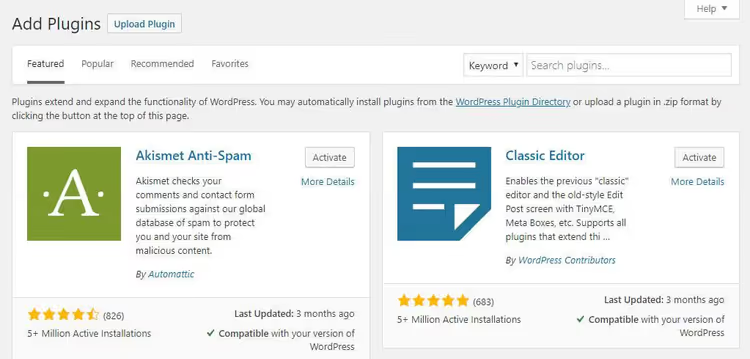
Open "Plugins → Add New" and enter each plugin's name in the search field. Install → Activate → verify the site works. If the site breaks after activating a specific plugin, you've found the culprit. Look for an alternative in the WordPress.org repository or update the plugin to a version compatible with your WP version.
For plugins not in the repository (premium, custom), upload the ZIP archive via the "Upload Plugin" button on the same page. After installing each plugin, go to its settings and restore the necessary configuration.
Video: step-by-step WordPress reinstallation
This video shows the entire process visually, from backup to final site verification on cPanel hosting.
⁉️🤔 Frequently asked questions
Will I lose content when reinstalling WordPress?
No, if you follow the instructions above. Content (posts, pages, comments) is preserved in the XML export, and media files are in the wp-content folder. The only thing that can be permanently lost is plugin settings that you didn't document. Before deleting, take screenshots of settings pages or note down key parameters.
Can I reinstall WordPress without admin access?
Yes. Steps 1 (backup) and 2 (export) require admin access, but if it's unavailable, create a backup through phpMyAdmin (database export) and download wp-content via FTP. You'll lose the XML export, but the content will remain in the database dump. In step 7, instead of importing XML, you'll need to import the SQL dump through phpMyAdmin. It's slightly more complex, but the result is the same.
Is creating a new database mandatory?
It's strongly recommended. If you keep the old database, the fresh WordPress installation will create new tables with the same
wp_prefix and may overwrite remnants of old data. A new database with a clean prefix eliminates conflicts. You can delete the old database after a successful reinstallation.
What should I do if the site doesn't load after installing WordPress?
Check three things. First: are the database name, username, and password correctly specified in
wp-config.php(this file is created automatically during installation, but sometimes write permissions prevent it). Second: does the table prefix in the database match the one inwp-config.php. Third: is thewp-content/themes/your-themefolder uploaded? Without an active theme, WordPress shows a white screen.
How long does a complete reinstallation take?
On standard hosting with a media library up to 500 MB, 25-40 minutes. Most time is spent downloading and uploading the
wp-contentfolder via FTP. XML content import for a hundred posts takes 1-2 minutes.
What to do after reinstalling WordPress?
The site is working again, content is in place, and the theme is active. Now for the final touches that transform "emergency recovery" into a fully functional site.
First, set up scheduled backups. UpdraftPlus allows you to upload backups to Google Drive automatically once a week. Go to "Settings → UpdraftPlus Backups → Settings tab" and set the schedule: files weekly, database daily.
Second, install a security plugin. After reinstallation, you have a clean WordPress, and this is the perfect time for Wordfence or Solid Security. Enable two-factor authentication for the administrator account.
Third, check indexing. Go to Google Search Console and verify that the search engine sees your pages and that the sitemap is current. If URLs changed, set up 301 redirects using a plugin like Redirection.
Reinstalling WordPress is a procedure that you only need to go through once to stop fearing it. If you have questions, ask them in the comments, and we'll help you figure it out.

A professional team of writers and editors specializing in creating quality content.